Get Started with DeskAlerts 11
This guide helps you quickly start using DeskAlerts 11 - from installing the application on user devices to sending your first alert.
It is designed for new deployments, pilot projects, and initial evaluations. Advanced scenarios are covered in separate guides linked throughout this article.
Overview
DeskAlerts can be deployed using two different server models: Cloud-based or On-Premises. The installation approach depends on your infrastructure, security requirements, and internal policies.
This guide assumes that the DeskAlerts server is already installed and configured, and focuses on the steps required to:
- Install the DeskAlerts app on end-user devices
- Register users
- Send the first alert
If you have not installed the server yet, refer to the server installation documentation before continuing: 📗 DeskAlerts 11 Server Installation
Install the App
DeskAlerts provides client applications for both Windows and macOS.
Unlike the Windows agent, the macOS application cannot be customized during installation. All required configuration parameters (such as the server URL and registration type) are embedded directly into the .pkg installer.
Before installation, provide the DeskAlerts Support team with:
- Your DeskAlerts 11 Server URL
- The desired registration type
A customized macOS installation package will be generated for your organization.
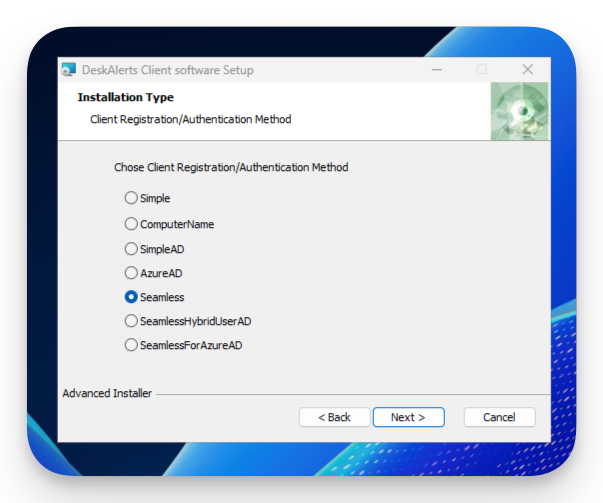
DeskAlerts supports multiple registration types, each designed for different environments:
- Seamless registration - best for pilots and quick starts, does not require Azure AD or Active Directory
- Azure AD registration - recommended for modern cloud-based identity management
- Active Directory registration - for classic on-prem AD environments
For a quick start, Seamless registration is the simplest option. The agent registers automatically on first launch, without any additional configuration.
High-level steps
Download the DeskAlerts Windows Agent installer
According to our internal security and distribution policies, DeskAlerts 11 installation packages are not published for public download.
To obtain the installation file for the current version, please contact our Support Team directly.
Enter the Server URL
Install the agent with Seamless registration type
Once the installation is complete the agent will be launched and registered automatically
User appears in the DeskAlerts admin portal
For the detailed installation guide please refer to the following articles:
Send Your First Alert
Once at least one agent is registered, you can send your first alert.
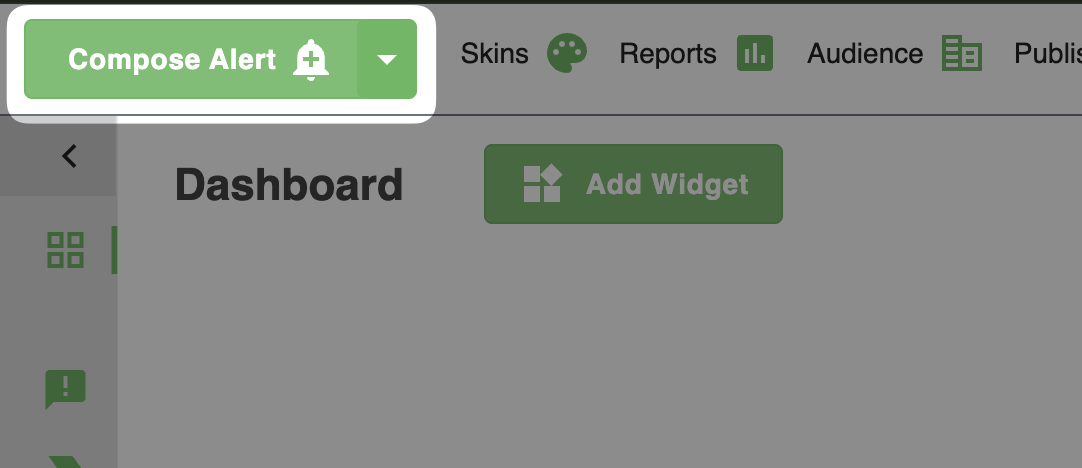
Open the DeskAlerts admin portal
Press the Compose Alert button
Enter a title and message
Select recipients (user or group)
Send the alert
For the detailed installation guide please refer to the Publisher guide: