DeskAlerts Server Installation
Overview
This guide is intended for clients who have chosen the on-premises DeskAlerts configuration.
This guide provides step-by-step instructions for installing and configuring DeskAlerts Server 11, including system prerequisites, SSL certificate setup, database connection, and post-installation configuration in IIS. It also includes detailed guidance on enabling High Availability (HA) and Disaster Recovery (DR) using a two-server deployment model with load balancing via Application Request Routing (ARR) and shared media storage via symbolic links and network shares.
By following this guide, system administrators will be able to successfully deploy a production-ready DeskAlerts environment that is scalable, secure, and resilient.
Installation Prerequisites
Before installing the DeskAlerts server, ensure the following prerequisites are in place:
- Check the DeskAlerts Server 11 minimum hardware requirements
- Windows Server 2019–2022. Ensure that a compatible version of Windows Server 2019, 2022, or later is installed on the target machine.
- Microsoft SQL Server 2019 or later.
- Both Express and Enterprise editions are supported.
- The Enterprise edition is required for environments with 1,000 or more alert recipients.
- Valid SSL Certificate and IIS Configuration. Obtain a valid SSL certificate and install it on the server.
- Configure Internet Information Services (IIS).
- Add a default site binding for the HTTPS protocol on port 443, using the installed SSL certificate.
- For more information please visit Microsoft Learn website.
- Open Ports 40000–40010. Ensure that ports 40000 through 40010 are open for communication between the DeskAlerts server and agent applications.
If your organization uses Active Directory Certificate Services (AD CS), you can generate a trusted SSL certificate using your internal CA server.
We provide a step-by-step guide here:
📗 Creating an SSL Certificate for DeskAlerts Using AD CS
If the script-based method described in the guide does not work, all steps must be performed manually on the AD CS server itself.
Install the prerequisites
These actions can also be automated using the PowerShell script. Save the script to the Downloads folder and run it from an elevated PowerShell console (Run as Administrator).
Install the following prerequisites in the specified order:
- 🔗 URL Rewrite Module.
- 🔗 Application Request Routing (ARR).
- 🔗 ASP.NET Core Runtime 6.0 Hosting Bundle.
- 🔗 ASP.NET Core Runtime 7.0 Hosting Bundle.
- 🔗 .NET Desktop Runtime 7.0.
Make sure that you installed the components in the exact order specified above
Enable Proxy in Application Request Routing (ARR):
- Open Internet Information Services (IIS) Manager.
- In the Connections pane, select the server node, then double-click Application Request Routing Cache.
- Click Server Proxy Settings in the Actions pane.
- Check the box for Enable proxy.
- Click Apply to save the changes.
Required Service Accounts for DeskAlerts Server Operation
-
Windows Service Account with Administrative Privileges
- This account must be a member of the local Administrators group.
- It will be used as the application pool identity for the IIS application pools running DeskAlerts services.
-
Database Access Account
- A dedicated SQL Server authentication account, or the same Windows account described in point 1.
- This account must have the db_owner role on the DeskAlerts database.
- Additionally, during installation or upgrade of the DeskAlerts server, the dbcreator role is also required.
noteThe dbcreator role only necessary during initial server installation or upgrade. You can revoke this role after installation.
Installing DeskAlerts Server 11
Launch the Installer
To begin the installation, run the DeskAlerts Server installer with administrative privileges: right-click the installer file and select Run as Administrator.
Accept the End User License Agreement
When prompted, review the End User License Agreement. Click I Agree.
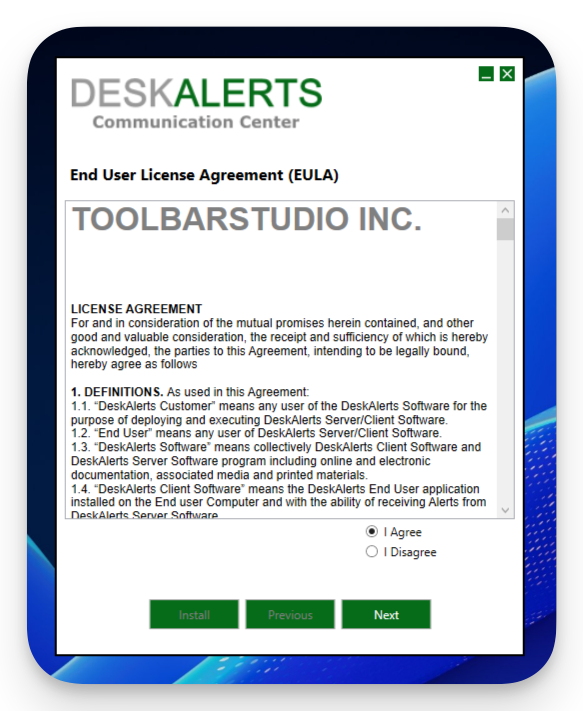
Click Next to proceed with the installation.
If any required system components are missing, the installer will display a separate window listing the missing features. These components can be downloaded and installed automatically during this step.
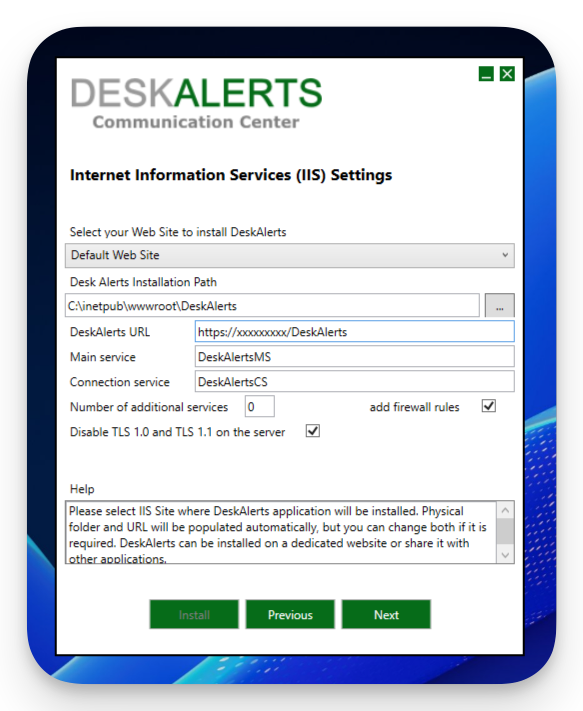
Specify Installation Path and Site URL
- Choose the destination folder for the DeskAlerts Server installation.
- Enter the DeskAlerts site (dashboard) URL.
Configure SQL Server Connection
Enter the SQL Server name and provide the necessary credentials that the DeskAlerts Server will use to connect to the database.
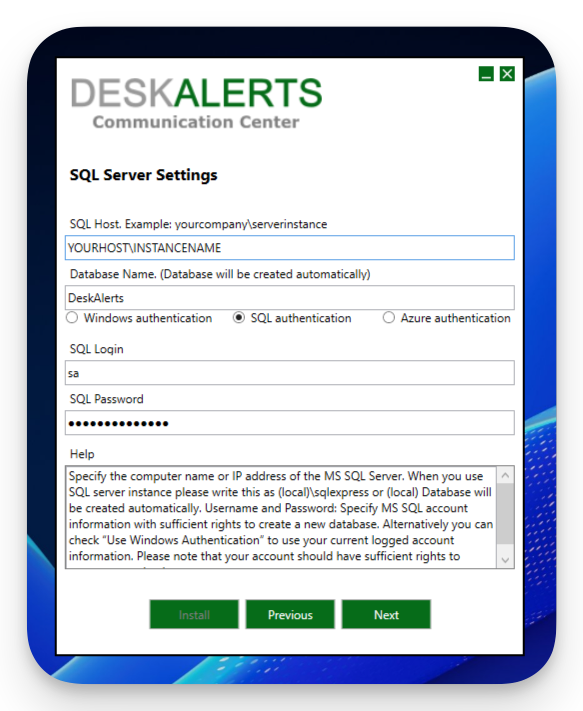
Click Next to continue.
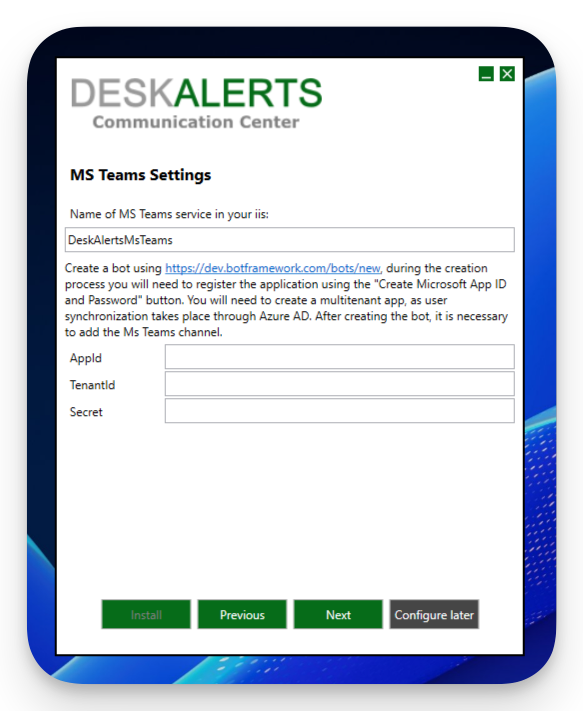
Configure Microsoft Teams Integration (Optional)
If you plan to use Microsoft Teams integration, enter the required credentials. If not, simply click Next to skip this step.
Verify Installation Readiness
The DeskAlerts Server installer will check your environment to ensure all prerequisites are met.
Once the verification is complete, click Proceed to begin the installation.
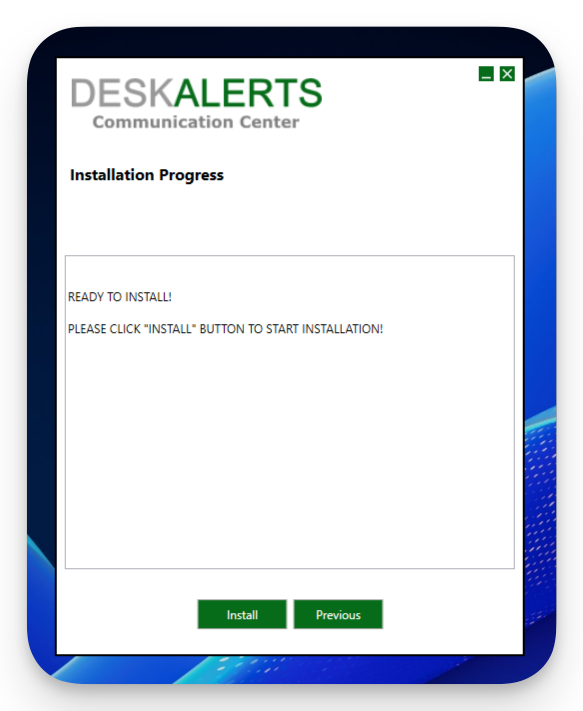
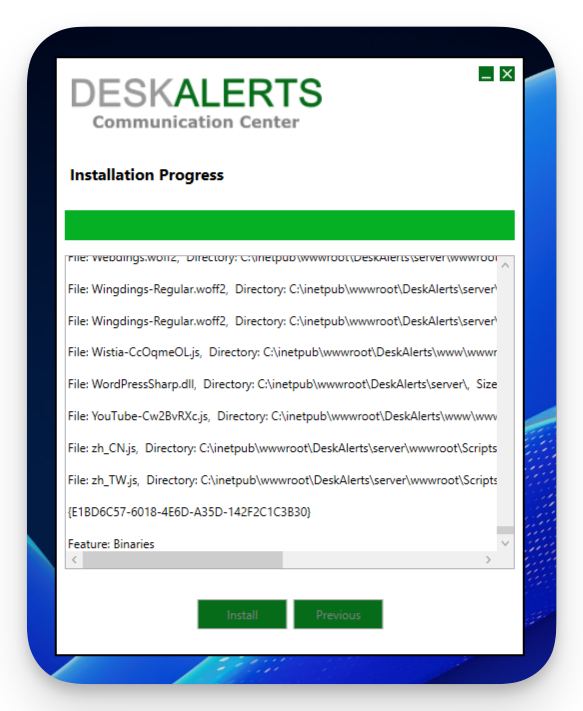
Begin Installation
The installation process will now start. Please wait while the DeskAlerts Server components are being installed.
Complete the Installation
Once the installation is finished, a confirmation message will appear.
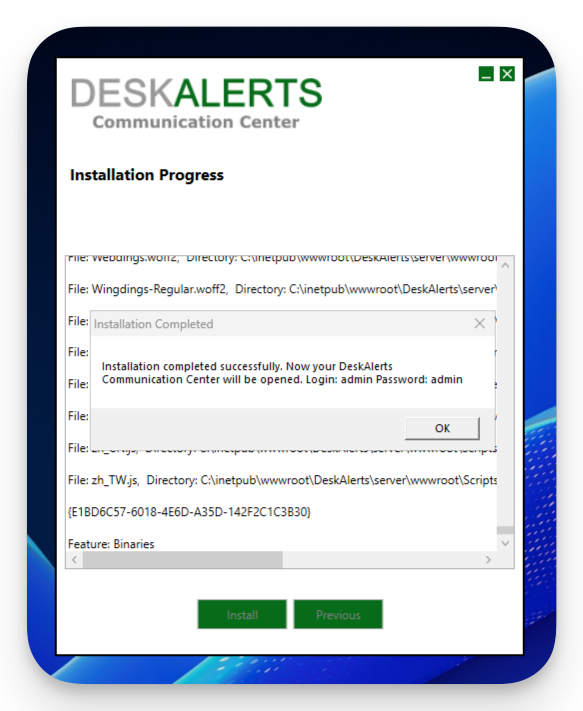
Click OK to close the installer.
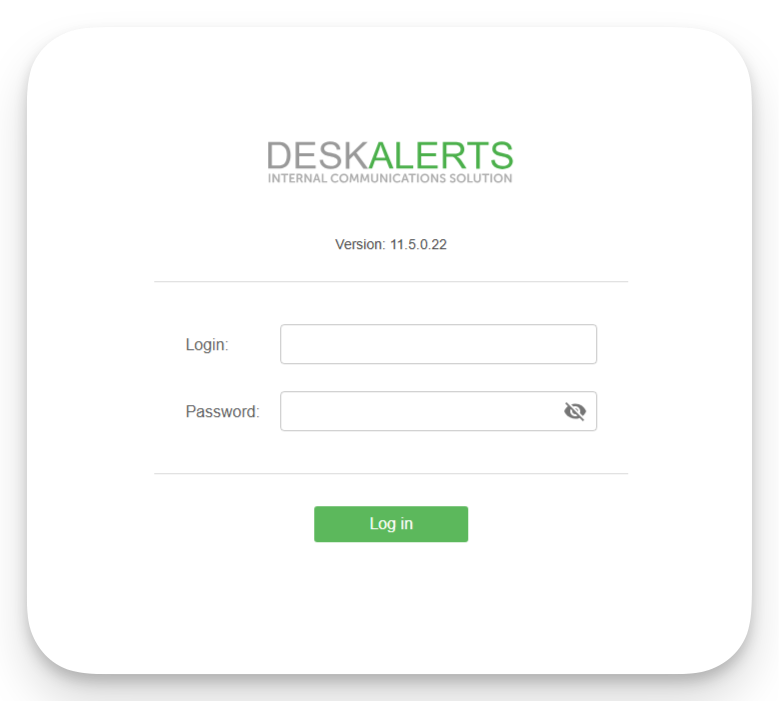
Access the DeskAlerts Dashboard
After installation is complete, the installer will automatically open the DeskAlerts dashboard in your default browser.
Log in using the default administrator credentials:
Username: admin
Password: admin
In some cases, the DeskAlerts Server may still be establishing a connection to the SQL Server. If the login page does not display the server version at the bottom, refresh the page. The appearance of the version number indicates that the server is fully initialized and ready for use.
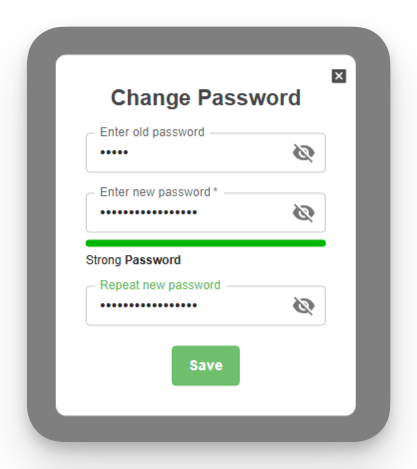
Change the Administrator Password
Upon first login, you will be prompted to change the default administrator password.
After updating the password, you will be redirected to the DeskAlerts Server home page.
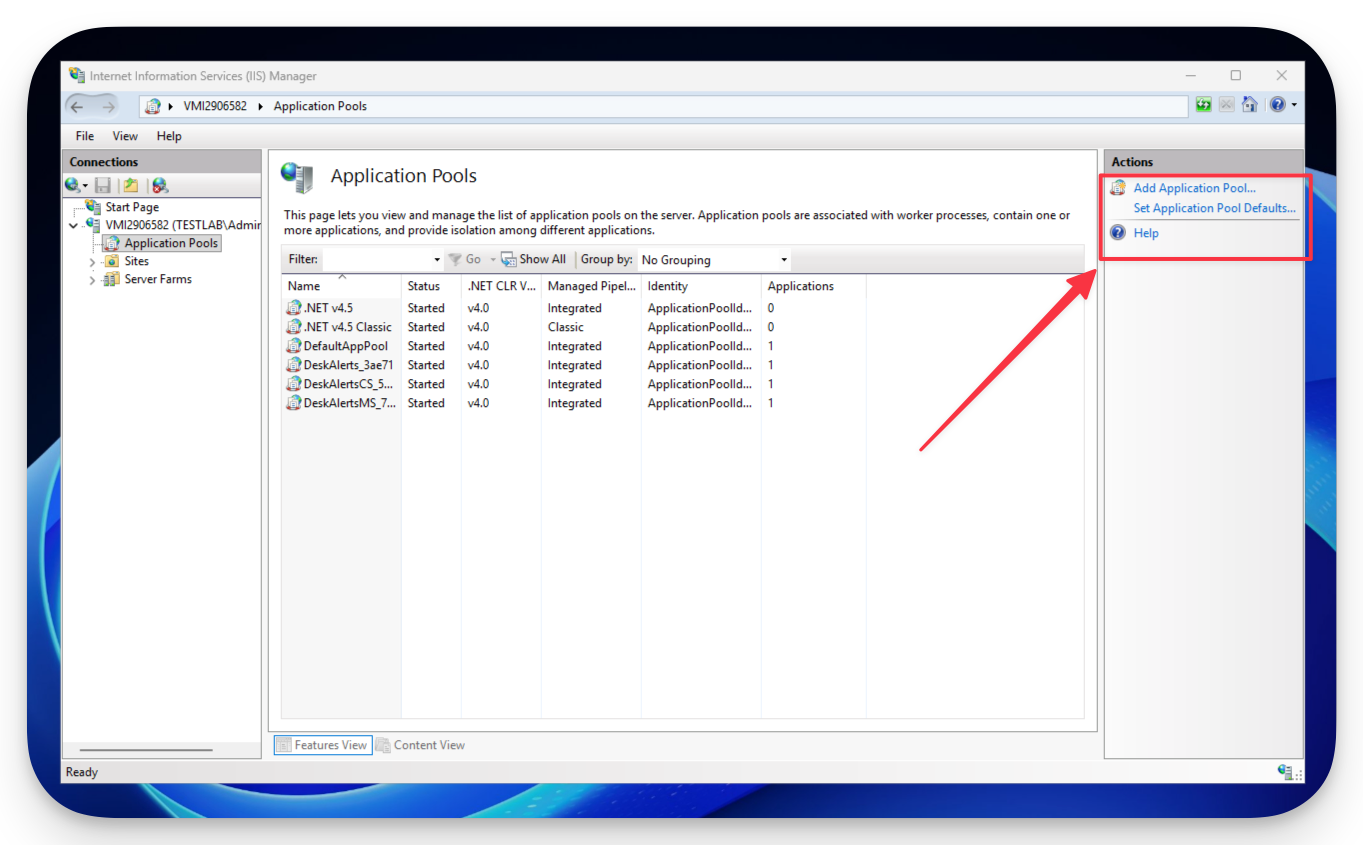
Configure DeskAlerts Application Pools in IIS
- Open IIS Manager and go to Application Pools → Set Application Pools Defaults.
- Apply the following configuration changes:
- Identity:
Set to a service account that will perform disk operations on behalf of the DeskAlerts web application (e.g., writing logs, uploading files).
This account must:
- Have a non-expiring password
- Be a member of the local Administrators group
- If Windows Authentication was used for the SQL Server during installation, this account must also have the necessary permissions to access the DeskAlerts database.
- Load User Profile: True
- Disable Overlapped Recycle: True
- Disable Recycling for Configuration Changes: True
- Regular Time Interval (minutes): 0
- Identity:
Set to a service account that will perform disk operations on behalf of the DeskAlerts web application (e.g., writing logs, uploading files).
This account must:
- Restart the IIS.
Configure Authentication Settings
- In IIS Manager, select the root node of the server in the Connections pane.
- In the Features View, double-click Authentication.
- Select Anonymous Authentication.
- In the Actions pane, click Edit….
- Choose Application pool identity, then click OK to apply the changes.
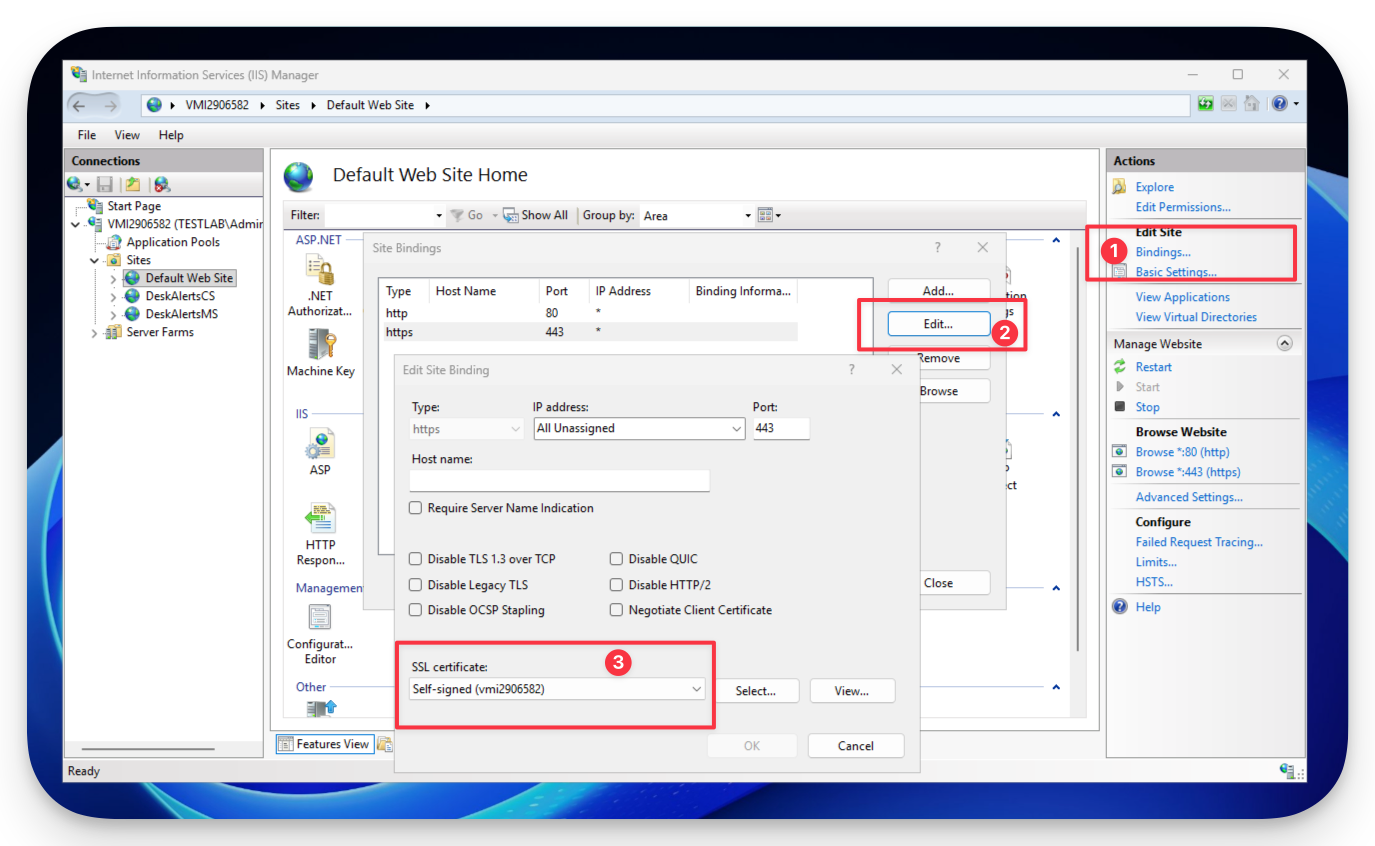
Verify SSL Certificate and Restart the Web Server
- In IIS Manager, go to Default Web Site → Bindings.
- Ensure that your SSL certificate is correctly applied to the HTTPS binding.
- Click OK to confirm.
- Restart the web server by running the following command in an elevated command prompt or PowerShell:
iisreset
The DeskAlerts Server setup is now complete and ready for use.
High Availability and Disaster Recovery
Overview
You can deploy two redundant DeskAlerts 11 servers to achieve a High Availability (HA) / Disaster Recovery (DR) solution. The architecture includes two DeskAlerts servers operating in HA mode, with load balancing handled by an Application Request Routing (ARR) server farm.
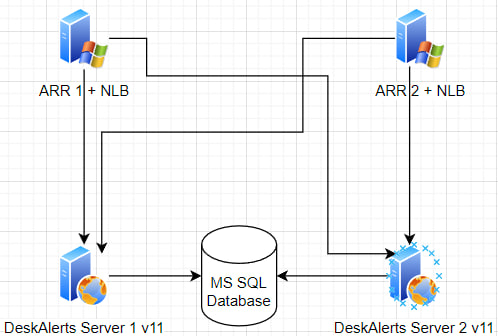
Media File Sharing for a Two-Server Setup
In a high availability (HA) configuration with two DeskAlerts servers, media files (such as images and videos) are stored on the server’s file system. To ensure continued access to these files even if one server goes offline, a shared storage solution must be implemented.
A simple and effective approach is to use a network share combined with symbolic links. This example assumes the default web application path:
C:\inetpub\wwwroot\
Shared Folder Configuration
-
Create a network share (e.g., \fileserver\SHARE\FILES\images\upload) that will store media files.
- This share must be accessible by both DeskAlerts servers and all end-user devices on the network.
- Grant read/write permissions to the Windows service accounts used to run the DeskAlerts web applications on both servers.
-
Map the shared folder on both servers:
net use F: \\fileserver\SHARE /SAVECRED /GLOBAL -
Create symbolic links to redirect media storage paths to the shared folder:
cmd /c mklink /D "C:\inetpub\wwwroot\DeskAlerts\server\wwwroot\admin\images" \\fileserver\SHARE\FILES\images
cmd /c mklink /D "C:\inetpub\wwwroot\DeskAlerts\server\wwwroot\admin\upload" \\fileserver\SHARE\FILES\images\upload
After this configuration, both DeskAlerts servers will store and access media files from the shared network location, ensuring file availability as long as the network share is online.