How-to: Send Your First Alert
Goal: send a popup alert to yourself, watch it arrive on your desktop agent, and read the delivery report. About 15 minutes.
Before you start: the DeskAlerts desktop agent is installed on a computer and signed in with the server (the example uses Tom Baker on his workstation), and you can sign in to the web portal with an account that can create and send popups — in the demo organization Emma Collins (role Communications Publisher).
1. Open the popup page
- Sign in to the web portal.
- Click Create alert in the left navigation panel and choose Popup under Core alerts — or open Alerts and click the Popup tile.
The Create popup alert page opens: one scrolling page with the sections Recipients, Content, Delivery, Appearance, Response & tracking, and Approvals, and a live preview on the right. Sections that still need input are marked in the step indicator.
2. Choose the recipient
- In Recipients, stay on Quick search and type the recipient's name into Search recipients by name or email… — for example
Tom Baker. - Pick the match. The recipient is listed in the section; the confirmation dialog will show
1 recipients selected.
3. Write the content
- In Content, enter a Title, for example
Hello from DeskAlerts. - In Body, type a sentence or two. The editor offers formatting, links, and images; plain text is fine for the first alert.
4. Check delivery and appearance
- In Delivery, leave Priority at Normal, keep Desktop as the channel, and Send immediately. Pick a duration preset — 1 hour is enough for a test.
- In Appearance, leave the default skin (
DAGreen) and the default window size (500 × 400 px). - In Response & tracking, switch on Require acknowledgement so that you can see the acknowledgement in the report.
- Approvals shows whether a dispatch rule matches. In the demo organization popups require approval (Approval required — Approval step 1 — Administrator); on a server without rules the section says that no approval is required.
5. Preview and send
- Click Preview in the toolbar to see the alert as the recipient will.
- Click Send alert. The Confirm send alert dialog summarizes the title, priority, recipients, active time, position, size, skin, and channels; click Send alert again.
The toast Alert sent successfully! appears and the alert is listed at the top of the Alerts list — with the status Distributing and, within seconds, the popup opens on the recipient's desktop; or with Pending approval when a dispatch rule applies, in which case the approver releases it from My tasks (see How-to: Require approval for alerts).
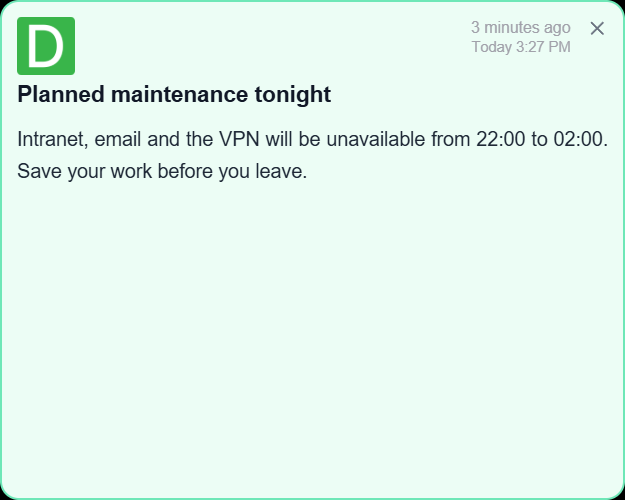 The popup as the desktop agent shows it — logo, title, creation time, content, and the close button
6. Read the report
- In the Alerts list click the alert's row — the actions Preview, Details, Clone, View schedule, Analytics, Full report, and Delete appear (Stop too while the alert is distributing). Click Full report for the Alert tracking report on the Reports page.
- The report shows the target audience, the delivery funnel Resolved audience → Sent → Delivered (recipients whose agent is offline stay under Pending delivery until they connect), and the Recipient records with the sent and delivered times. For an alert that requires acknowledgement the report also shows who acknowledged it and when.
Next steps
- Send the same alert to a group: pick a group such as All Staff in Recipients.
- Save the content as a template (Content → Template → Save) so that colleagues can reuse it.
- Try other channels once they are configured: Email needs an SMTP server, Mobile needs the mobile app.
- Read Alerts for every option of the composer and the other alert types.