Users & Access
Users & Access contains identity, authentication, audience management, and web-portal access settings.
Use this section to:
- synchronize users and groups from Active Directory, Microsoft Entra ID, or Google Workspace
- configure SSO for the web portal and sign-in methods for the web (PWA) client
- manage manually created users, groups, IP groups, and domains
- define how desktop and mobile devices register
- manage web-portal users and roles
- control web-portal session and password policies
IAM sync (AD/EntraID)
IAM sync manages synchronization of users, groups, organizational units, and optionally computers from a directory service into DeskAlerts.
Synchronization types offered by the Synchronization type list: Active Directory, Azure AD (Microsoft Entra ID), AD filtered group, OpenLDAP, AD LDS, and Google Workspace.
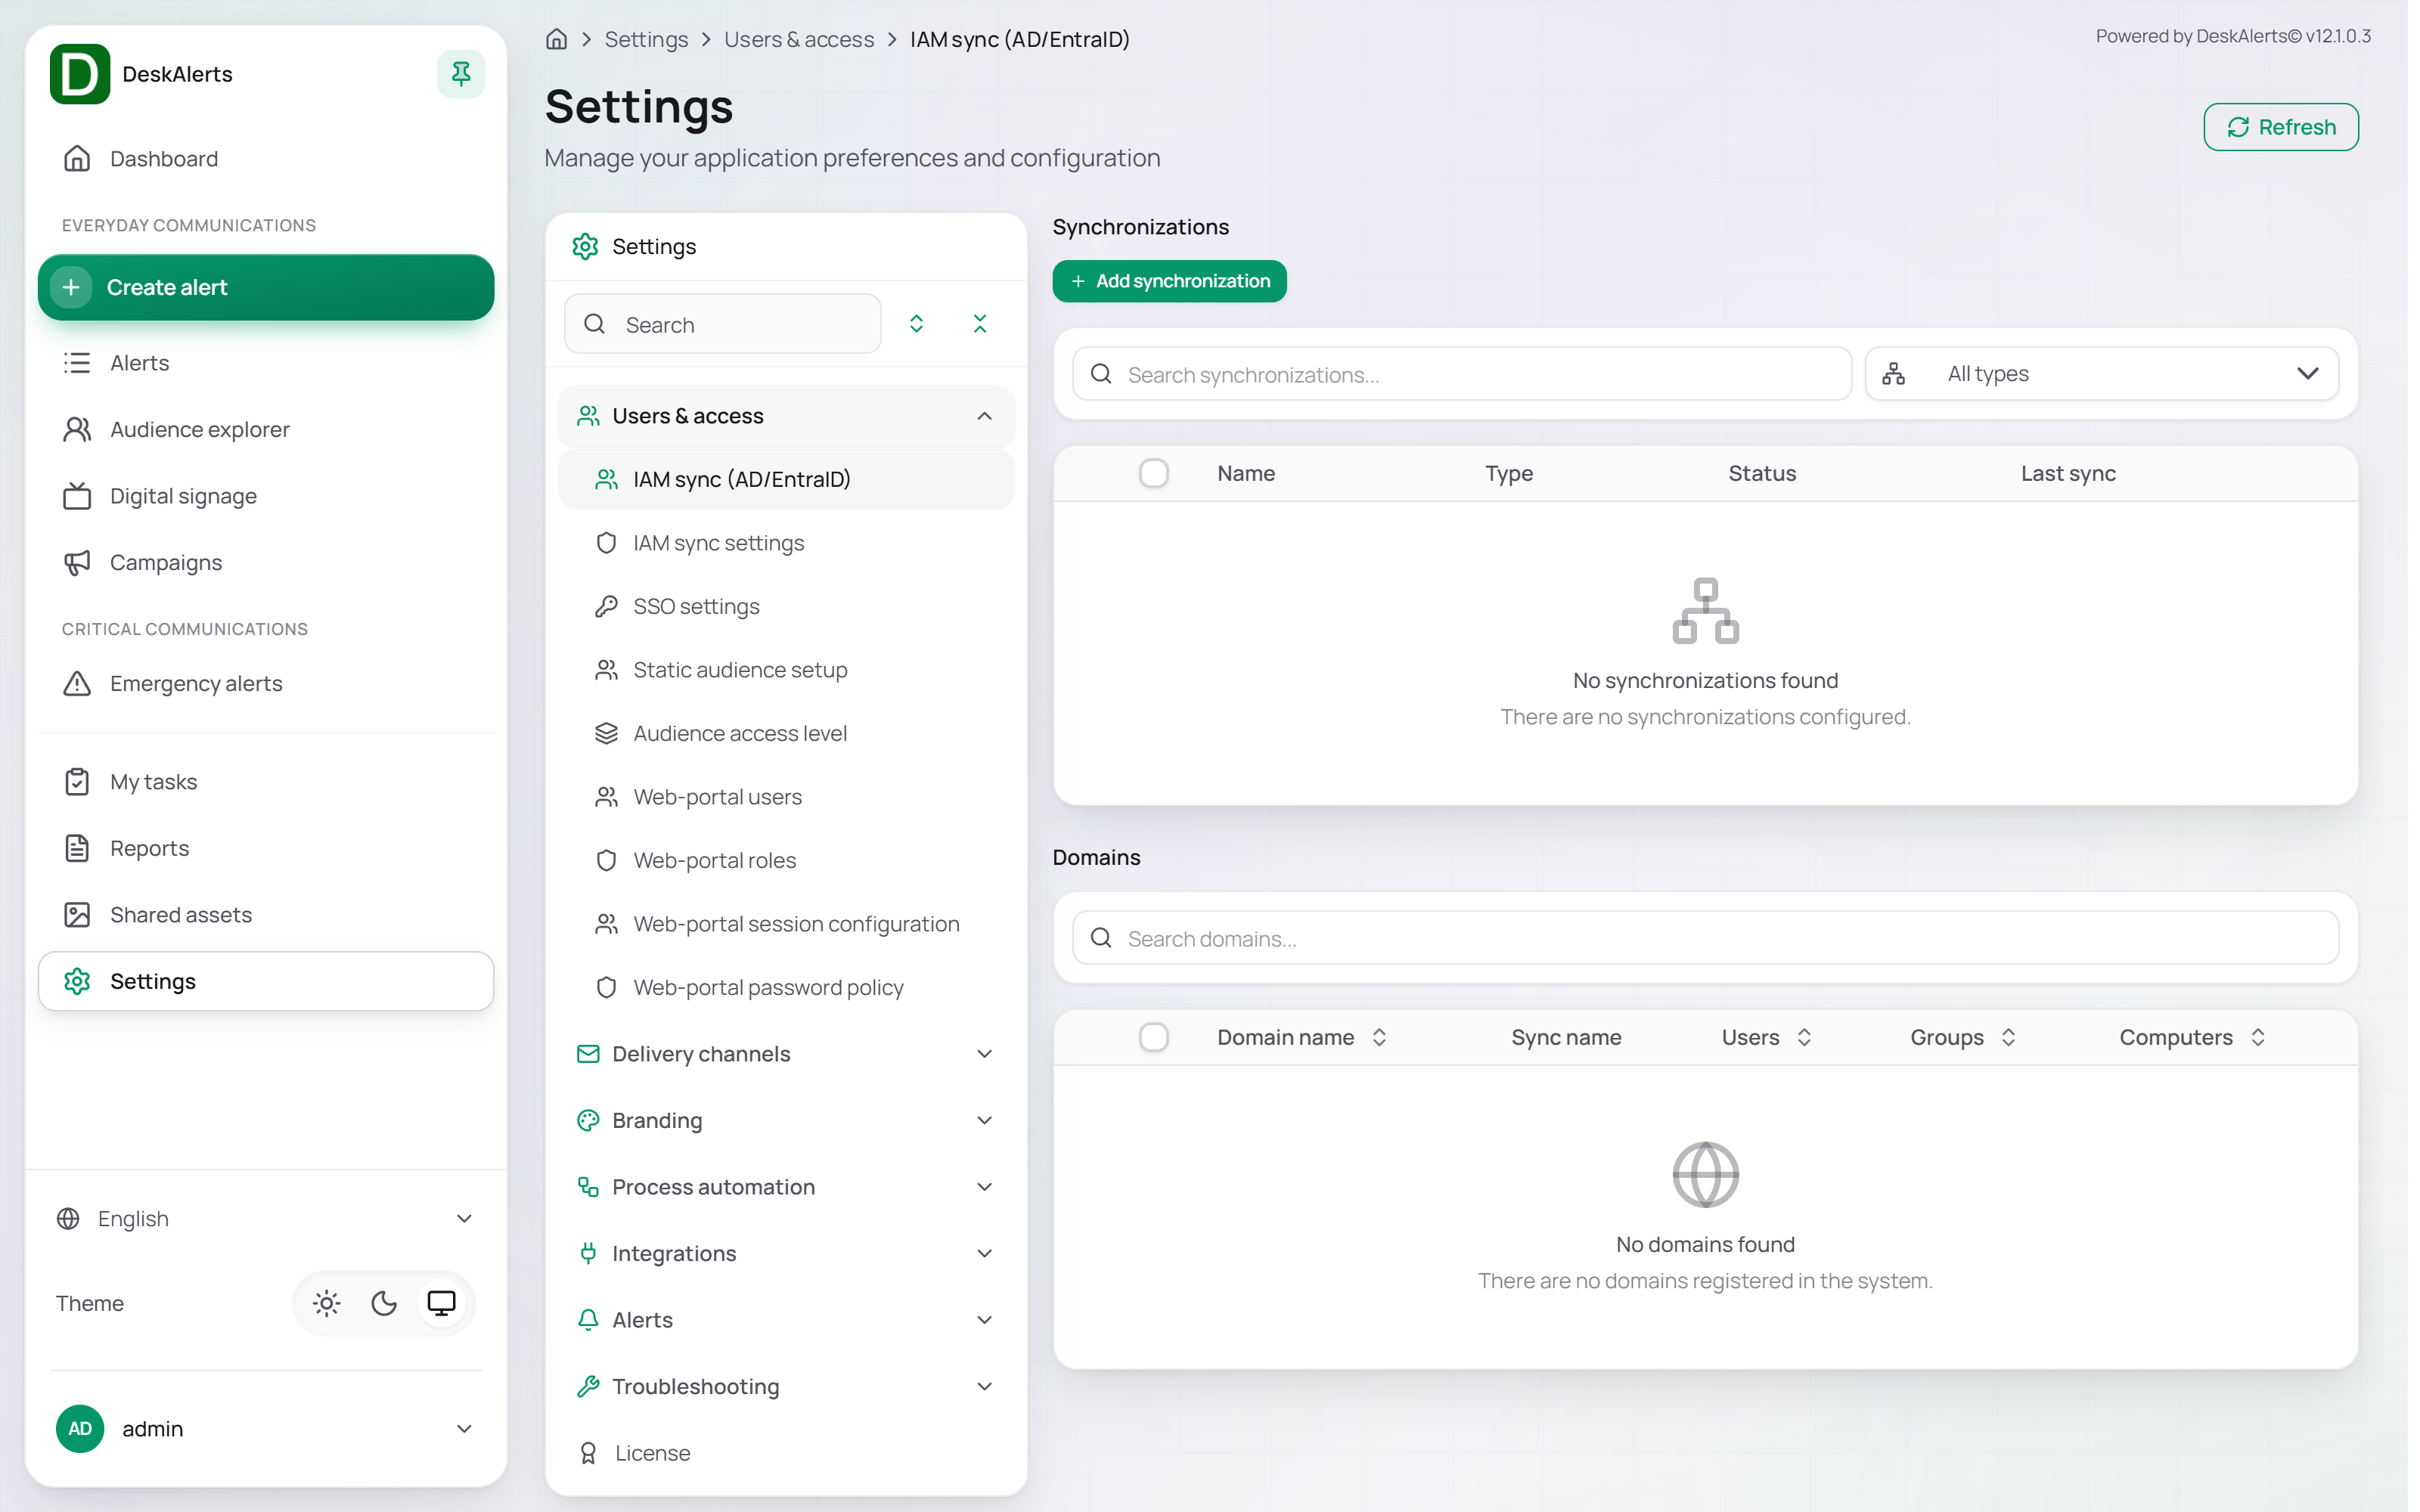 The IAM sync page — the Synchronizations list and the Domains list
The page is divided into two panels.
Synchronizations
Lists all configured sync connections.
| Column | Description |
|---|---|
| Name | The name given to the synchronization configuration |
| Type | The synchronization type (Active Directory, Azure AD, AD filtered group, OpenLDAP, AD LDS, or Google Workspace) |
| Status | Last synchronization result (Completed or Failed), with the run duration and the time it finished |
| Last sync | Date and time of the last run |
Use the search box and the All types filter to narrow the list. Click a sync row to open its actions; the checkboxes select several synchronizations at once.
Click Add synchronization to create a new sync connection.
Domains
Lists domains imported into DeskAlerts.
| Column | Description |
|---|---|
| Domain name | The domain (for example, corp.deskalerts.com), or Registered for users that self-registered from their devices |
| Sync name | The synchronization that imported the domain, or — for domains created manually or by self-registration |
| Users / Groups / Computers | Number of objects in the domain |
Creating a Synchronization
Click Add synchronization to open the Create synchronization page.
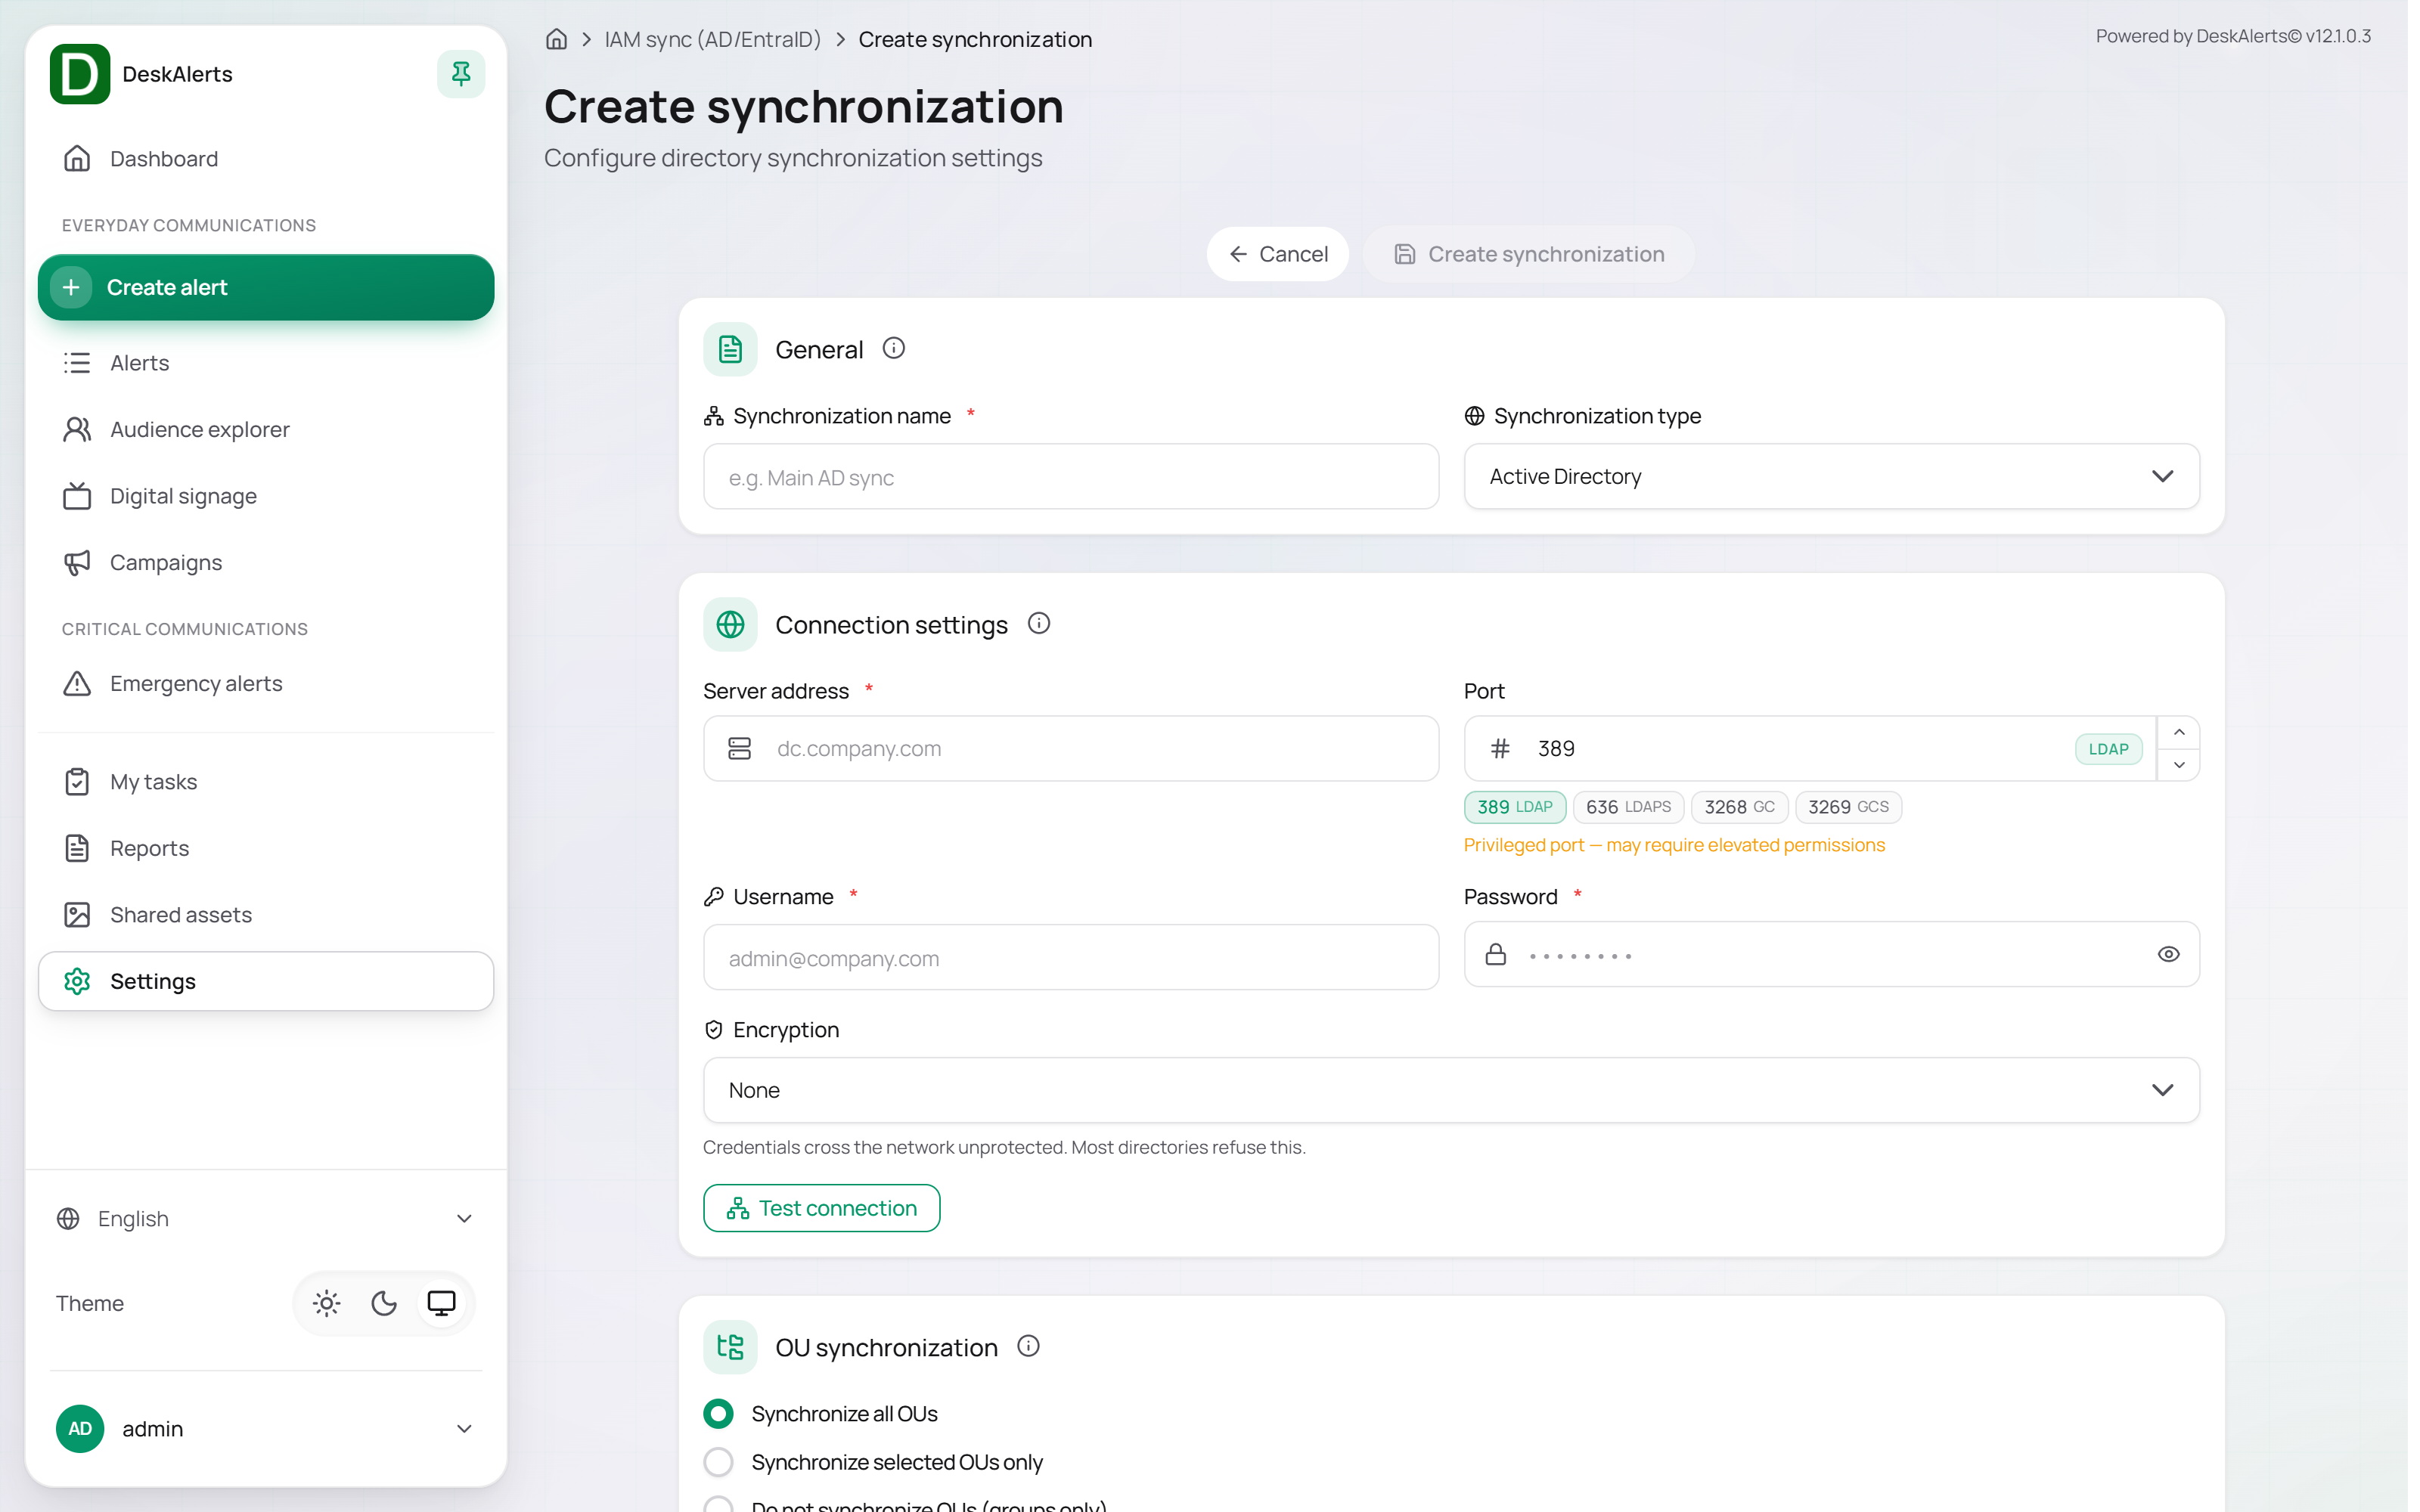
General
| Field | Description |
|---|---|
| Synchronization name | Required. A descriptive name for the sync connection, such as Main AD sync |
| Synchronization type | Directory source type: Active Directory, Azure AD, or Google Workspace. The fields below are those of the Active Directory type |
Connection settings
| Field | Description |
|---|---|
| Server address | Required. Directory server hostname or IP address, for example dc.acme.example |
| Port | LDAP or Global Catalog port. The presets under the field set 389 LDAP, 636 LDAPS, 3268 GC, and 3269 GCS |
| Username | Required. Service account used to connect to the directory |
| Password | Required. Service account password |
| Encryption | None, StartTLS, or LDAPS. With None the credentials cross the network unprotected and most directories refuse the connection; use LDAPS with port 636 or StartTLS with port 389 |
Click Test connection before saving to verify server connectivity and credentials.
OU synchronization
Choose which organizational units to import:
| Option | Description |
|---|---|
| Synchronize all OUs | Imports the full OU tree |
| Synchronize selected OUs only | Imports only selected organizational units. Selecting a nested OU imports its users and everything below it; the OUs above it are kept as an empty branch so that the tree keeps its structure, but their own users are not imported |
| Do not synchronize OUs (groups only) | Skips OUs and imports group membership only |
Group selection under the options lets you search the directory for the groups to import.
Additional options
| Option | Description |
|---|---|
| Import computers | Also imports computer accounts from the directory |
| Import disabled users | Includes disabled user accounts in the sync |
| Remove deleted entries | Removes users from the database that no longer exist in the directory |
| Recursive group membership | Resolves nested group membership |
| Exclude email addresses | Does not import mail addresses. Users without an address cannot be reached by the email channel |
| Exclude phone numbers | Does not import phone numbers. Users without a number cannot be reached by the SMS channel |
Custom field mapping
Fills a DeskAlerts user field (for example private mobile) from an attribute of the directory. Enter the attribute name; leave the field empty to stop the synchronization from touching that DeskAlerts field.
Auto-sync schedule
Enable Enable auto-sync to run the synchronization automatically on a recurring schedule.
For the Azure AD type the connection settings are the Tenant ID, the Application (client) ID, and the Client Secret of the app registration, plus the groups to import; for Google Workspace they are the Hosted domain, the Google Client ID, and the Service Account JSON.
IAM sync settings
IAM sync settings provides advanced sync behavior and logging controls.
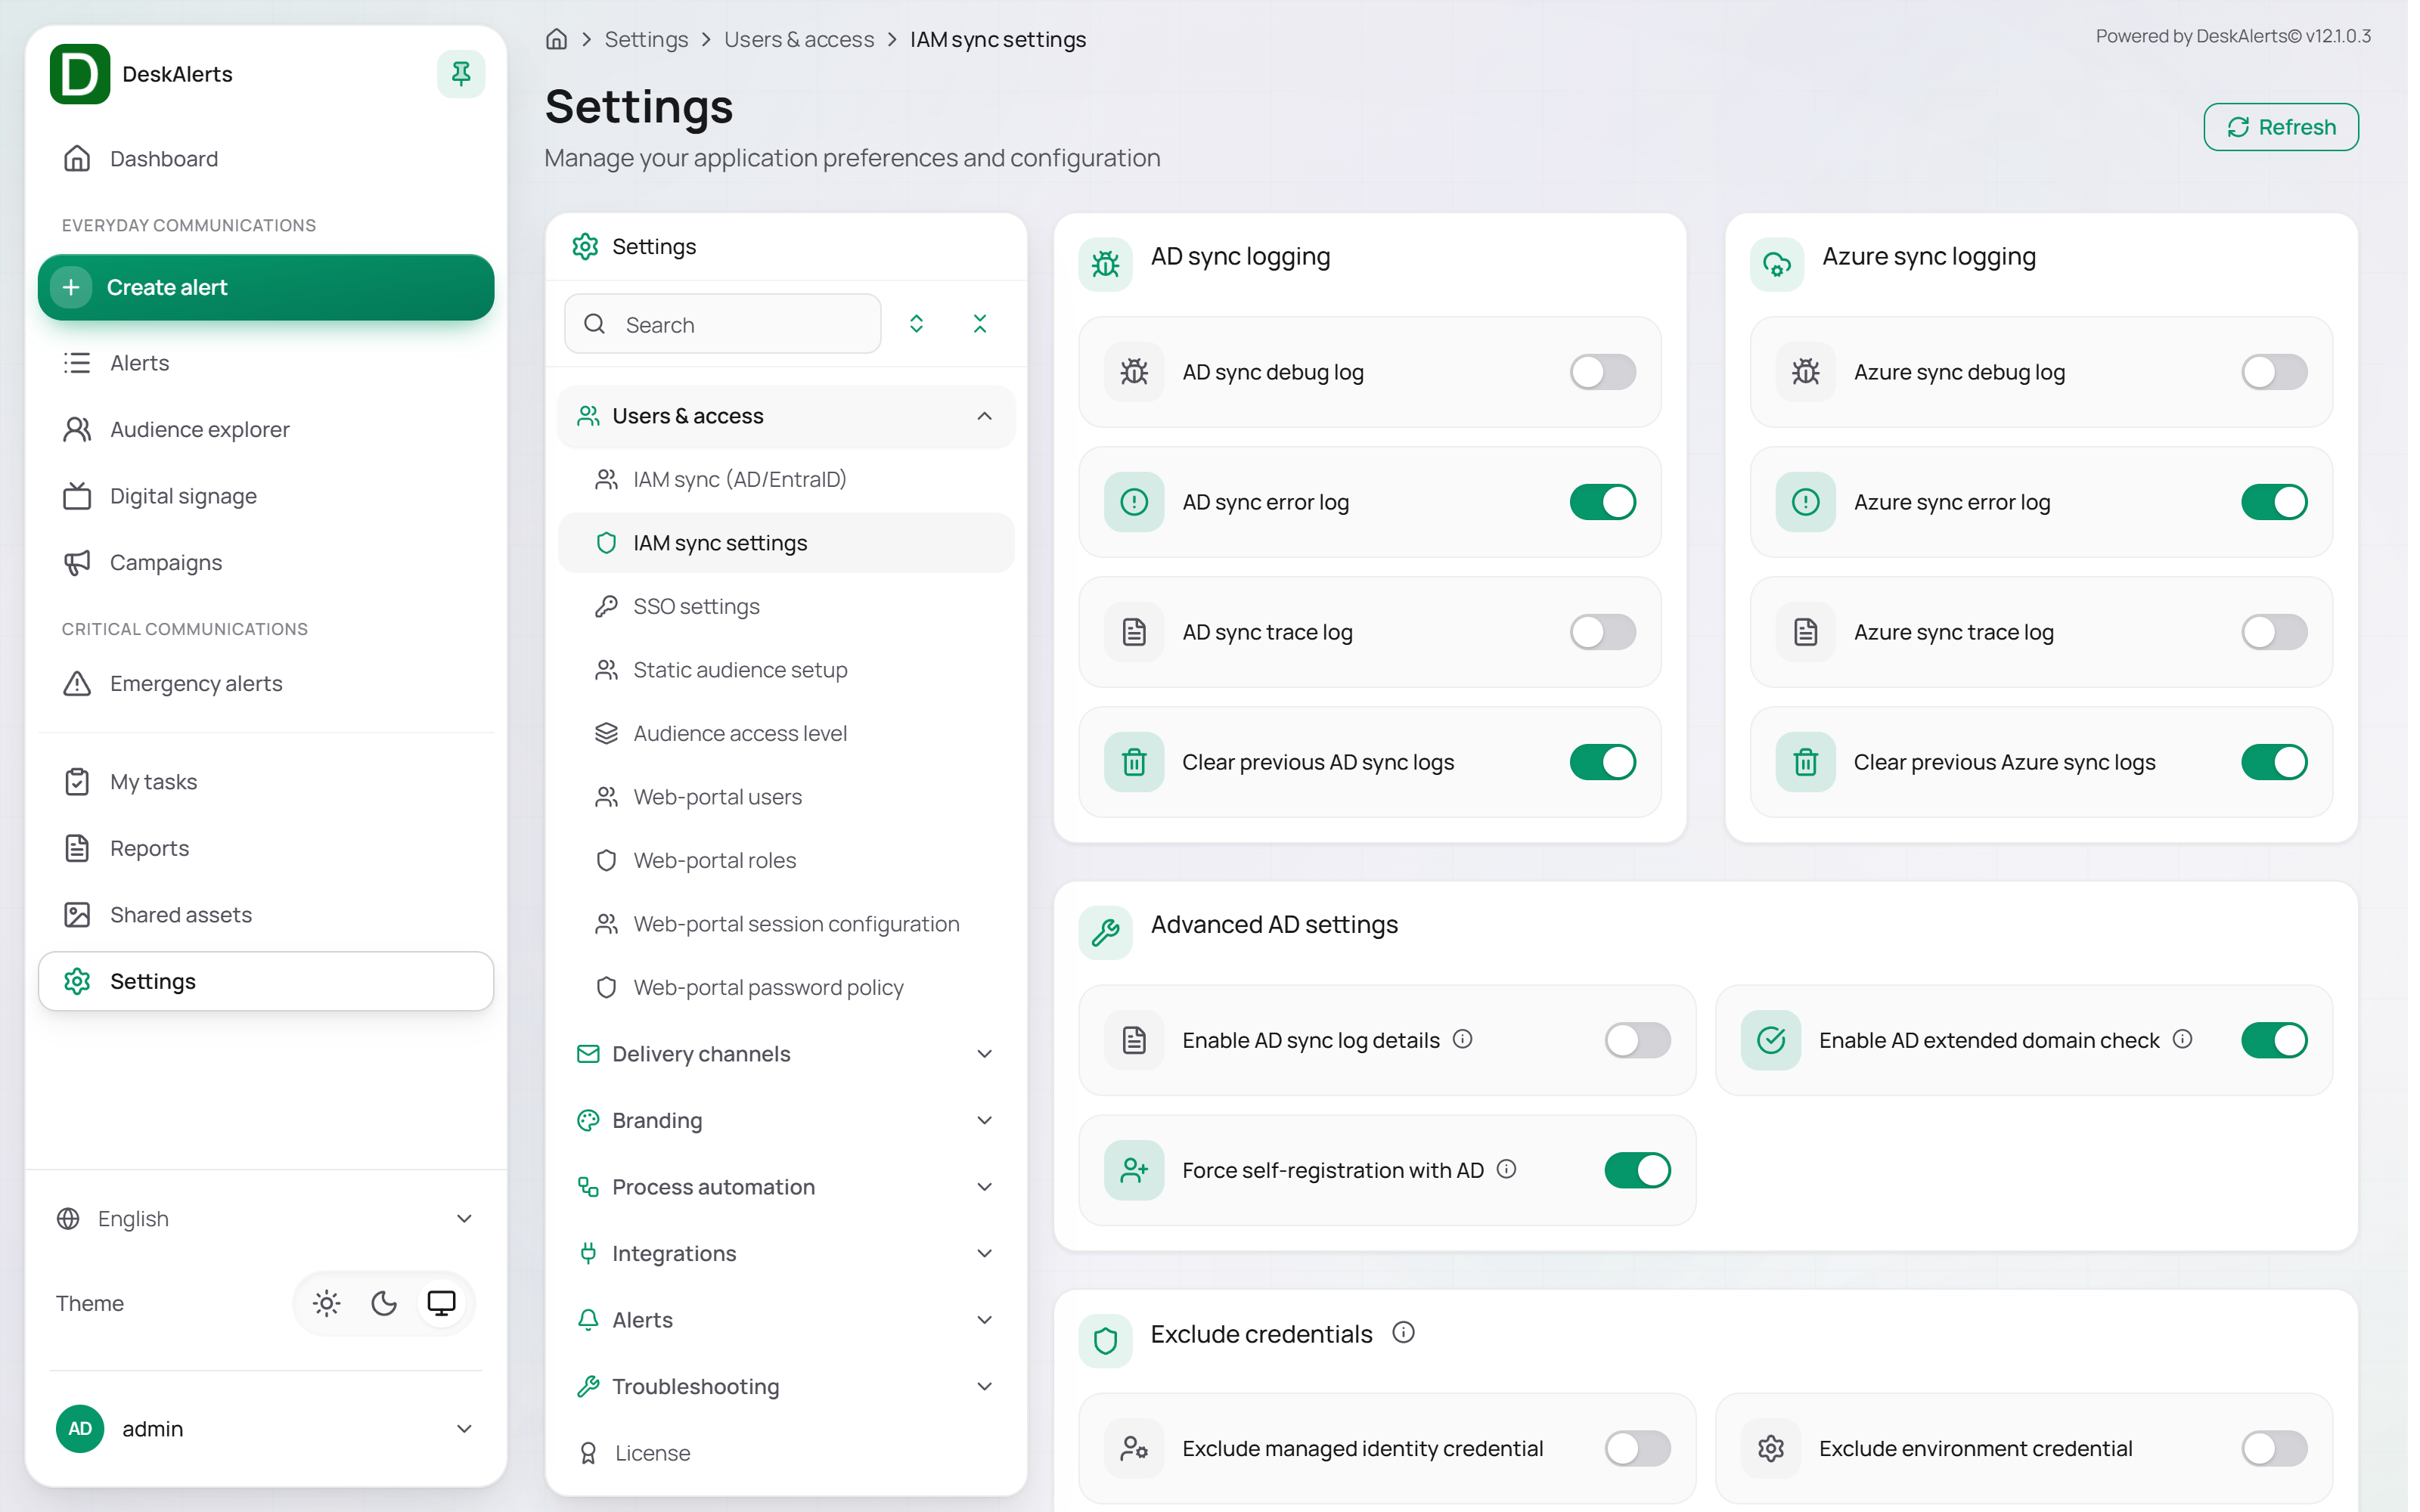
AD sync logging
| Setting | Description |
|---|---|
| AD sync debug log | Enables verbose debug logging for AD sync operations |
| AD sync error log | Logs sync errors |
| AD sync trace log | Enables trace-level diagnostics |
| Clear previous AD sync logs | Clears old logs before each new sync run |
Azure sync logging
| Setting | Description |
|---|---|
| Azure sync debug log | Enables debug logging for Azure AD sync |
| Azure sync error log | Logs errors during Azure sync |
| Azure sync trace log | Enables detailed trace logs |
| Clear previous Azure sync logs | Clears old Azure sync logs before each new run |
Advanced AD settings
| Setting | Description |
|---|---|
| Enable AD sync log details | Adds additional detail fields to sync log entries |
| Enable AD extended domain check | Performs extended domain validation during sync |
| Force self-registration with AD | Requires non-domain devices to self-register using AD credentials |
Exclude credentials
The Exclude Credentials section lets administrators prevent specific Azure credential flows from being used by the desktop agents. Agents installed with the Azure AD or Seamless for Azure AD registration method sign in through the Azure Identity library, which can use several credential sources. A source that is blocked or broken in your environment makes the sign-in fail with a message such as Failed to sign in using Azure SDK. Message: ManagedIdentityCredential authentication failed in the agent log — tick that source here to skip it. The change reaches the agents when they reconnect. A single workstation can exclude a source locally by setting the matching Exclude…Credential value to true in the agent's appsettings.json.
Excluding Shared Token Cache Credential is also the way to stop the agent from silently picking up whichever Microsoft account is cached on the workstation (for example, a personal account used in another application): the user is then always asked which account to sign in with.
The sources that can be excluded:
- Managed Identity Credential
- Interactive Browser Credential
- Shared Token Cache Credential
- Visual Studio Credential
- Workload Identity Credential
- Environment Credential
- Azure PowerShell Credential
- VS Code Credential
- Azure CLI Credential
- Azure Developer CLI Credential
SSO settings
SSO settings enables Single Sign-On for web-portal users and defines how the web (PWA) client signs users in.
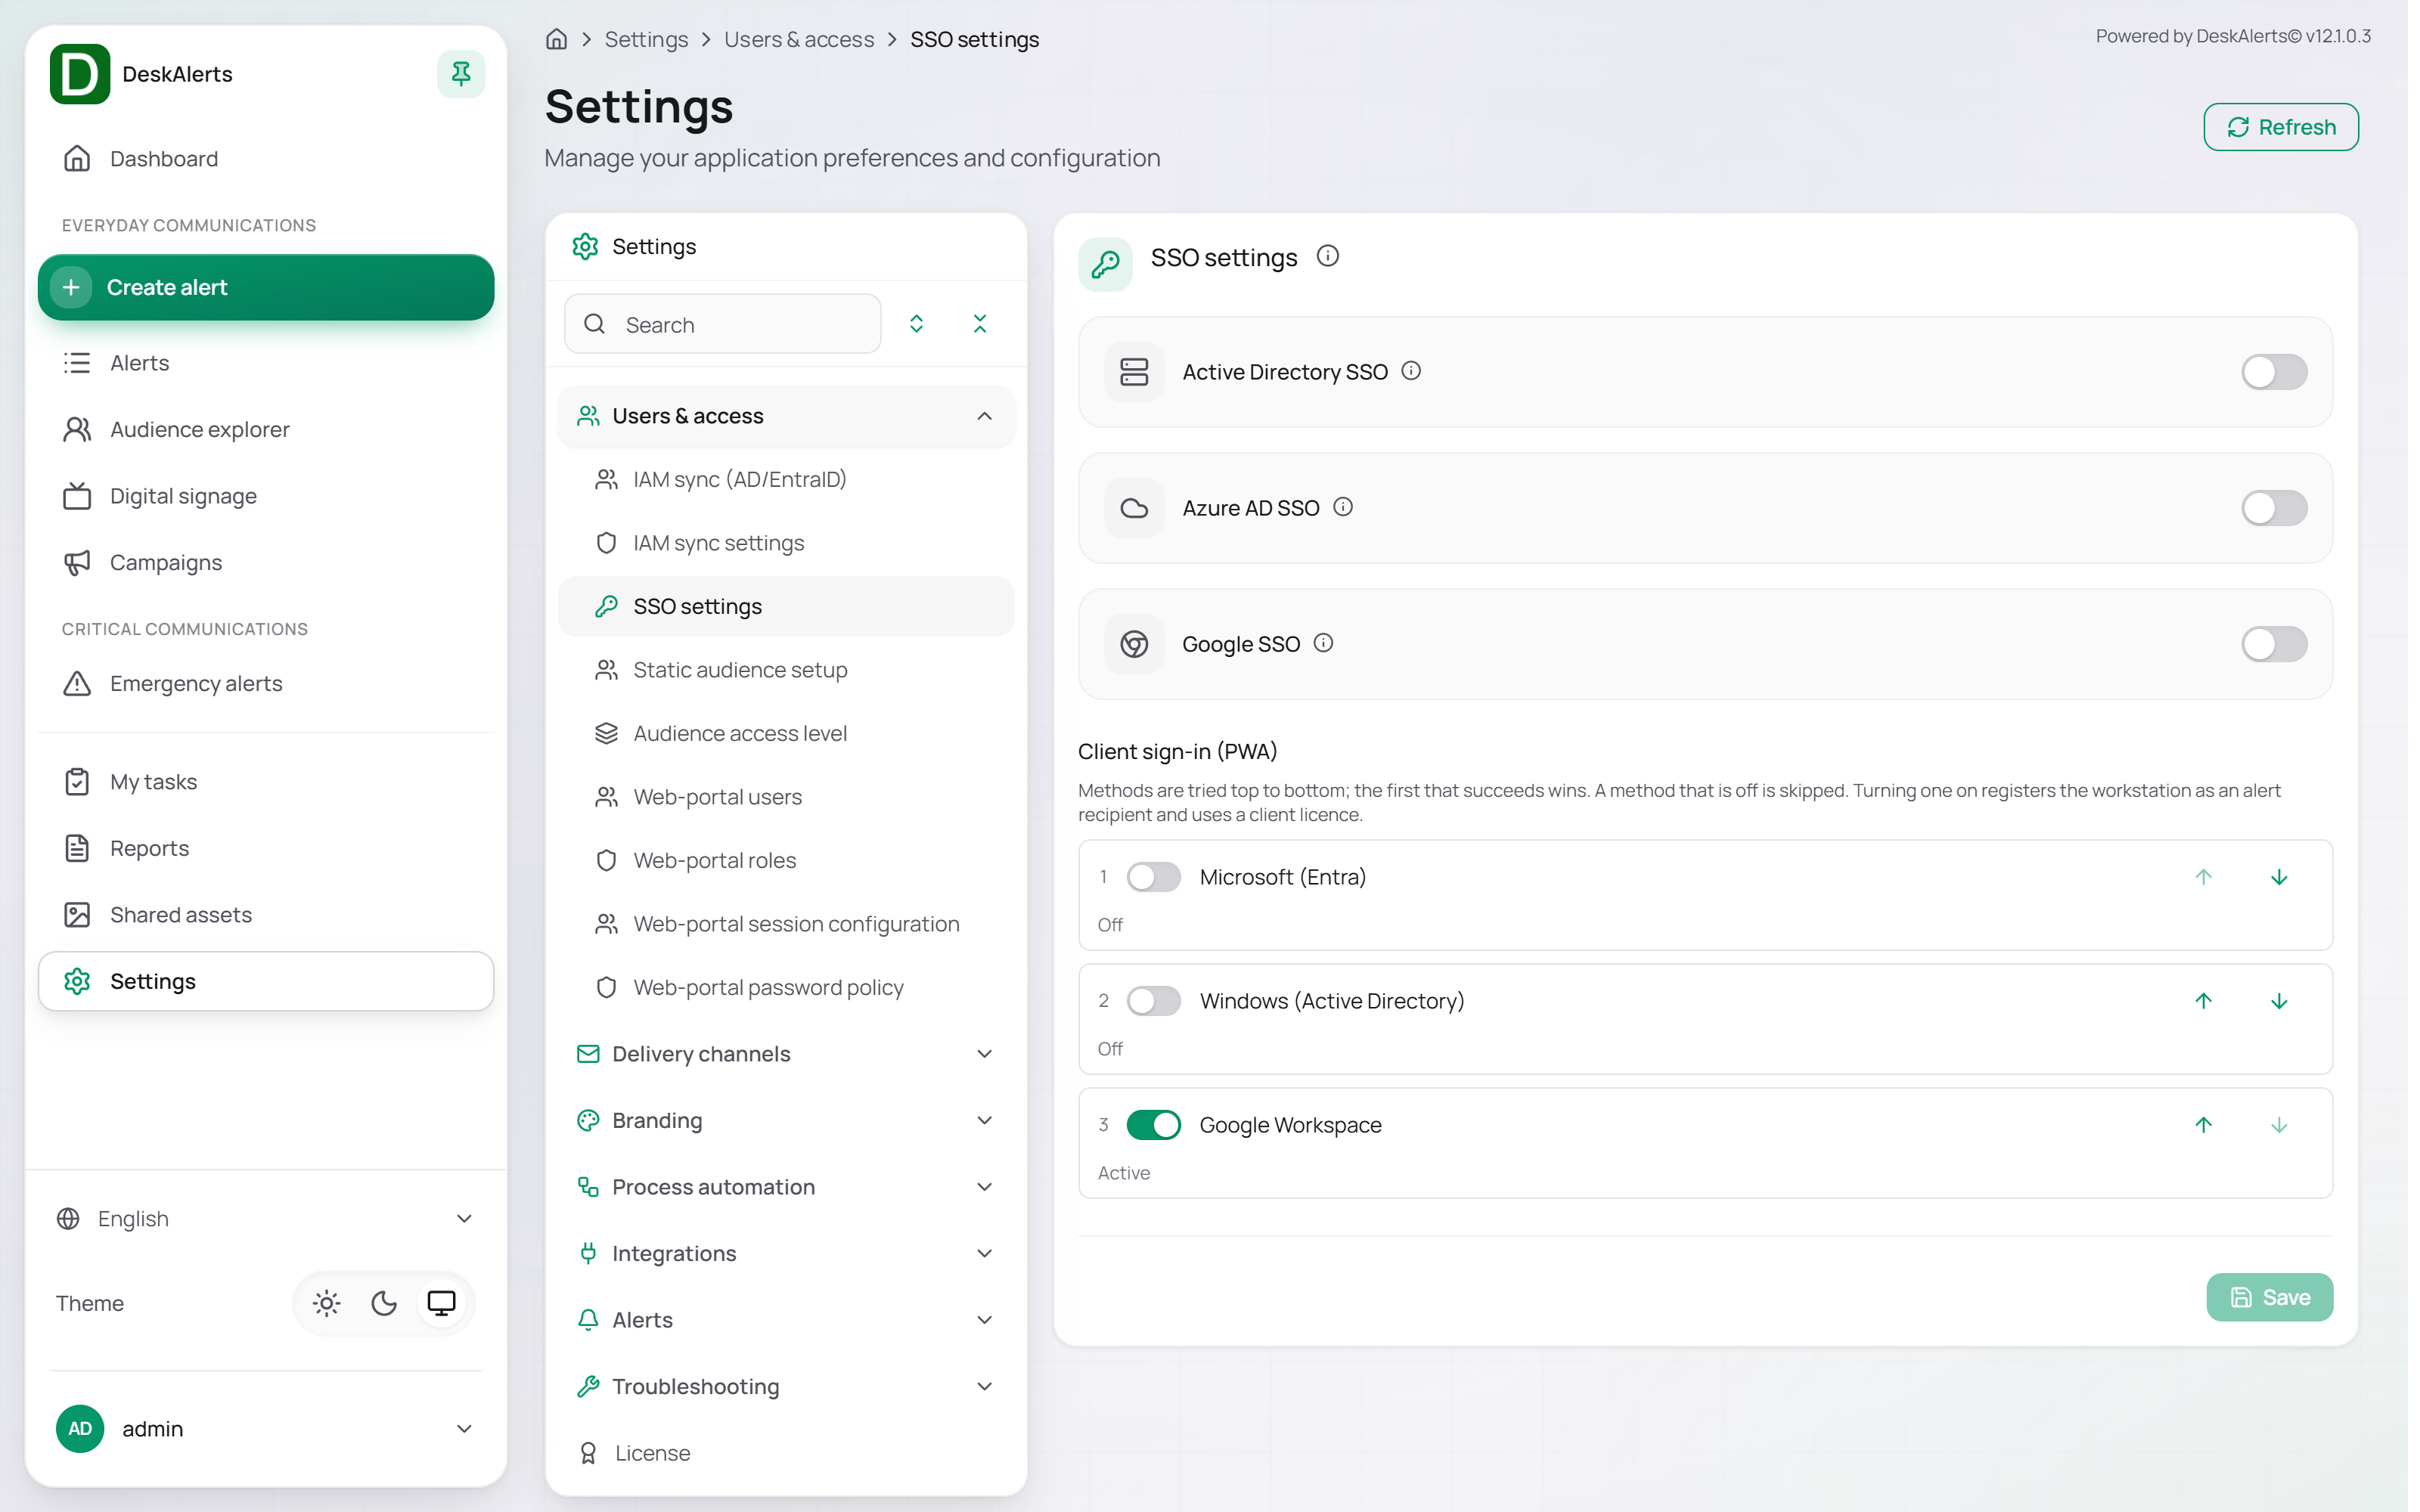 SSO settings — the three providers and the Client sign-in (PWA) list
Each provider has an on/off toggle and its own connection fields:
| Provider | Fields |
|---|---|
| Active Directory SSO | Internal Domain — the internal domain used for AD SSO authentication |
| Azure AD SSO | Client ID — the Azure AD application client ID; Tenant ID — the Azure AD tenant ID; Client Secret — the application client secret. A stored secret is shown as •••••••• (saved); leave the field blank to keep it |
| Google SSO | Google OAuth Client ID — the OAuth 2.0 Web client ID from Google Cloud Console (ends with .apps.googleusercontent.com); Hosted Domain — optional, restricts login to one Google Workspace domain (leave empty to bind to the domain configured in Sync) |
Enable the relevant providers for your environment and click Save.
Note: SSO allows users to log in with their corporate credentials without maintaining a separate DeskAlerts password.
Client sign-in (PWA)
The Client sign-in (PWA) list at the bottom of the page defines which identity providers the web client may use to sign a user in, and in which order.
| Method | Description |
|---|---|
| Microsoft (Entra) | Sign-in with a Microsoft Entra ID account |
| Windows (Active Directory) | Sign-in with the Windows domain account |
| Google Workspace | Sign-in with a Google Workspace account |
Methods are tried from top to bottom; the first that succeeds wins, and a method that is off is skipped. Use the arrows to reorder the methods and the toggles to turn them on or off. Each row shows its state (Active or Off).
Important: Turning a method on registers the workstation that signs in as an alert recipient.
Static audience setup
Static audience setup is used to manually manage users, groups, IP groups, and domains that are not managed exclusively through directory synchronization.
This section contains three tabs:
- Organization
- IP Groups
- Domains
Organization tab
The Organization tab contains Users and Groups sub-tabs.
Users
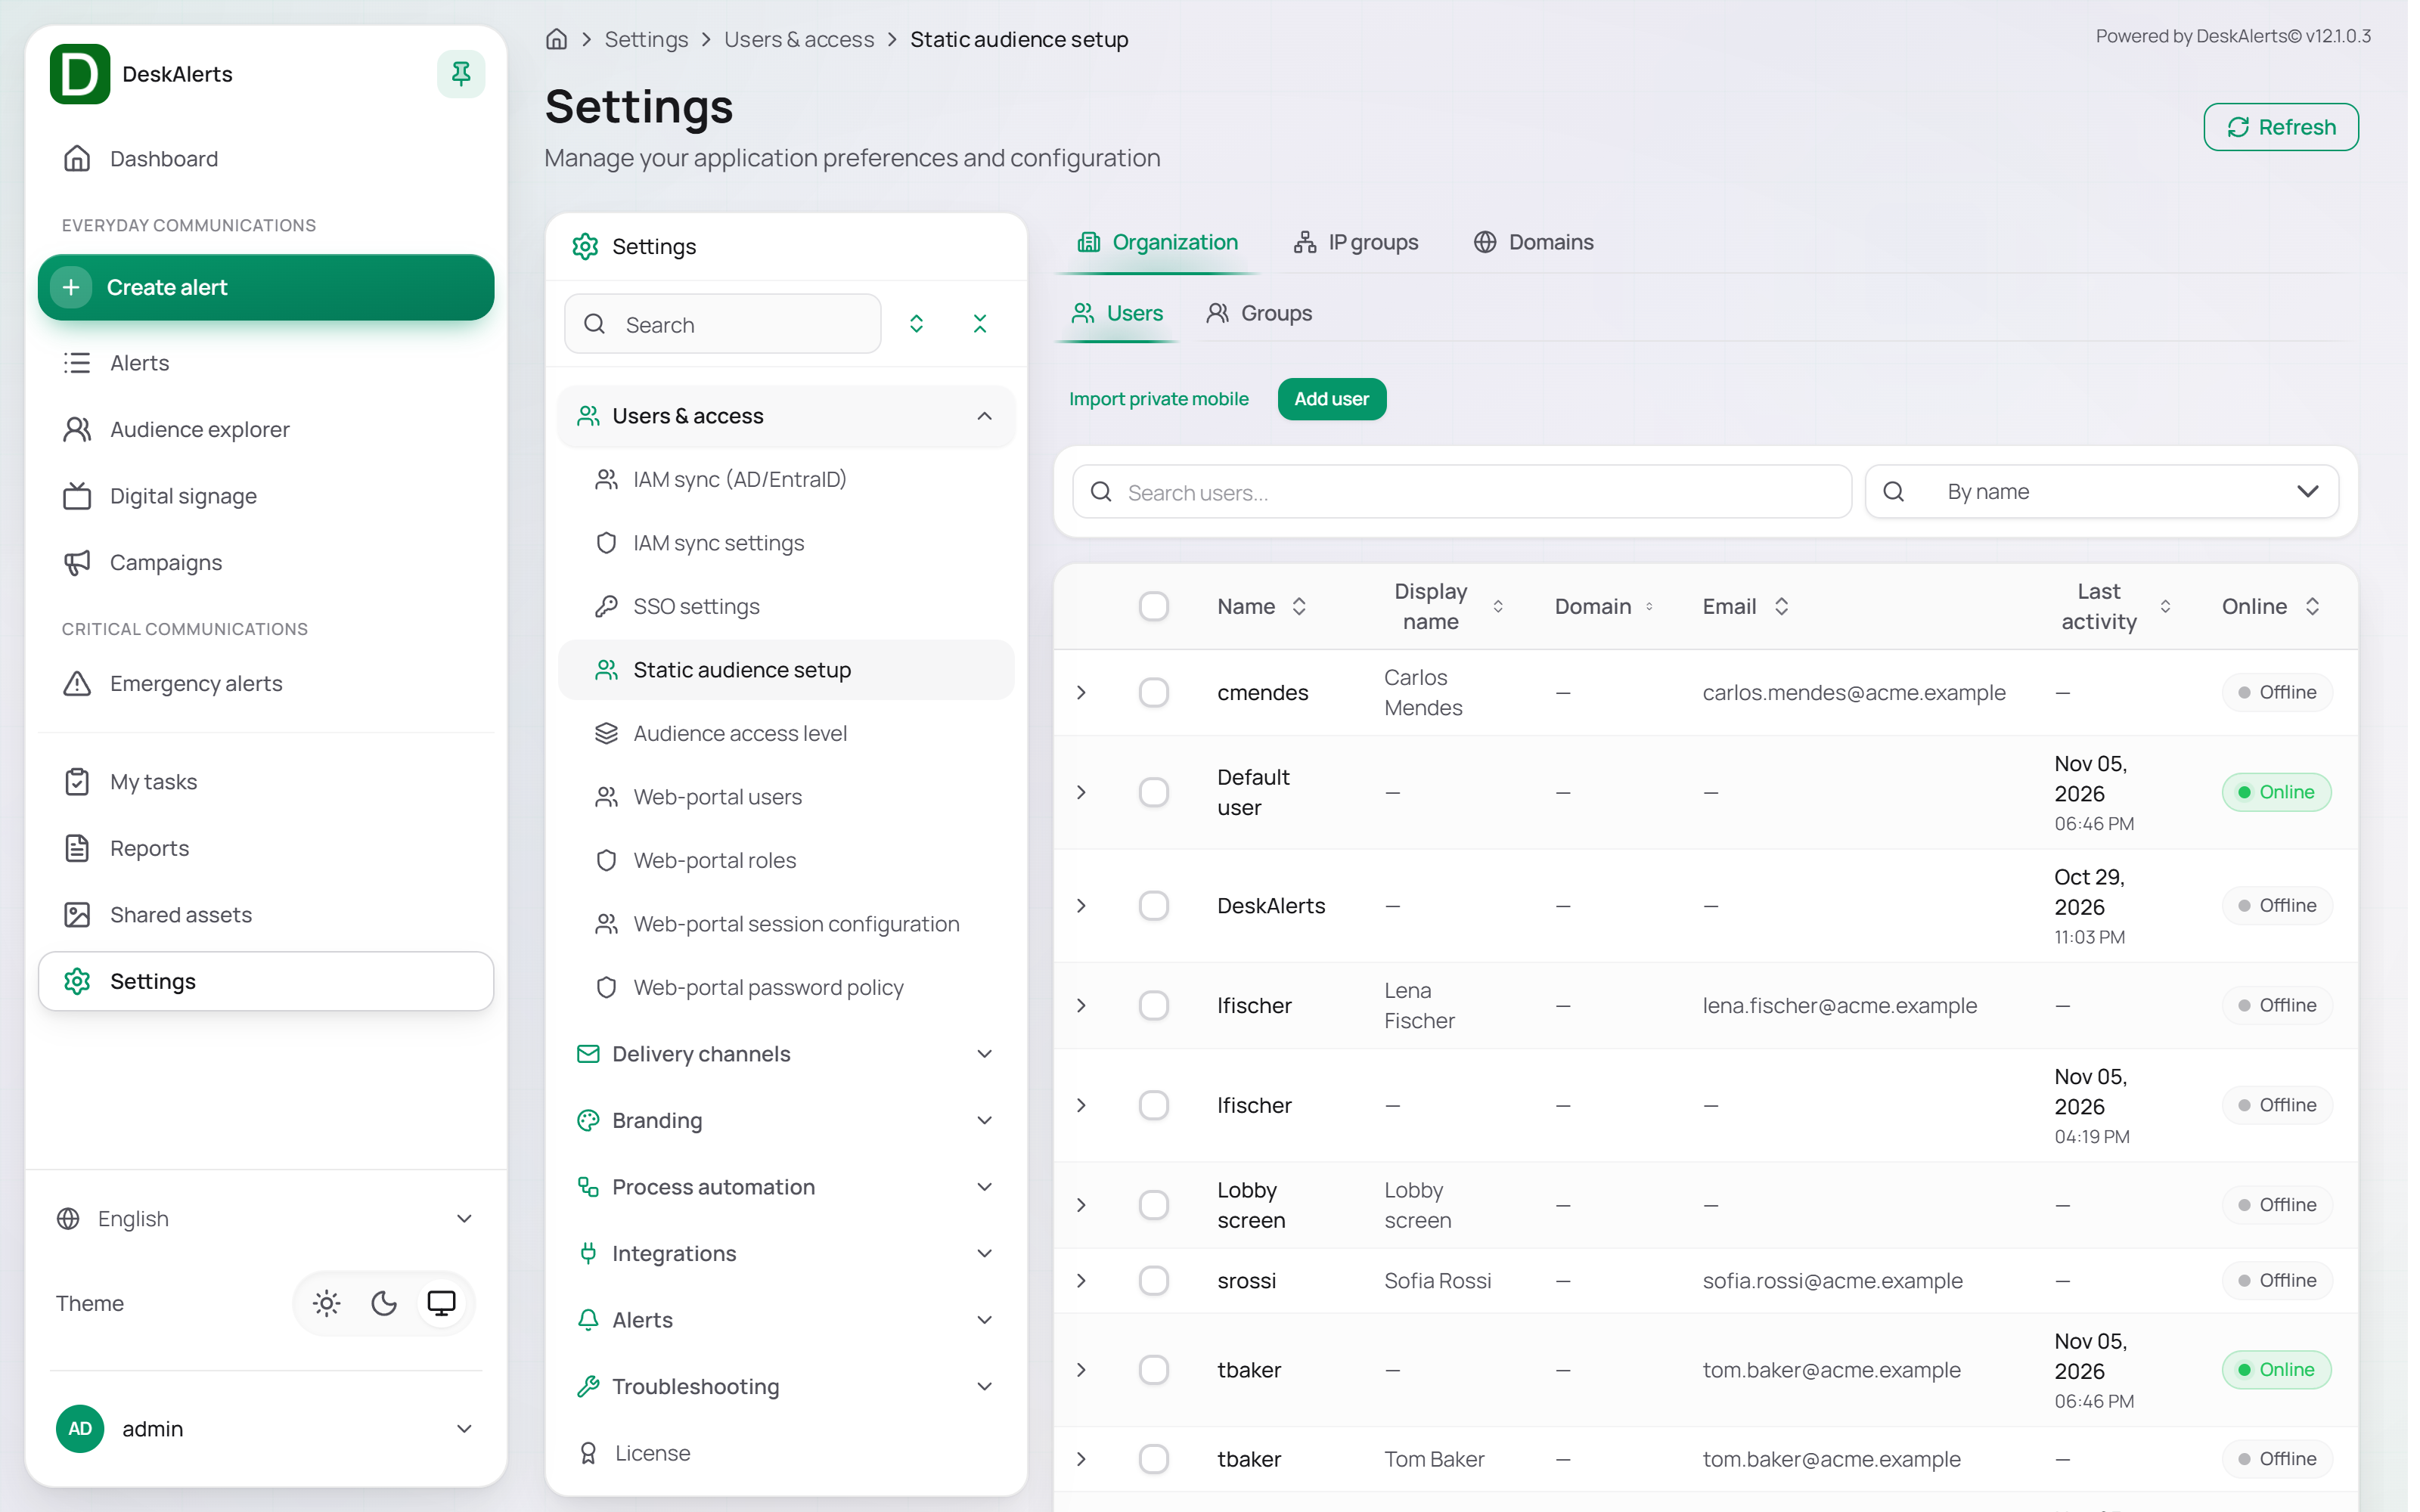
The Users list displays all registered users.
| Column | Description |
|---|---|
| Name | User login name |
| Display name | User-facing display name |
| Domain | Associated domain |
| User email address | |
| Last activity | Most recent desktop agent activity |
| Online | Current connection status |
Use search and sorting controls to find users quickly.
Click a user row to open its actions: View, Edit user, and Delete user. The checkboxes select several users for Delete selected.
Adding a user
Click Add user and complete the required fields.
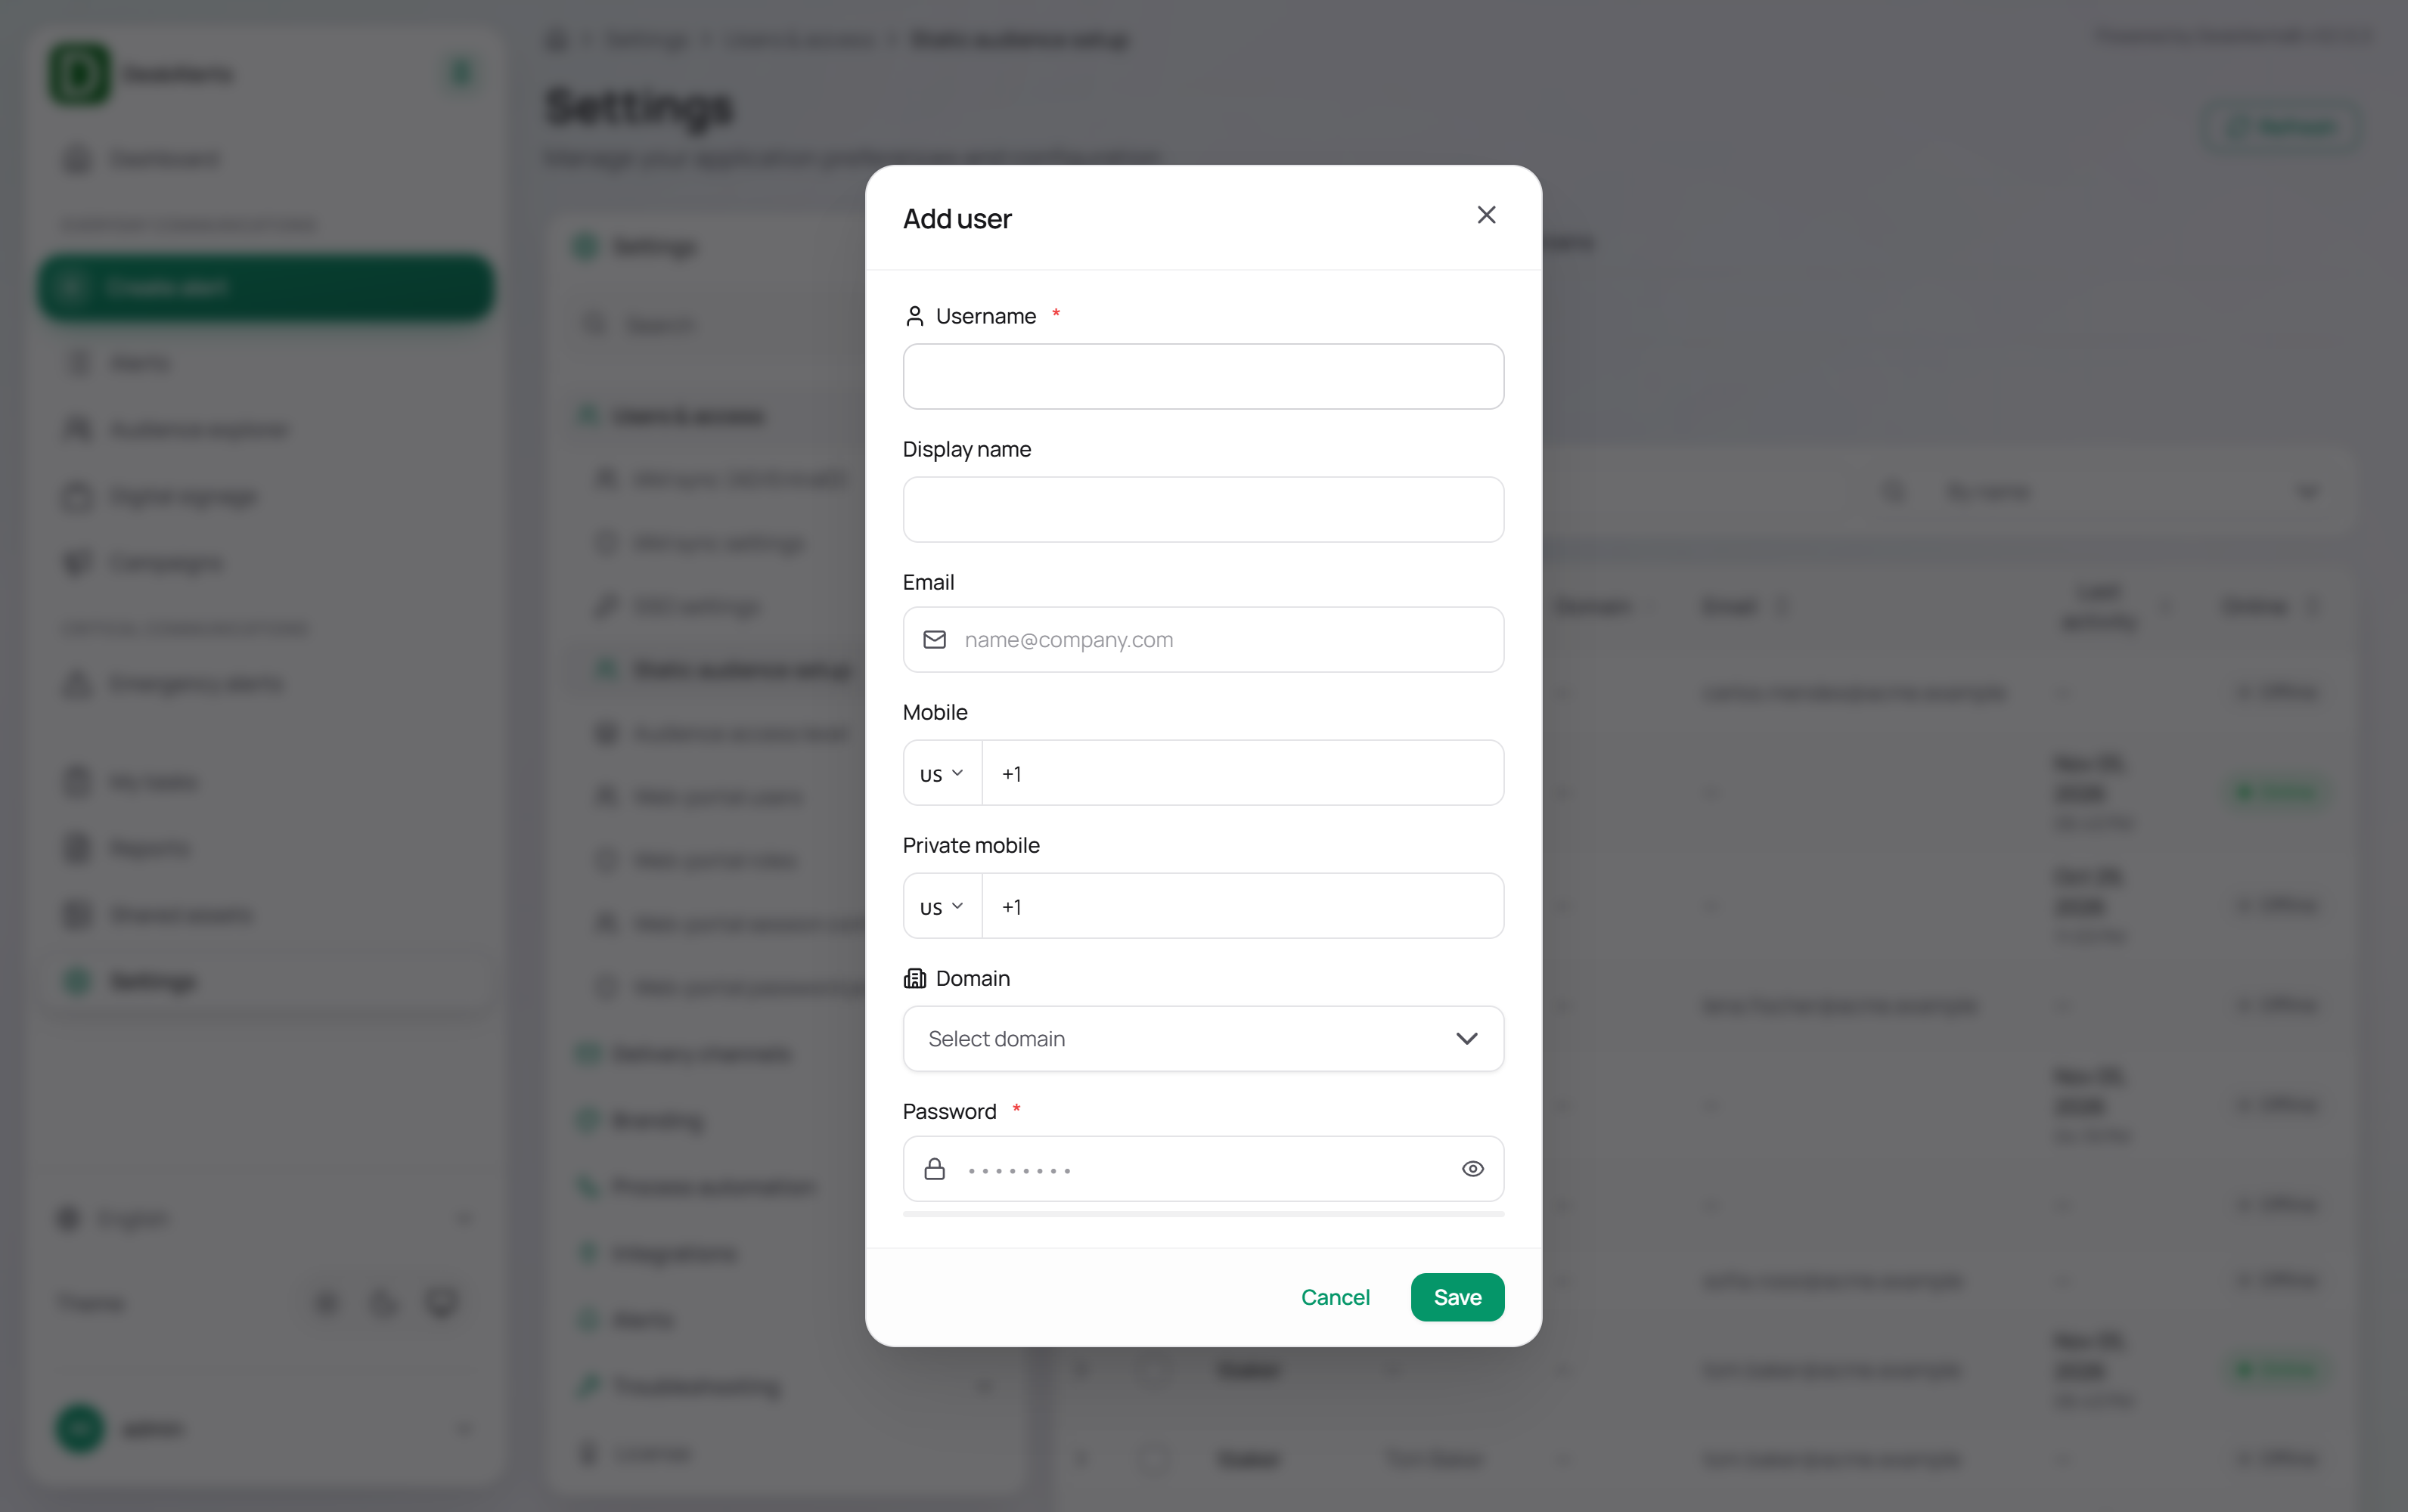
| Field | Description |
|---|---|
| Username | Required login name, for example tbaker |
| Display name | Optional display name shown in the audience and in reports, for example Tom Baker |
| Optional email address; needed for the email channel | |
| Mobile | Optional phone number; needed for the SMS and text-to-call channels |
| Private mobile | Optional second phone number |
| Domain | Optional assigned domain |
| Password | Required. The password the user enters in the agent's sign-in form (Simple registration) |
Click Save to create the user. The user appears in the list at once and in Audience explorer under the Registered domain.
Groups
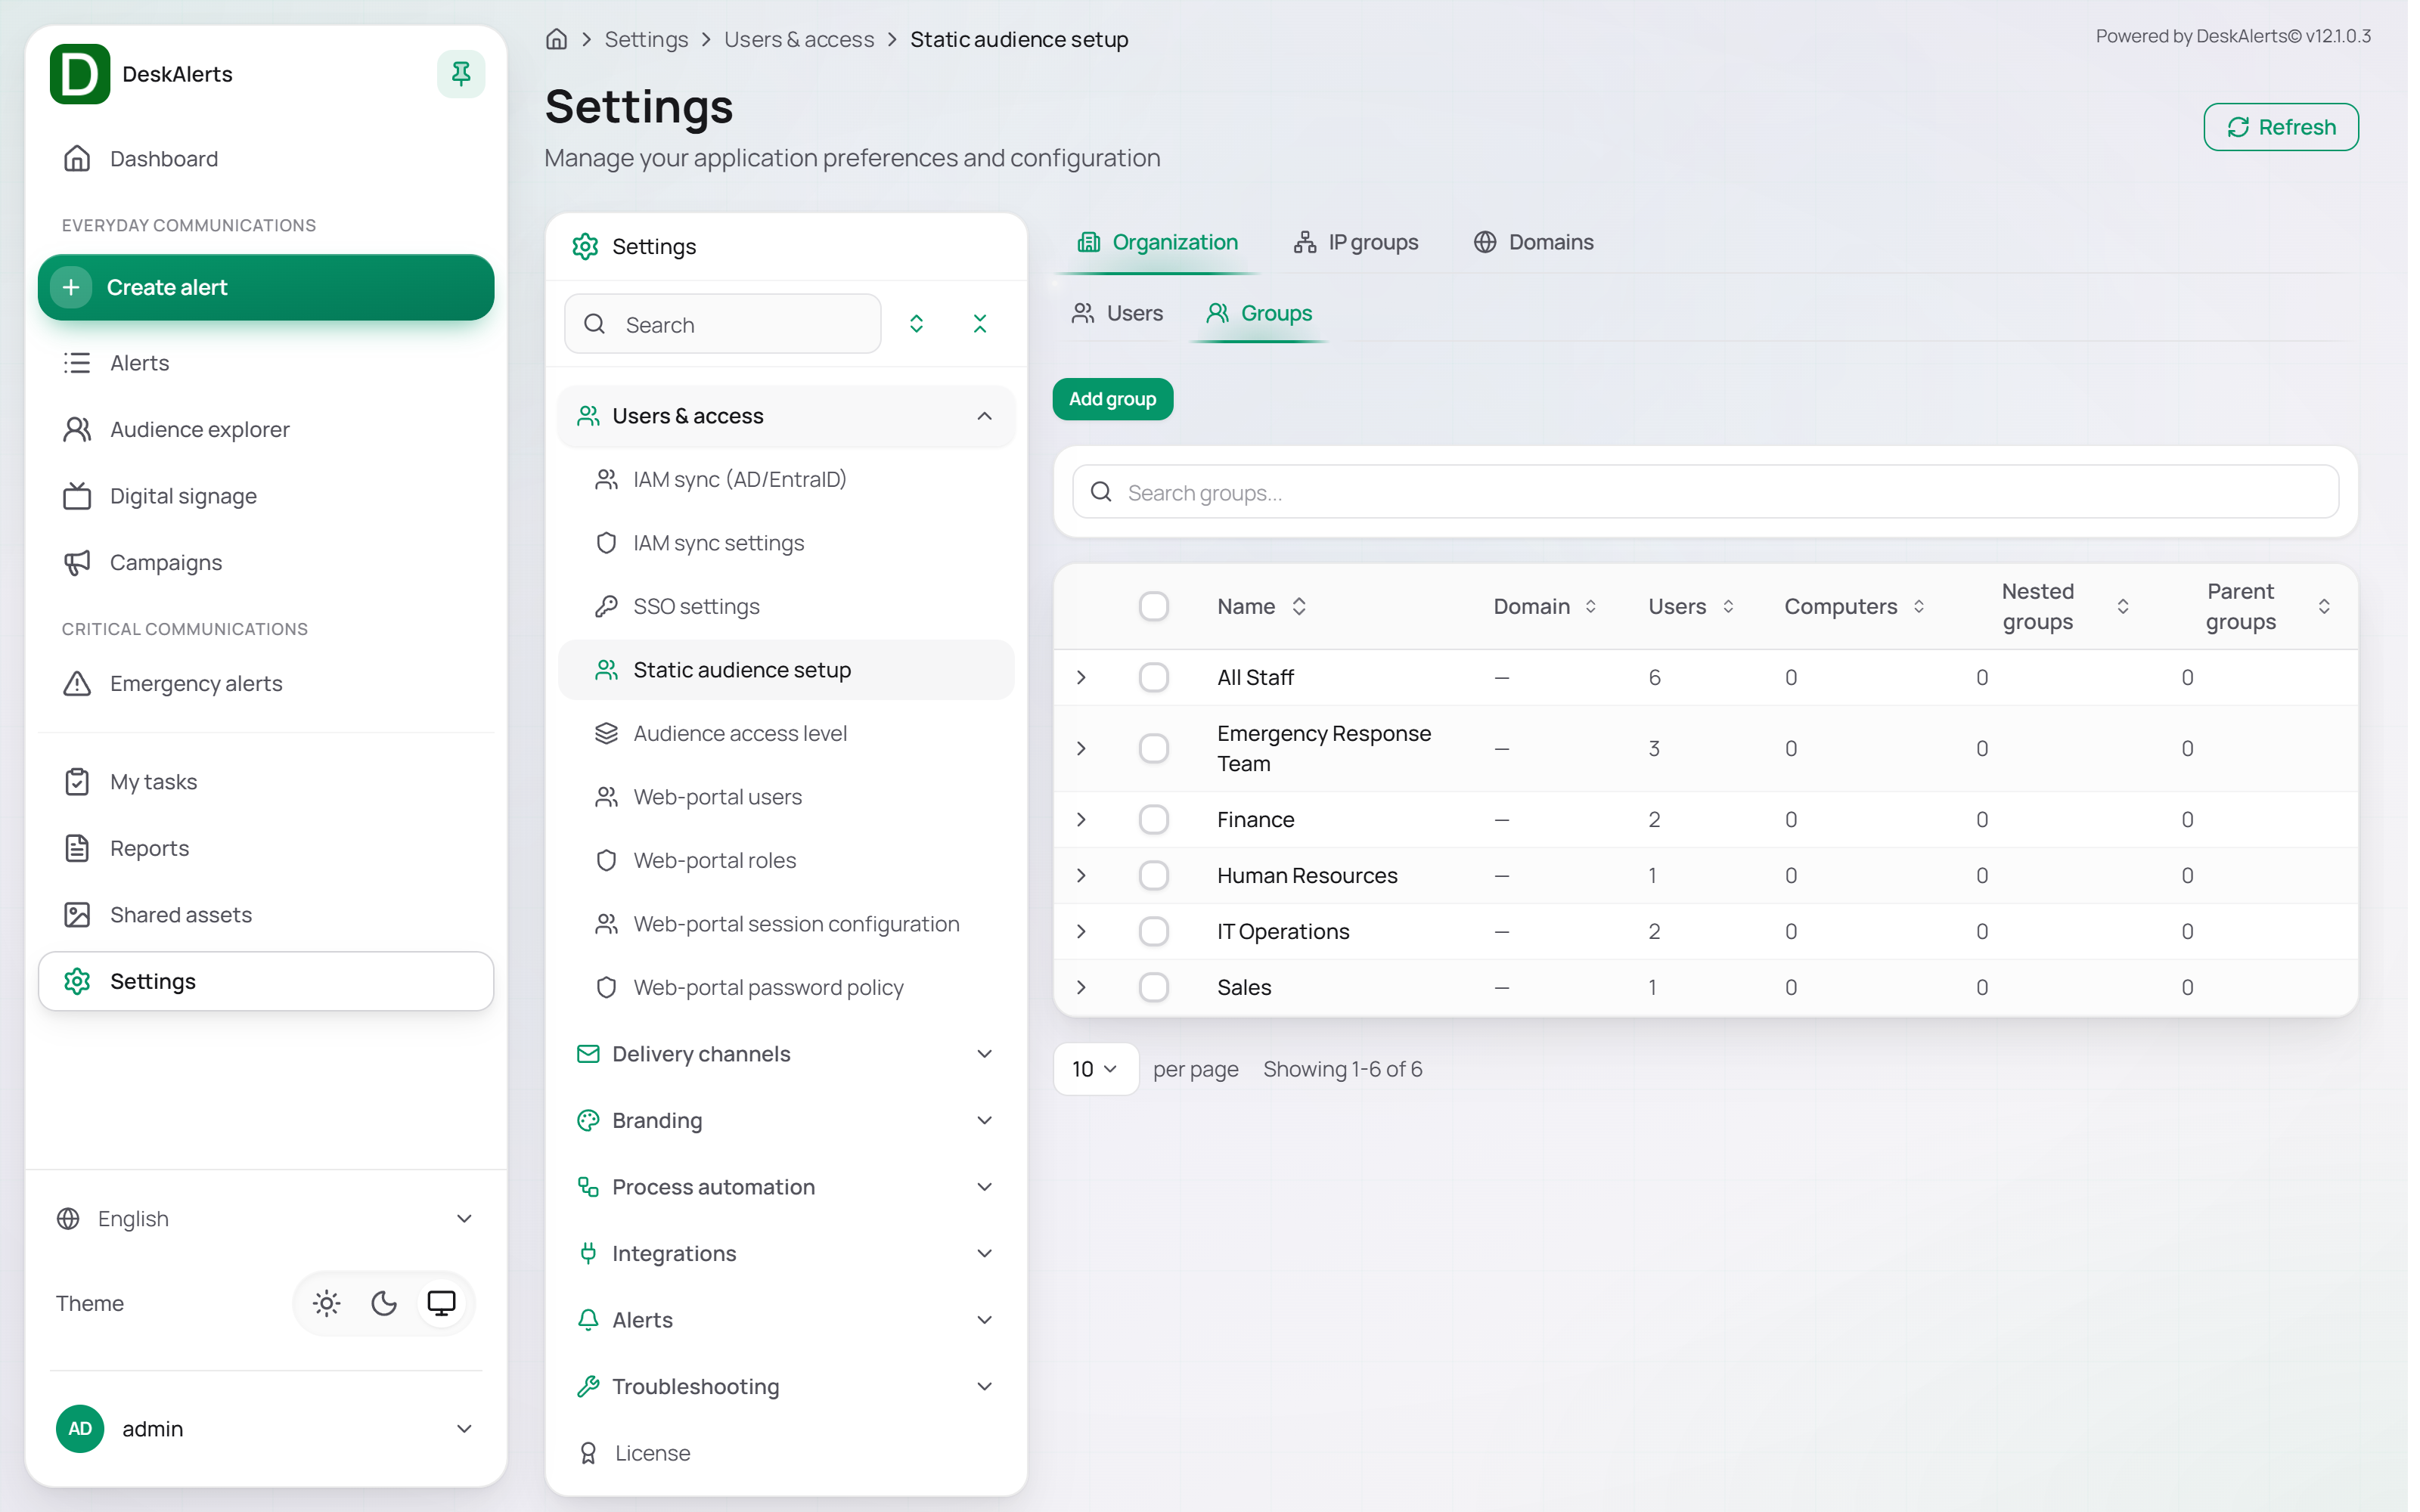
The Groups list displays manually created and imported groups.
| Column | Description |
|---|---|
| Name | Group name |
| Domain | Associated domain |
| Users | Number of user members |
| Computers | Number of computer members |
| Nested groups | Number of child groups |
| Parent groups | Number of parent groups |
Click a group row to open its actions: Edit group and Delete group.
Adding a group
Click Add group.
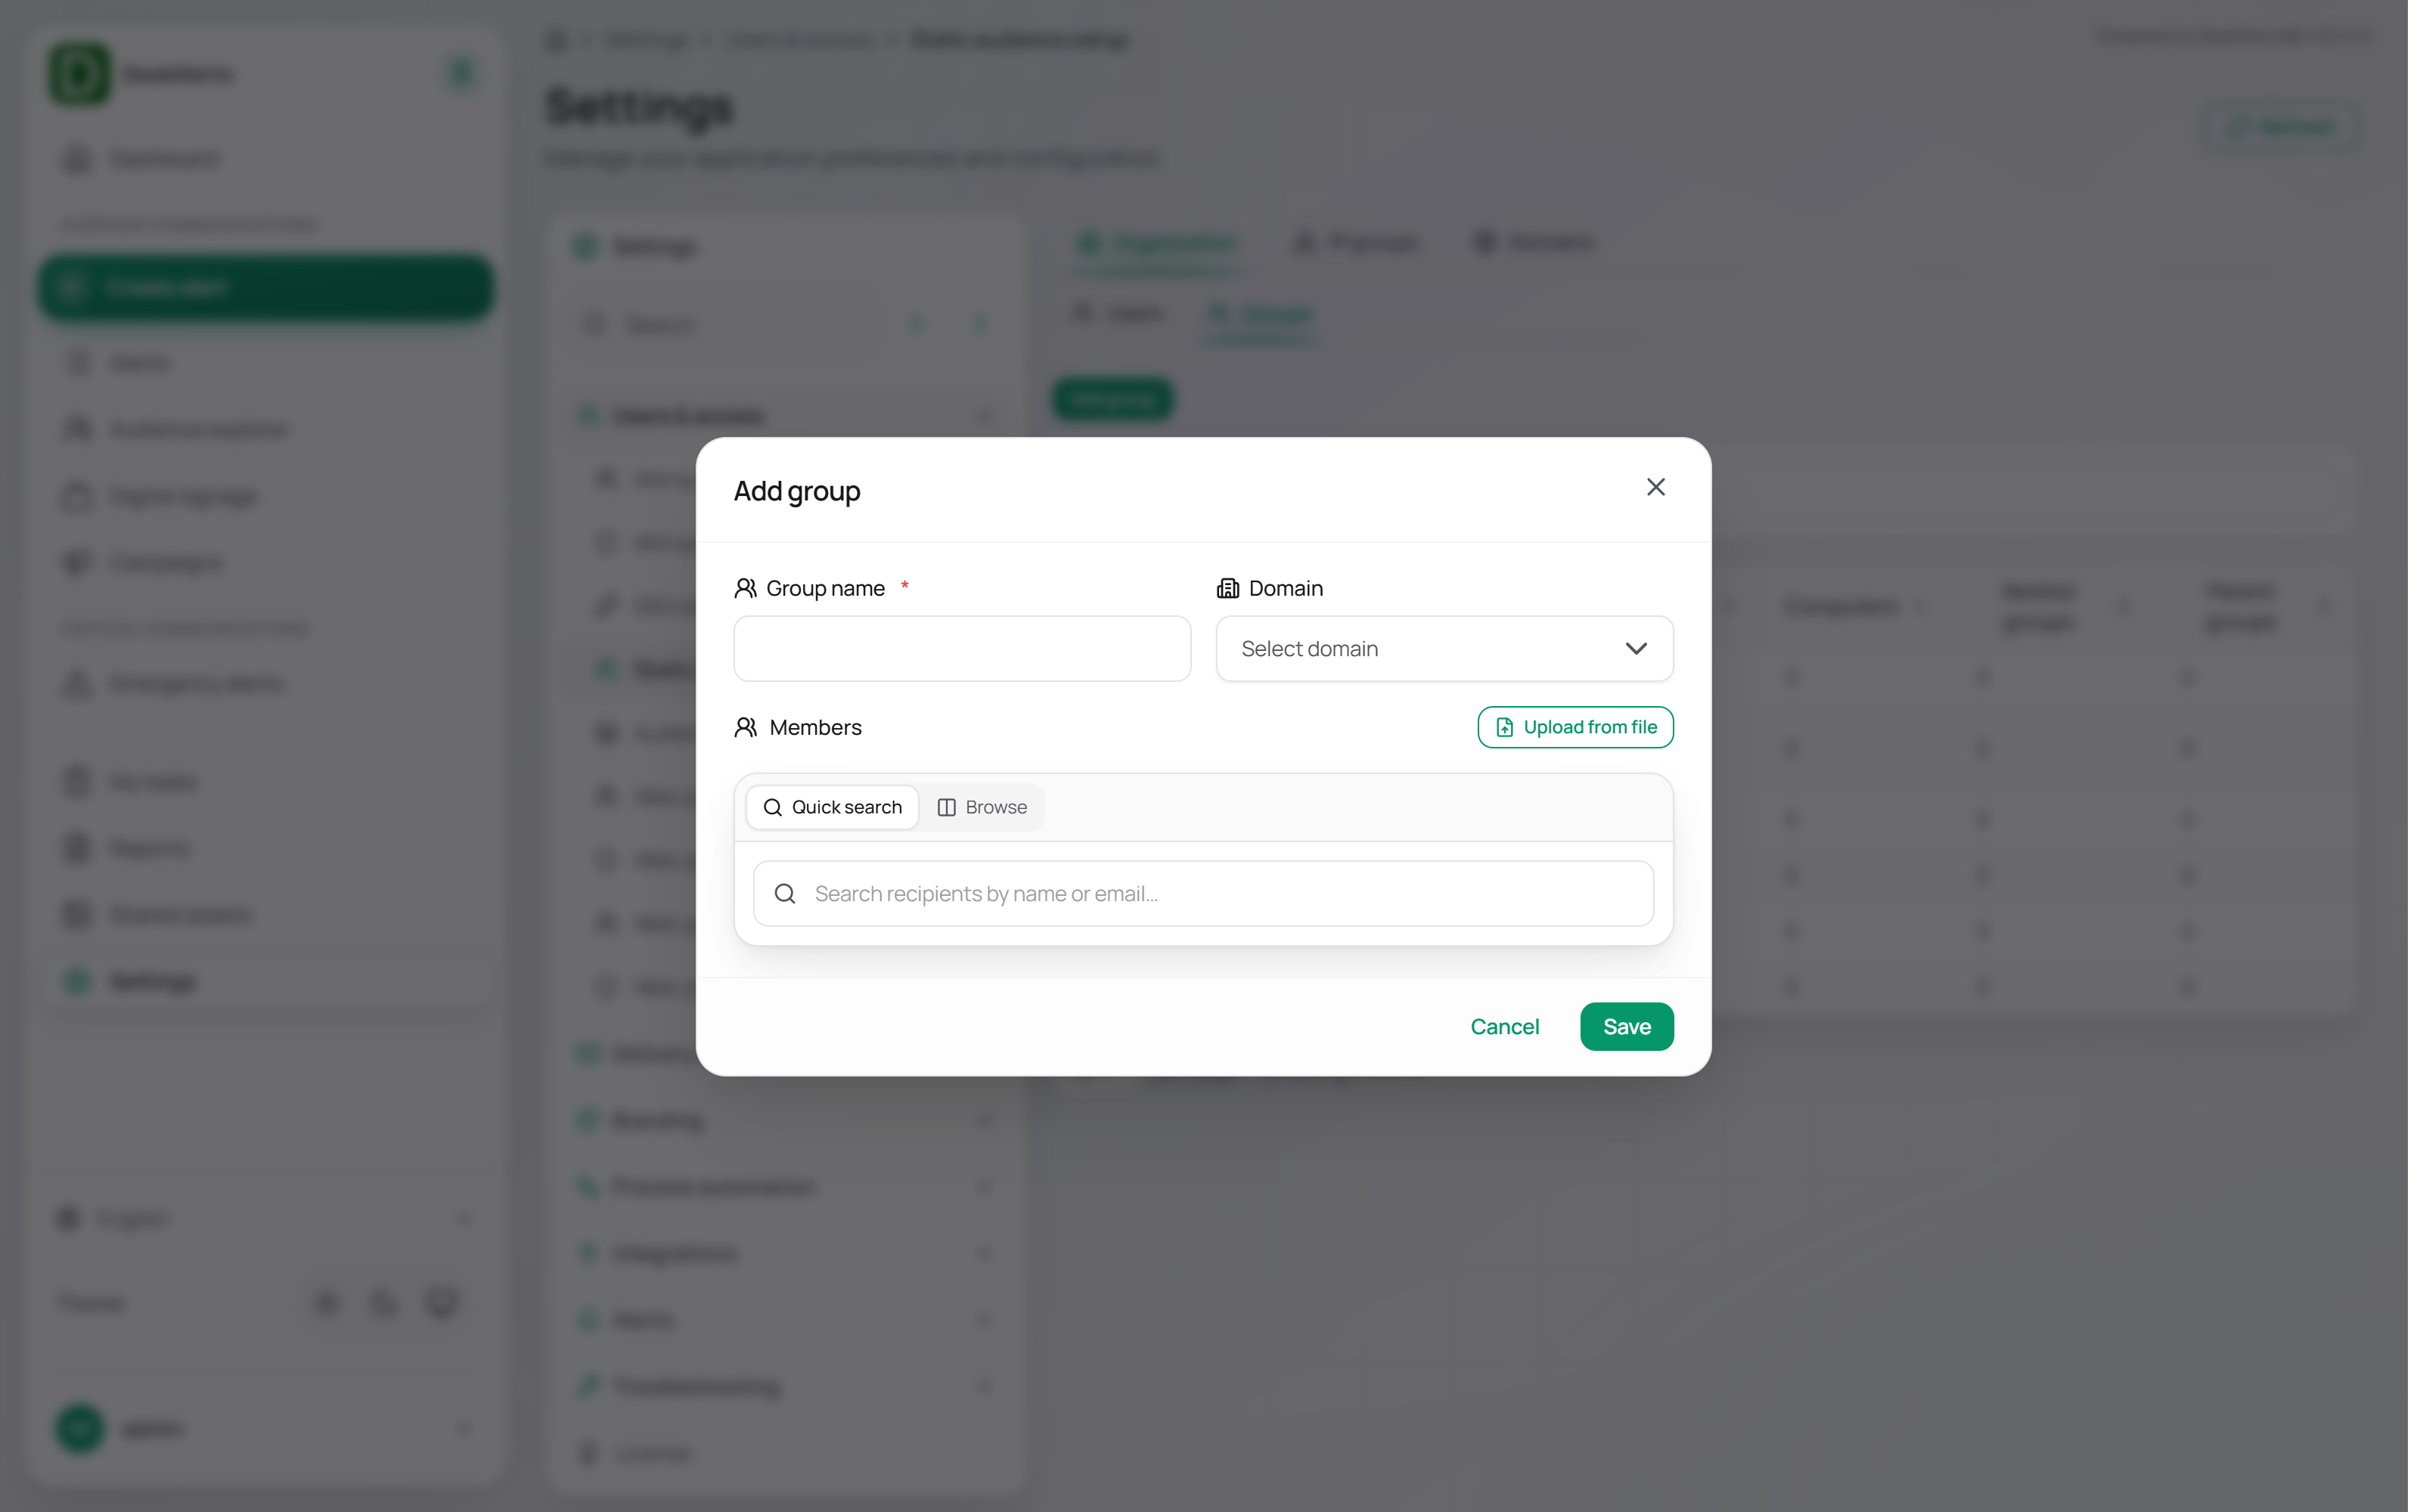
| Field | Description |
|---|---|
| Group name | Required group name, for example Finance |
| Domain | Optional assigned domain |
| Members | Recipients added with Quick search (type a name or email and pick the match; hold Shift to pick several, or paste a list) or with Browse (pick from the audience tree) |
Use Upload from file to bulk-import members.
The file for Upload from file (CSV, XLS, or XLSX) has a header row and three columns — Type, Name, Domain. Type is user, group, or computer; Name is the login, group, or computer name; Domain is the domain name, empty for recipients that do not belong to a domain. The file adds existing recipients only; it does not create users. A file in any other layout (for example a single column of names) is rejected with Failed to upload recipients.
Type,Name,Domain
user,jsmith,CONTOSO
group,Nurses,CONTOSO
computer,WS-0042,CONTOSO
After the upload the dialog lists the rows that were not added, each with a numeric reason: 3 — unknown type, 5 — user not found, 6 — group not found.
Add users and groups that were created manually in the portal with the member picker.
IP groups tab
IP Groups define named sets of IP addresses or ranges that can be used for targeting.
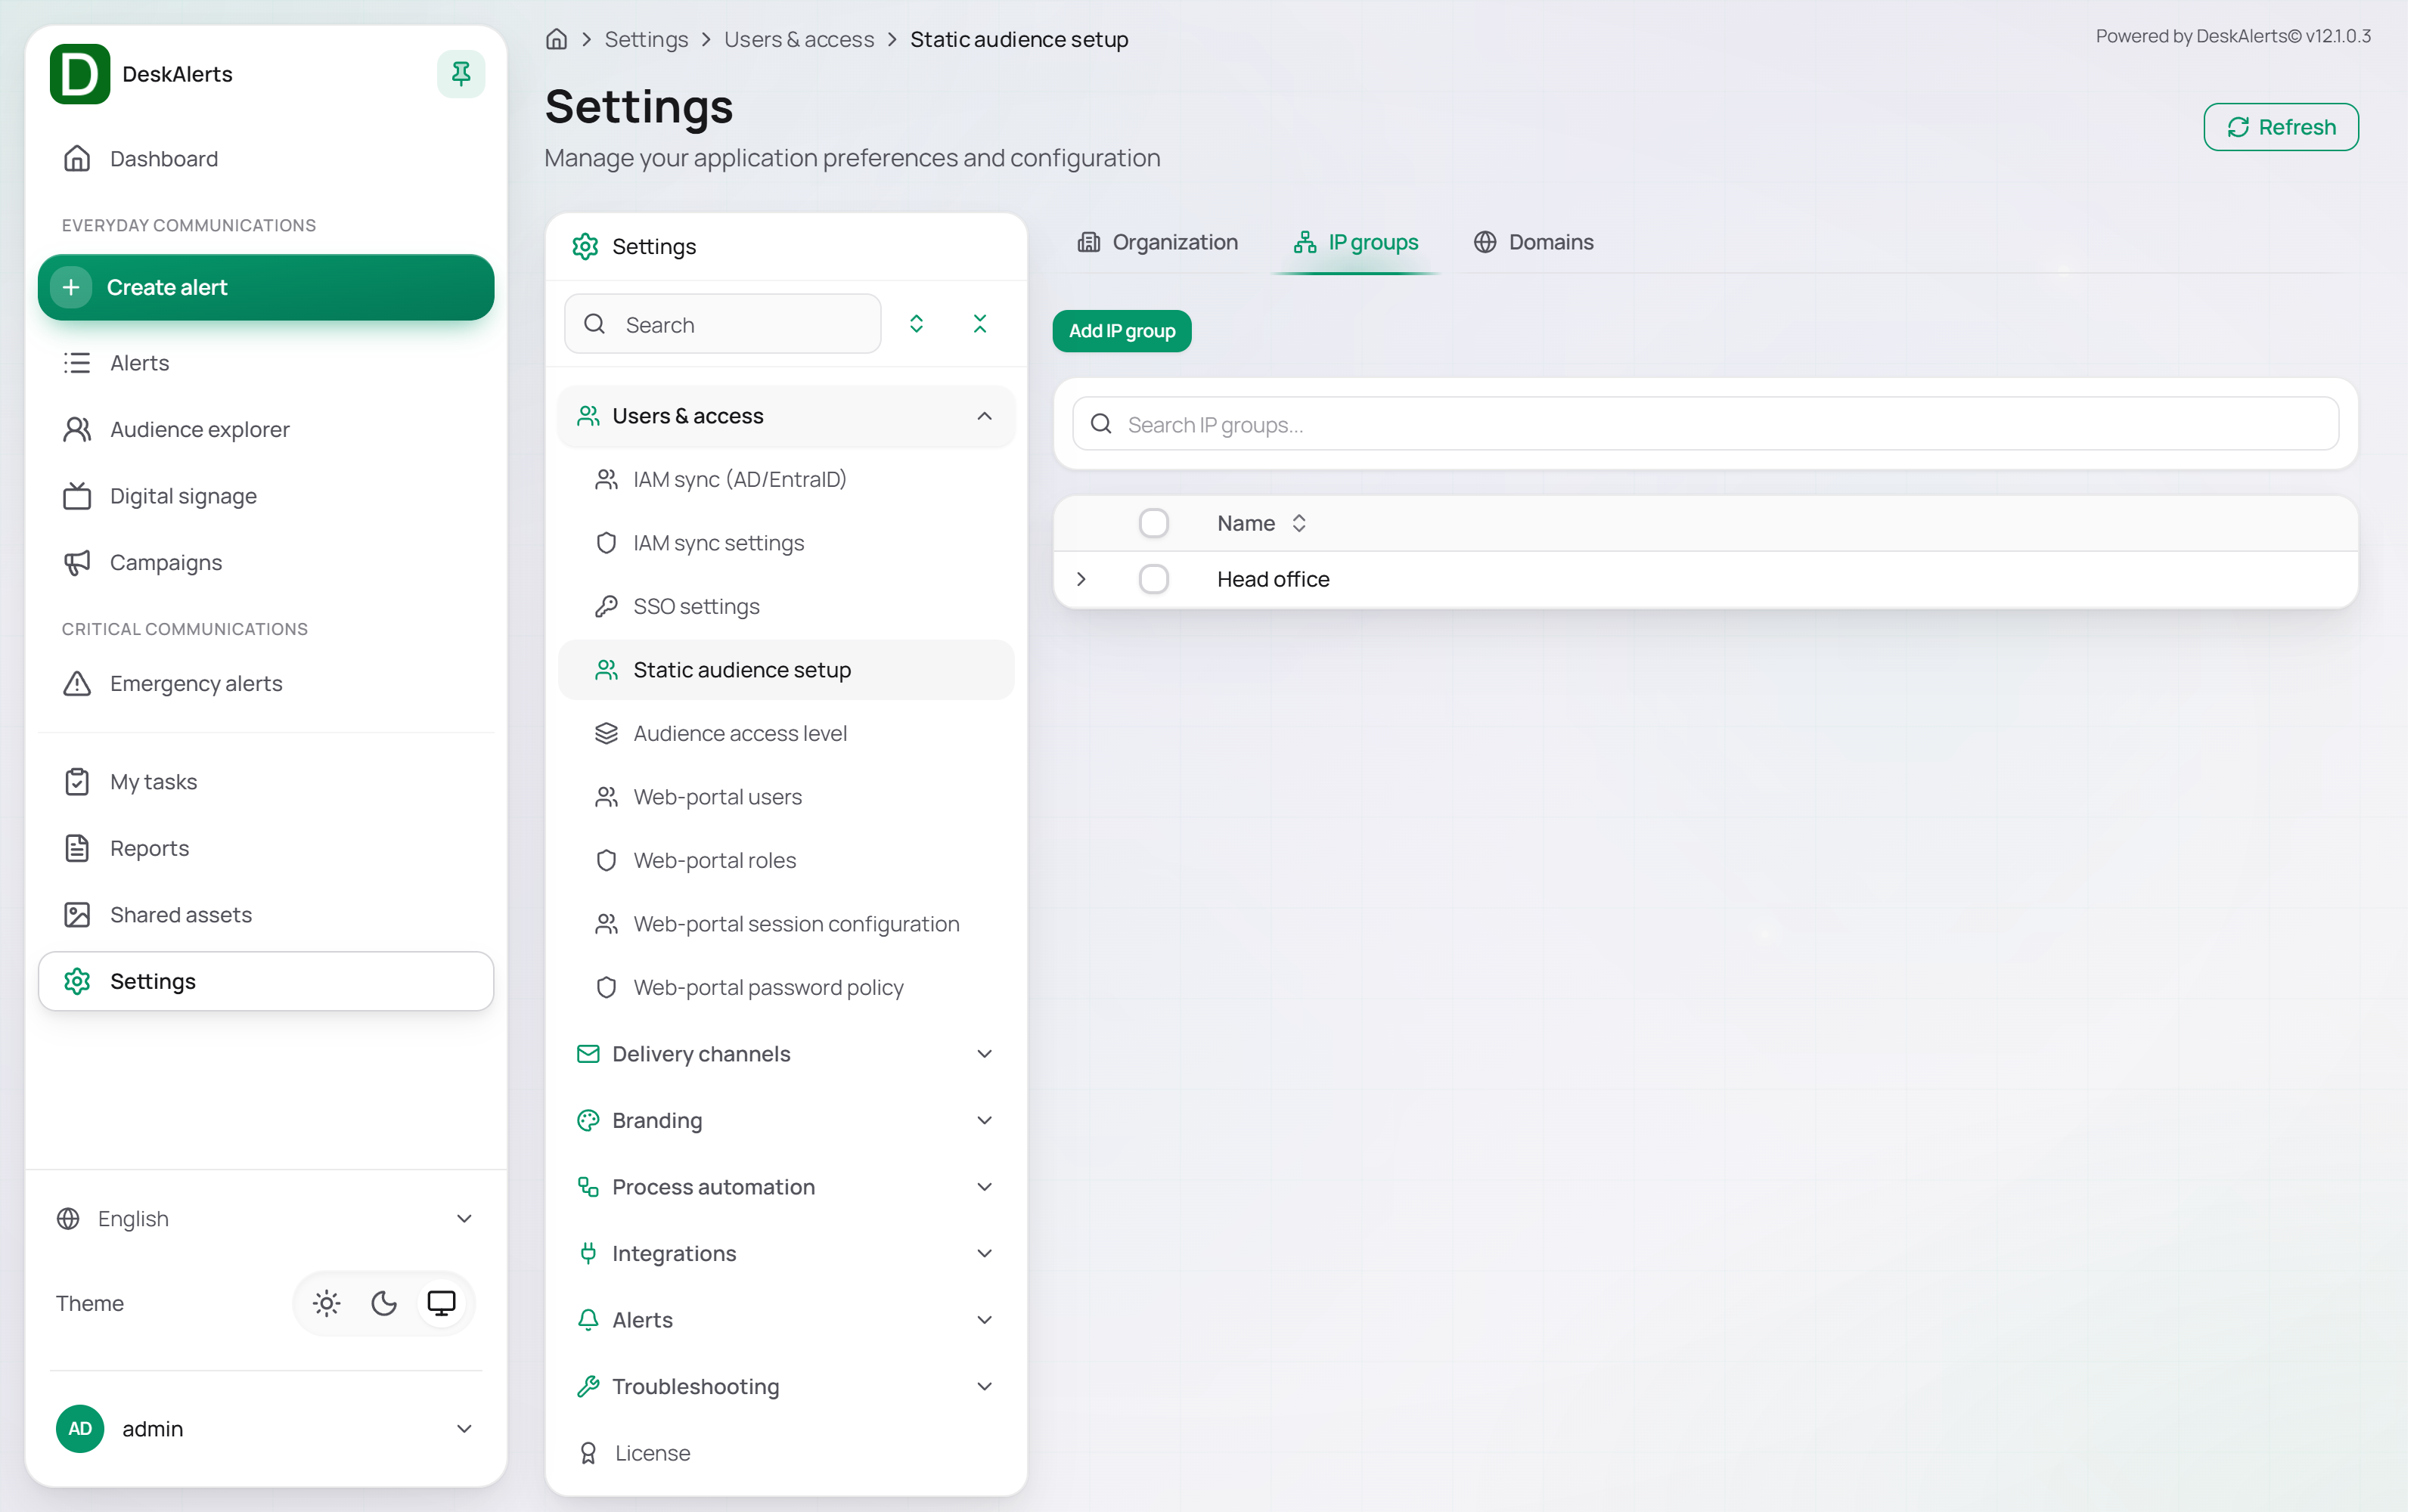
Click an IP group row to open its actions: Edit IP group and Delete IP group.
Adding an IP group
Click Add IP group.
| Field | Description |
|---|---|
| Group name | Required descriptive name, for example Head office |
| IP addresses | Individual IP addresses; type an address and click Add for each |
| IP ranges | From IP / To IP pairs; click Add range for each |
Click Save to create the group.
Domains tab
The Domains tab lists all registered domains.
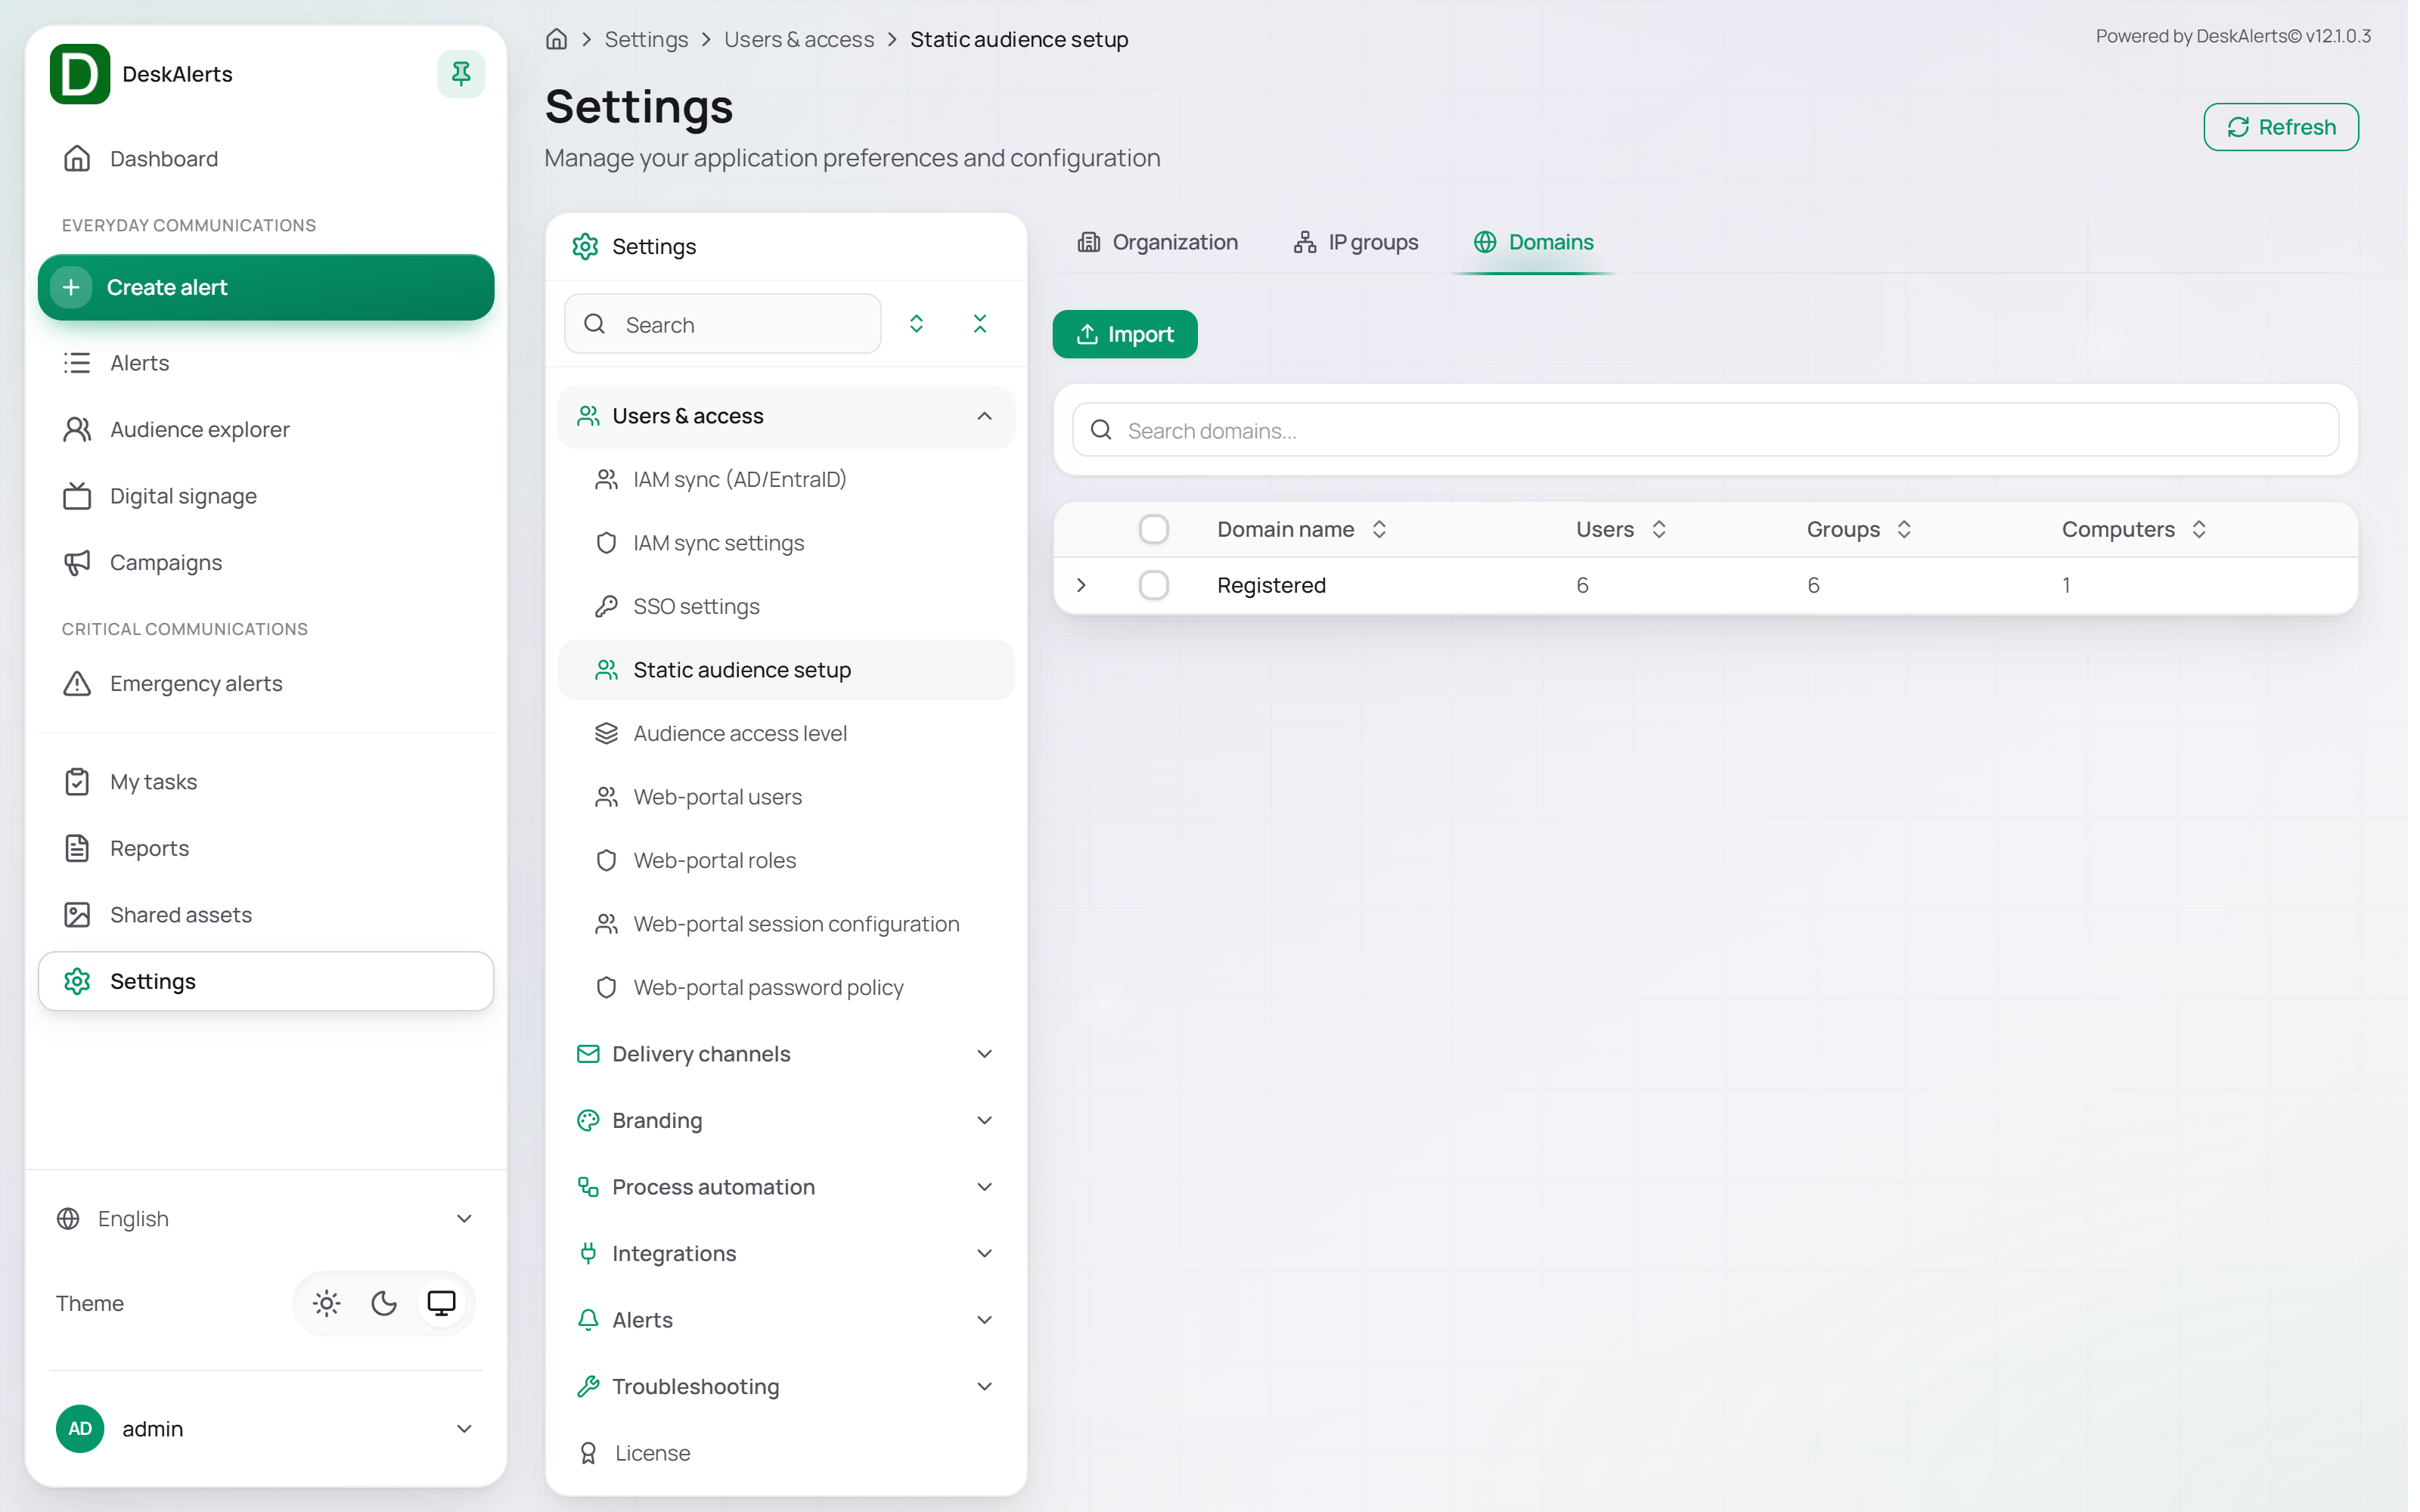
| Column | Description |
|---|---|
| Domain name | Domain name |
| Users | Number of associated users |
| Groups | Number of associated groups |
| Computers | Number of associated computers |
Select one or more domains to reveal the Delete selected bulk action.
Click Import to upload domain data from a CSV file. Enable Overwrite existing domains when imported values should replace existing entries (without it, records that already exist are skipped). The file is a comma-separated list with a header row and the columns Username, Display Name, Groups List, Domain, Email, Phone and an optional Password; several groups in one cell are separated by ;. The domain named in the file is created if it does not exist, and the users are created under it with their groups. A password column is needed only for users who will sign in with a password (Simple registration); for accounts that sign in with directory credentials leave it empty.
Username,Display Name,Groups List,Domain,Email,Phone
jdoe,John Doe,Group1;Group2,company.com,jdoe@company.com,+15555550100
asmith,Jane Smith,Group1,company.com,asmith@company.com,
Audience access level
Audience access level determines how devices authenticate and register with DeskAlerts.
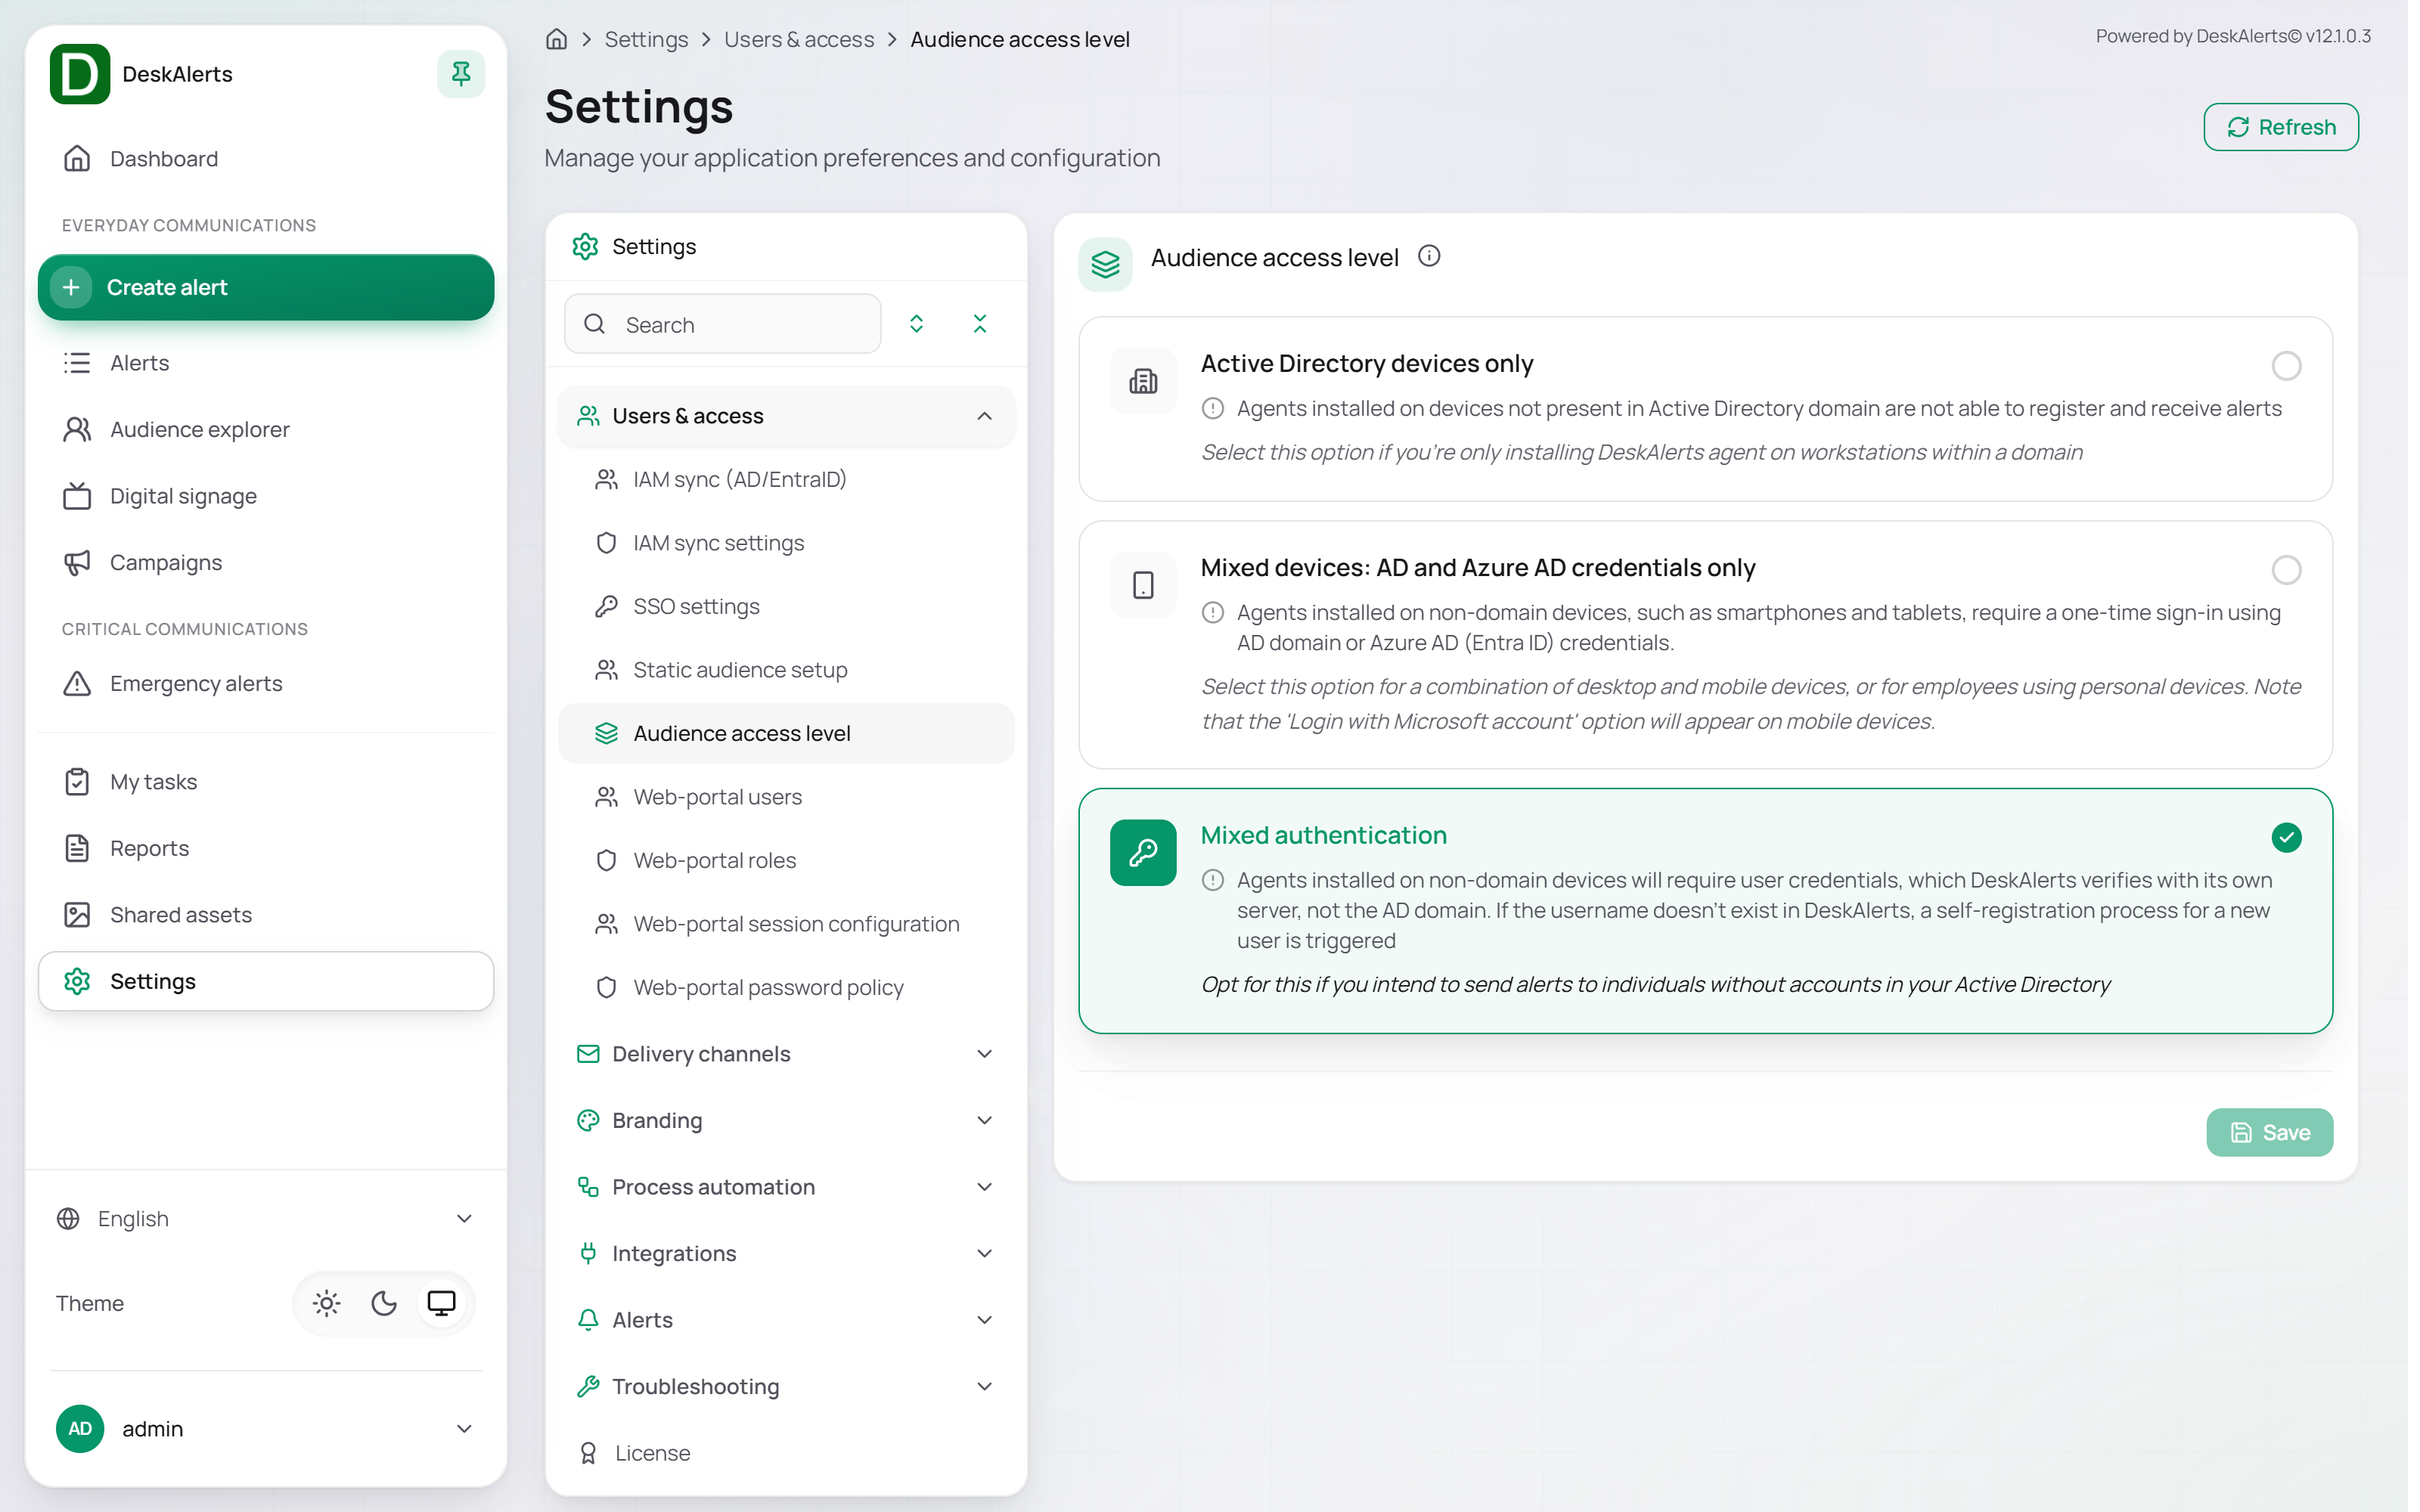
| Option | Description |
|---|---|
| Active Directory devices only | Only devices joined to the Active Directory domain can register and receive alerts. Devices not present in the directory are blocked entirely. Use this for environments where DeskAlerts is deployed exclusively to domain workstations |
| Mixed devices: AD and Azure AD credentials only | Non-domain devices (smartphones, tablets, personal laptops) can register with a one-time sign-in using AD Domain or Azure AD (Entra ID) credentials. A "Login with Microsoft account" option appears on mobile devices. Use this for environments with a combination of domain workstations and personal or mobile devices |
| Mixed authentication | Non-domain devices authenticate using credentials verified by the DeskAlerts server itself, not the AD domain. If the username doesn't exist in DeskAlerts, a self-registration process is triggered automatically. Use this when you need to reach recipients who don't have Active Directory accounts — for example, contractors, partners, or frontline workers |
Select the required access model and click Save.
Web-portal users
Web-portal users manages administrative and operational users who can access the DeskAlerts web interface.
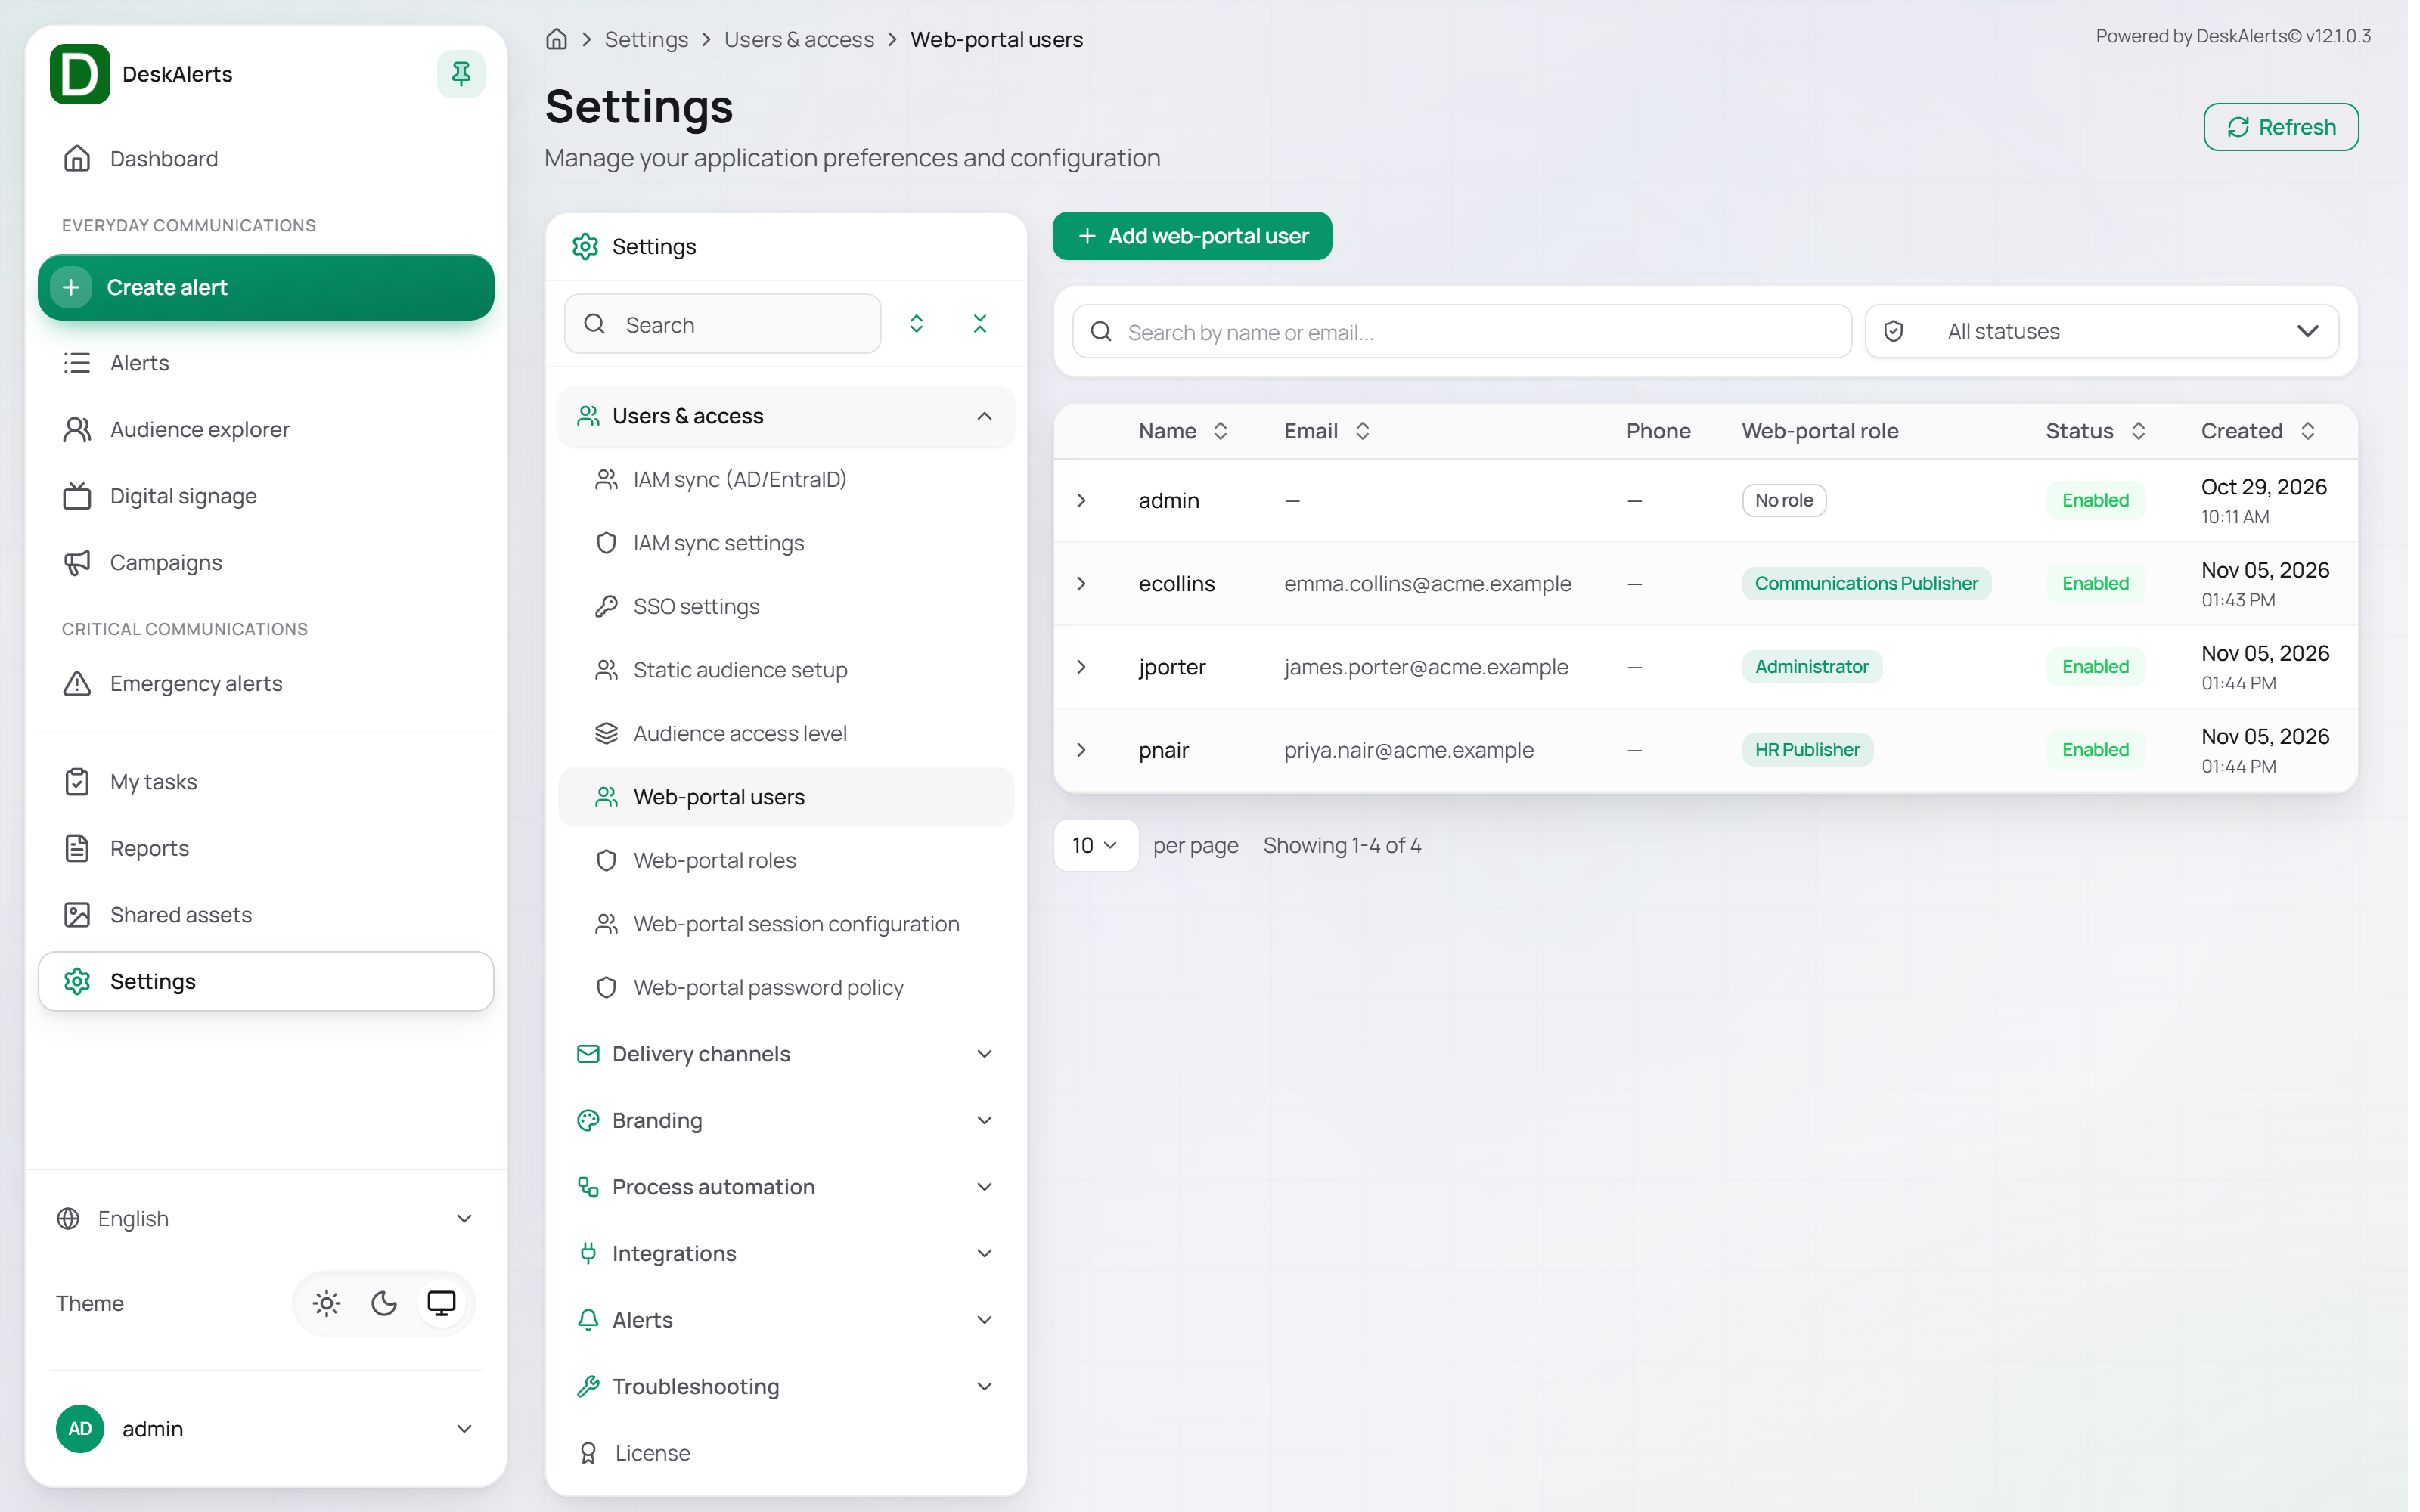
These users can be assigned web-portal roles that control what they can view, create, edit, delete, send, or manage.
| Column | Description |
|---|---|
| Name | Web-portal username |
| User email address | |
| Phone | User phone number |
| Web-portal role | Assigned web-portal roles, or No Role |
| Status | Account status: Enabled or Disabled. Accounts created automatically through SSO or a directory group mapping carry an additional Auto-provisioned badge |
| Created | Date and time the account was created |
Use search to find users by name or email. Use the All statuses filter to show enabled or disabled accounts.
Click a row to open its actions: Edit web-portal user, Change password, Disable (or Enable), and Delete web-portal user.
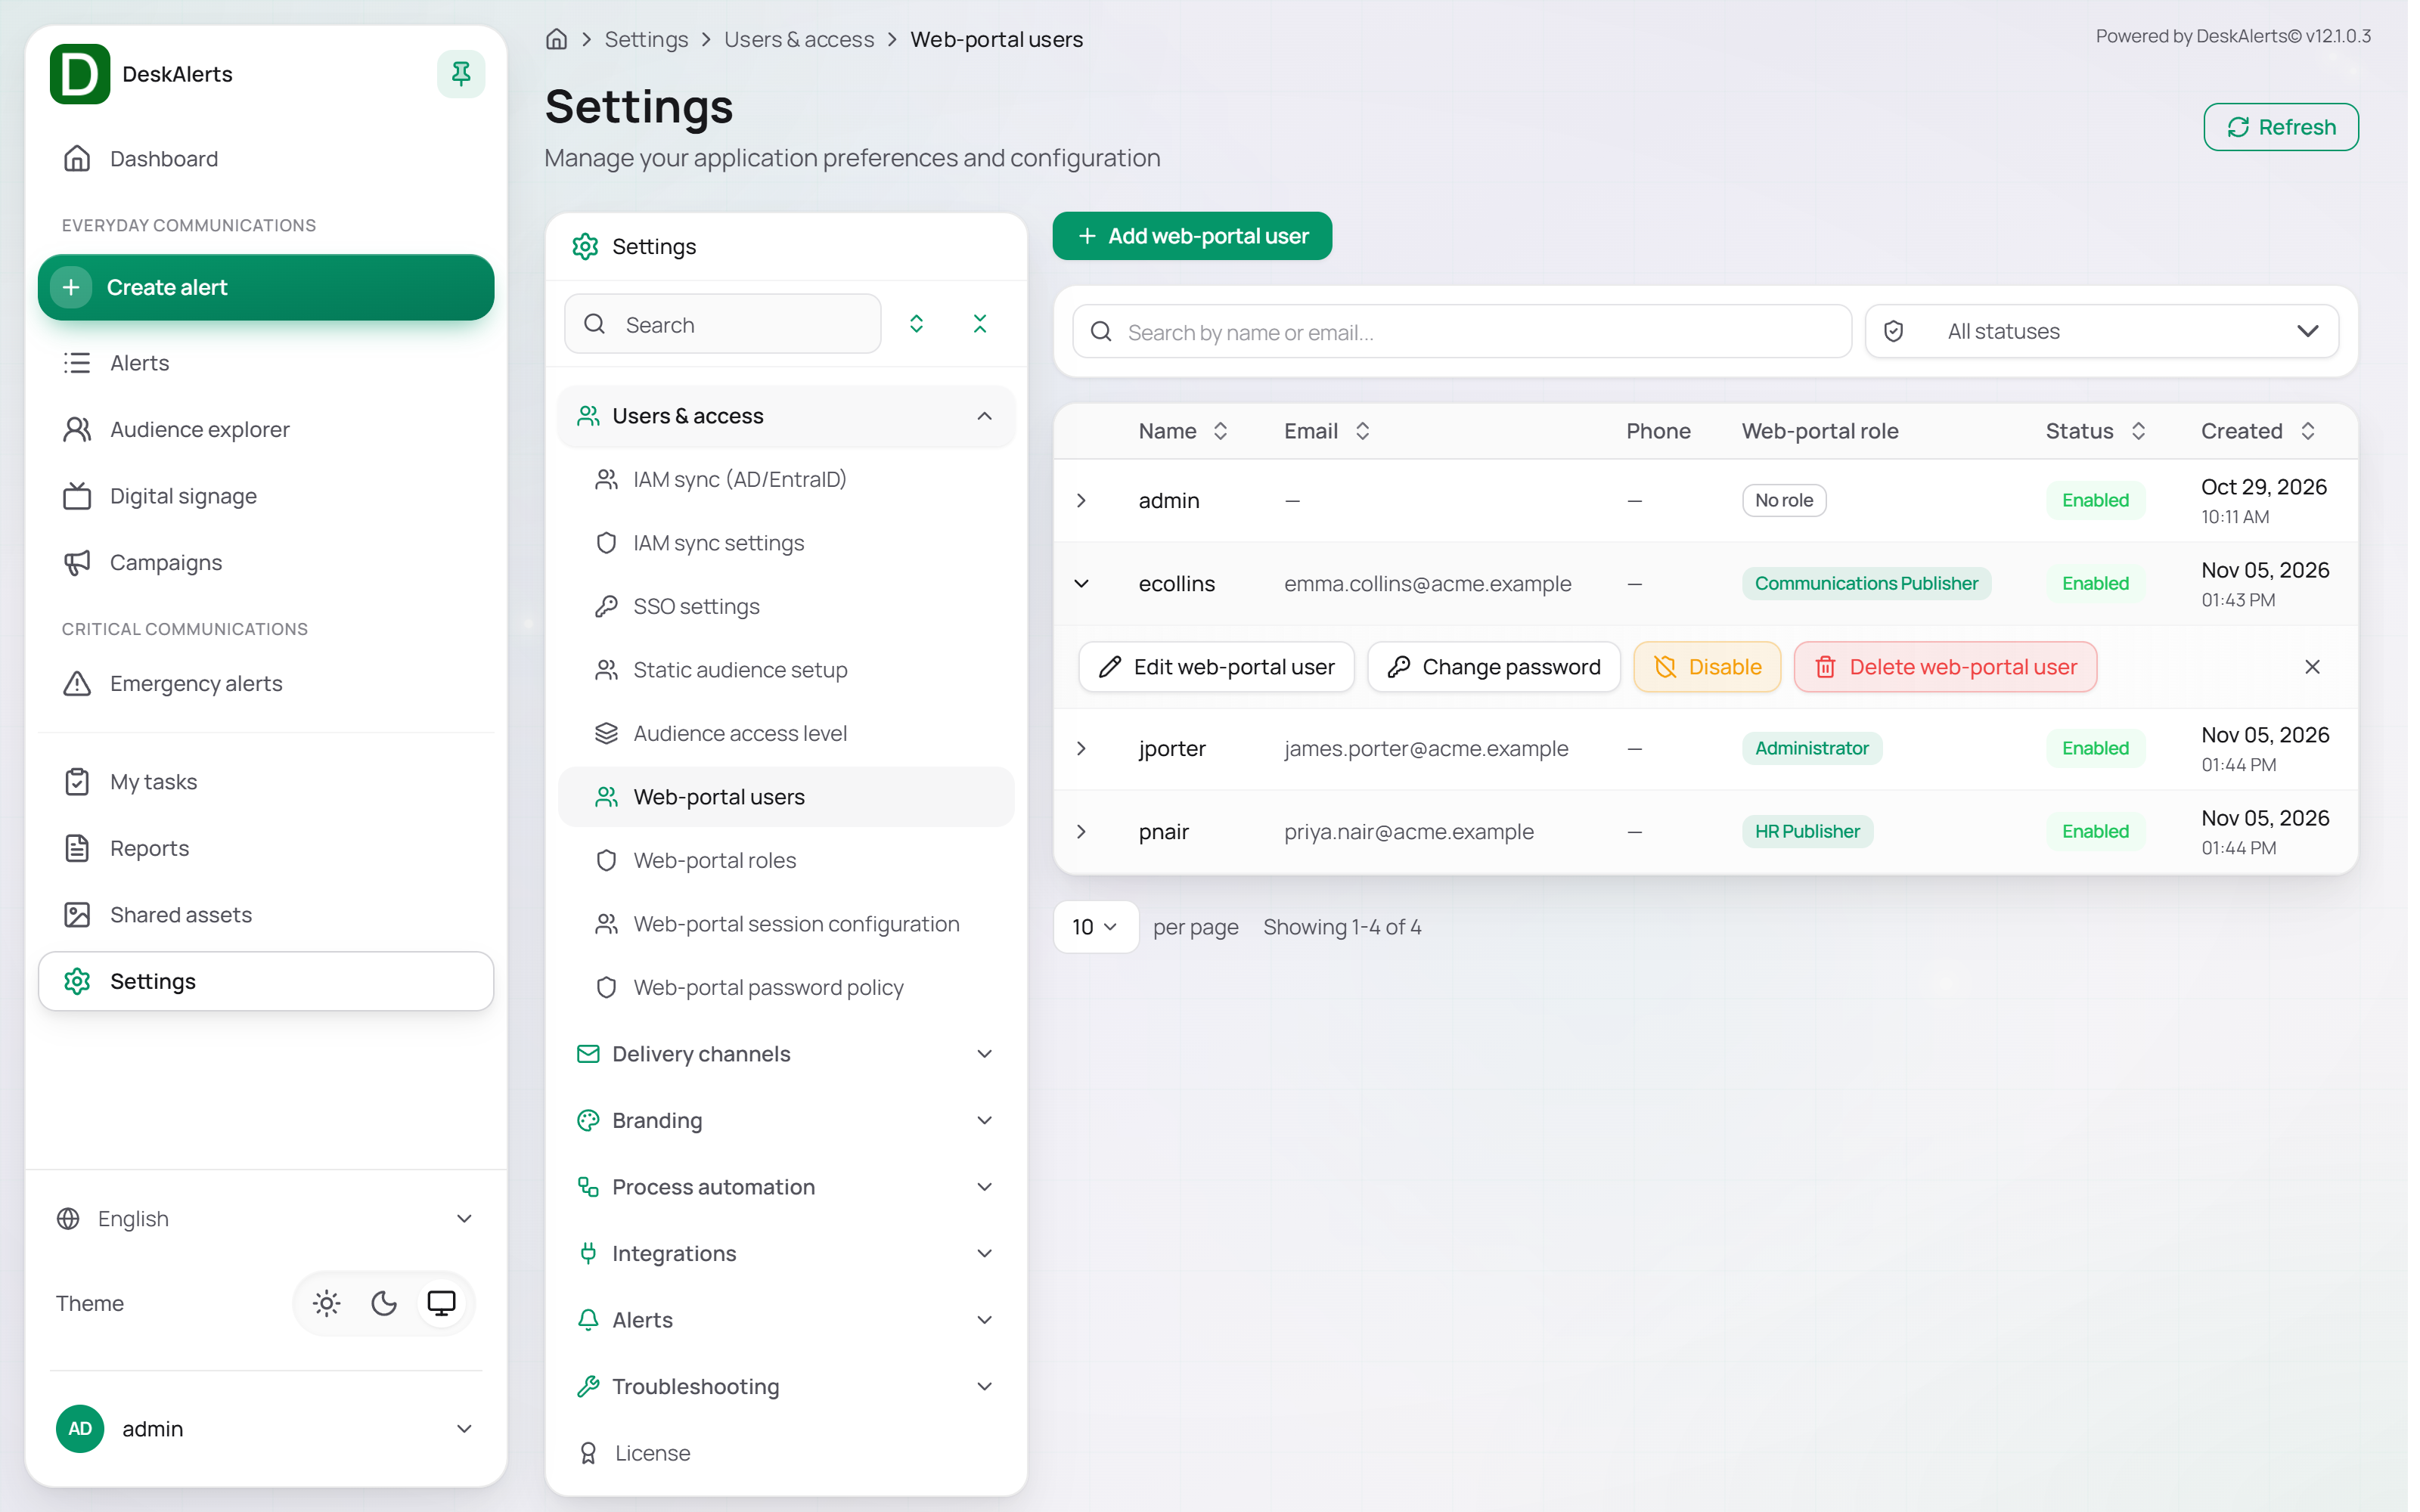
Adding a web-portal user
Click Add web-portal user.
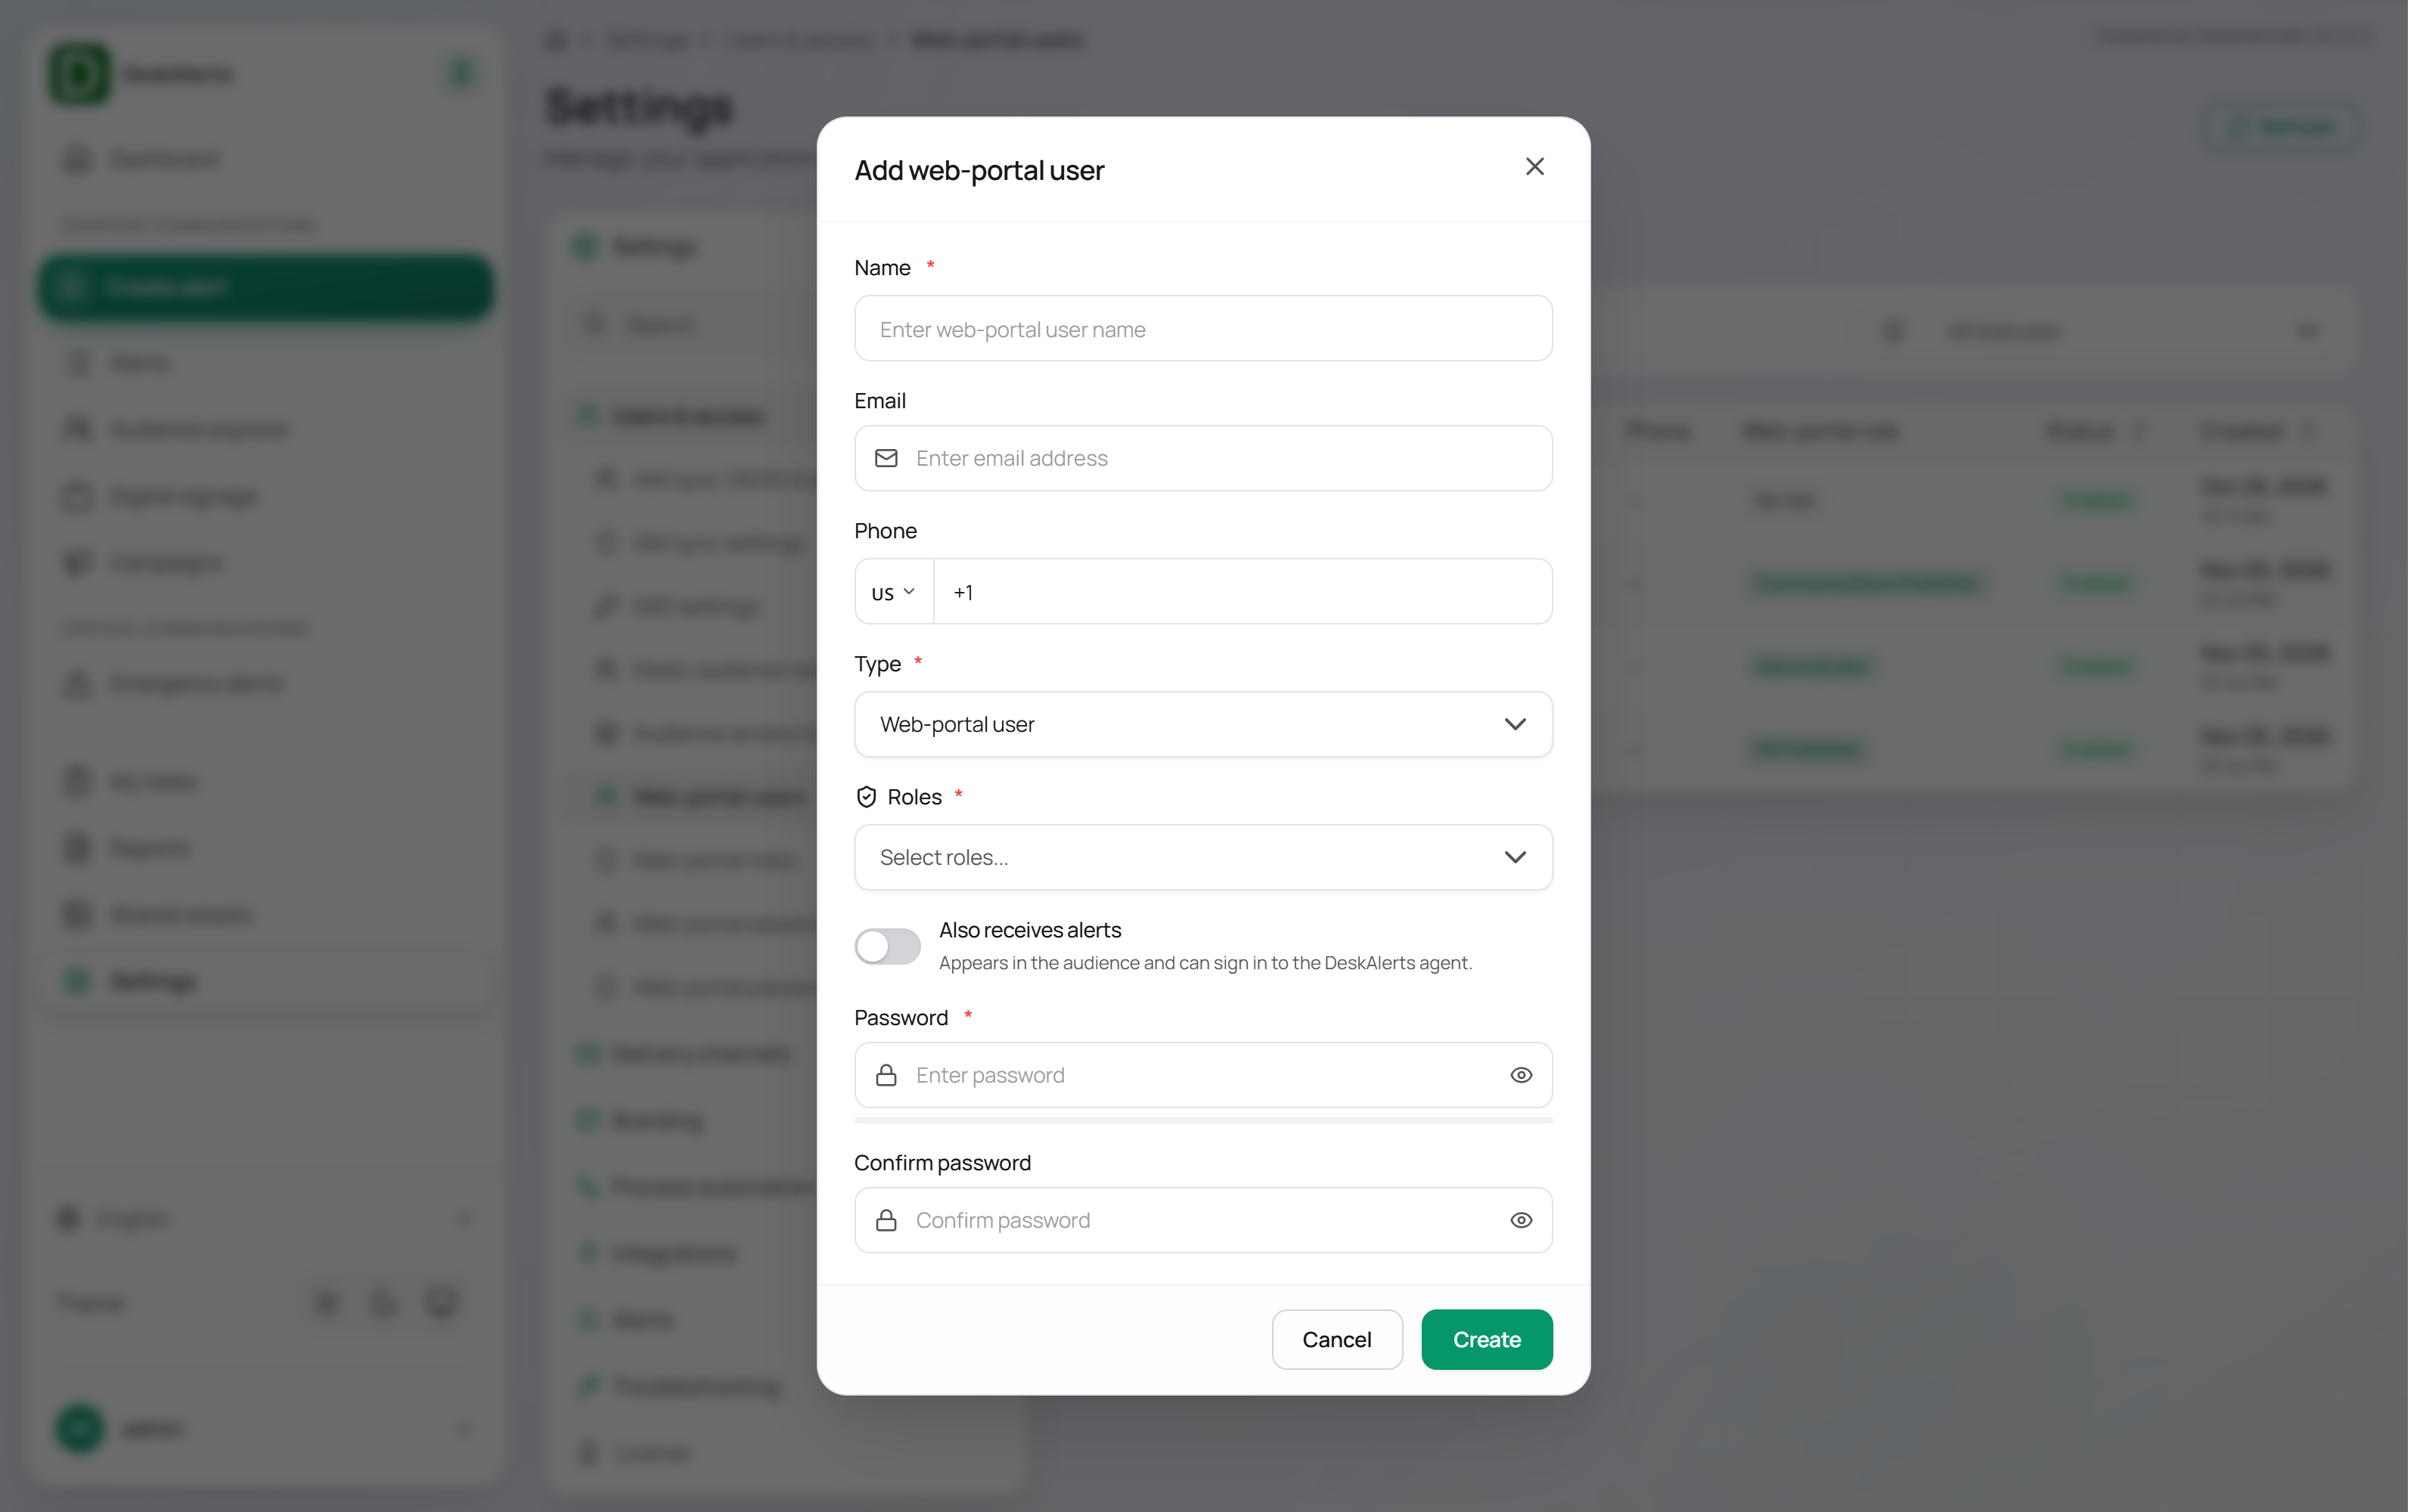
| Field | Description |
|---|---|
| Name | Required. The login name the user types on the sign-in page, for example ecollins |
| Optional email address | |
| Phone | Optional phone number |
| Type | Required user type: Administrator — full access to the web portal without a role — or Web-portal user — access defined by the assigned roles |
| Roles | One or more roles, picked from the list with a search box; shown when Type is Web-portal user |
| Also receives alerts | When on, the account also appears in the audience and can sign in to the DeskAlerts agent as a recipient |
| Password | Required login password |
| Confirm password | Password confirmation |
Click Create to create the user.
Note: Approval tasks are routed to web-portal roles. A user of the Administrator type has no role and therefore does not receive approval tasks in My Tasks, even though the account has full administrative rights. To let an administrator approve alerts, create the account as a Web-portal User with an appropriate role. A role change takes effect after the user signs in again.
Web-portal roles
Web-portal roles define permission sets for web-portal users.
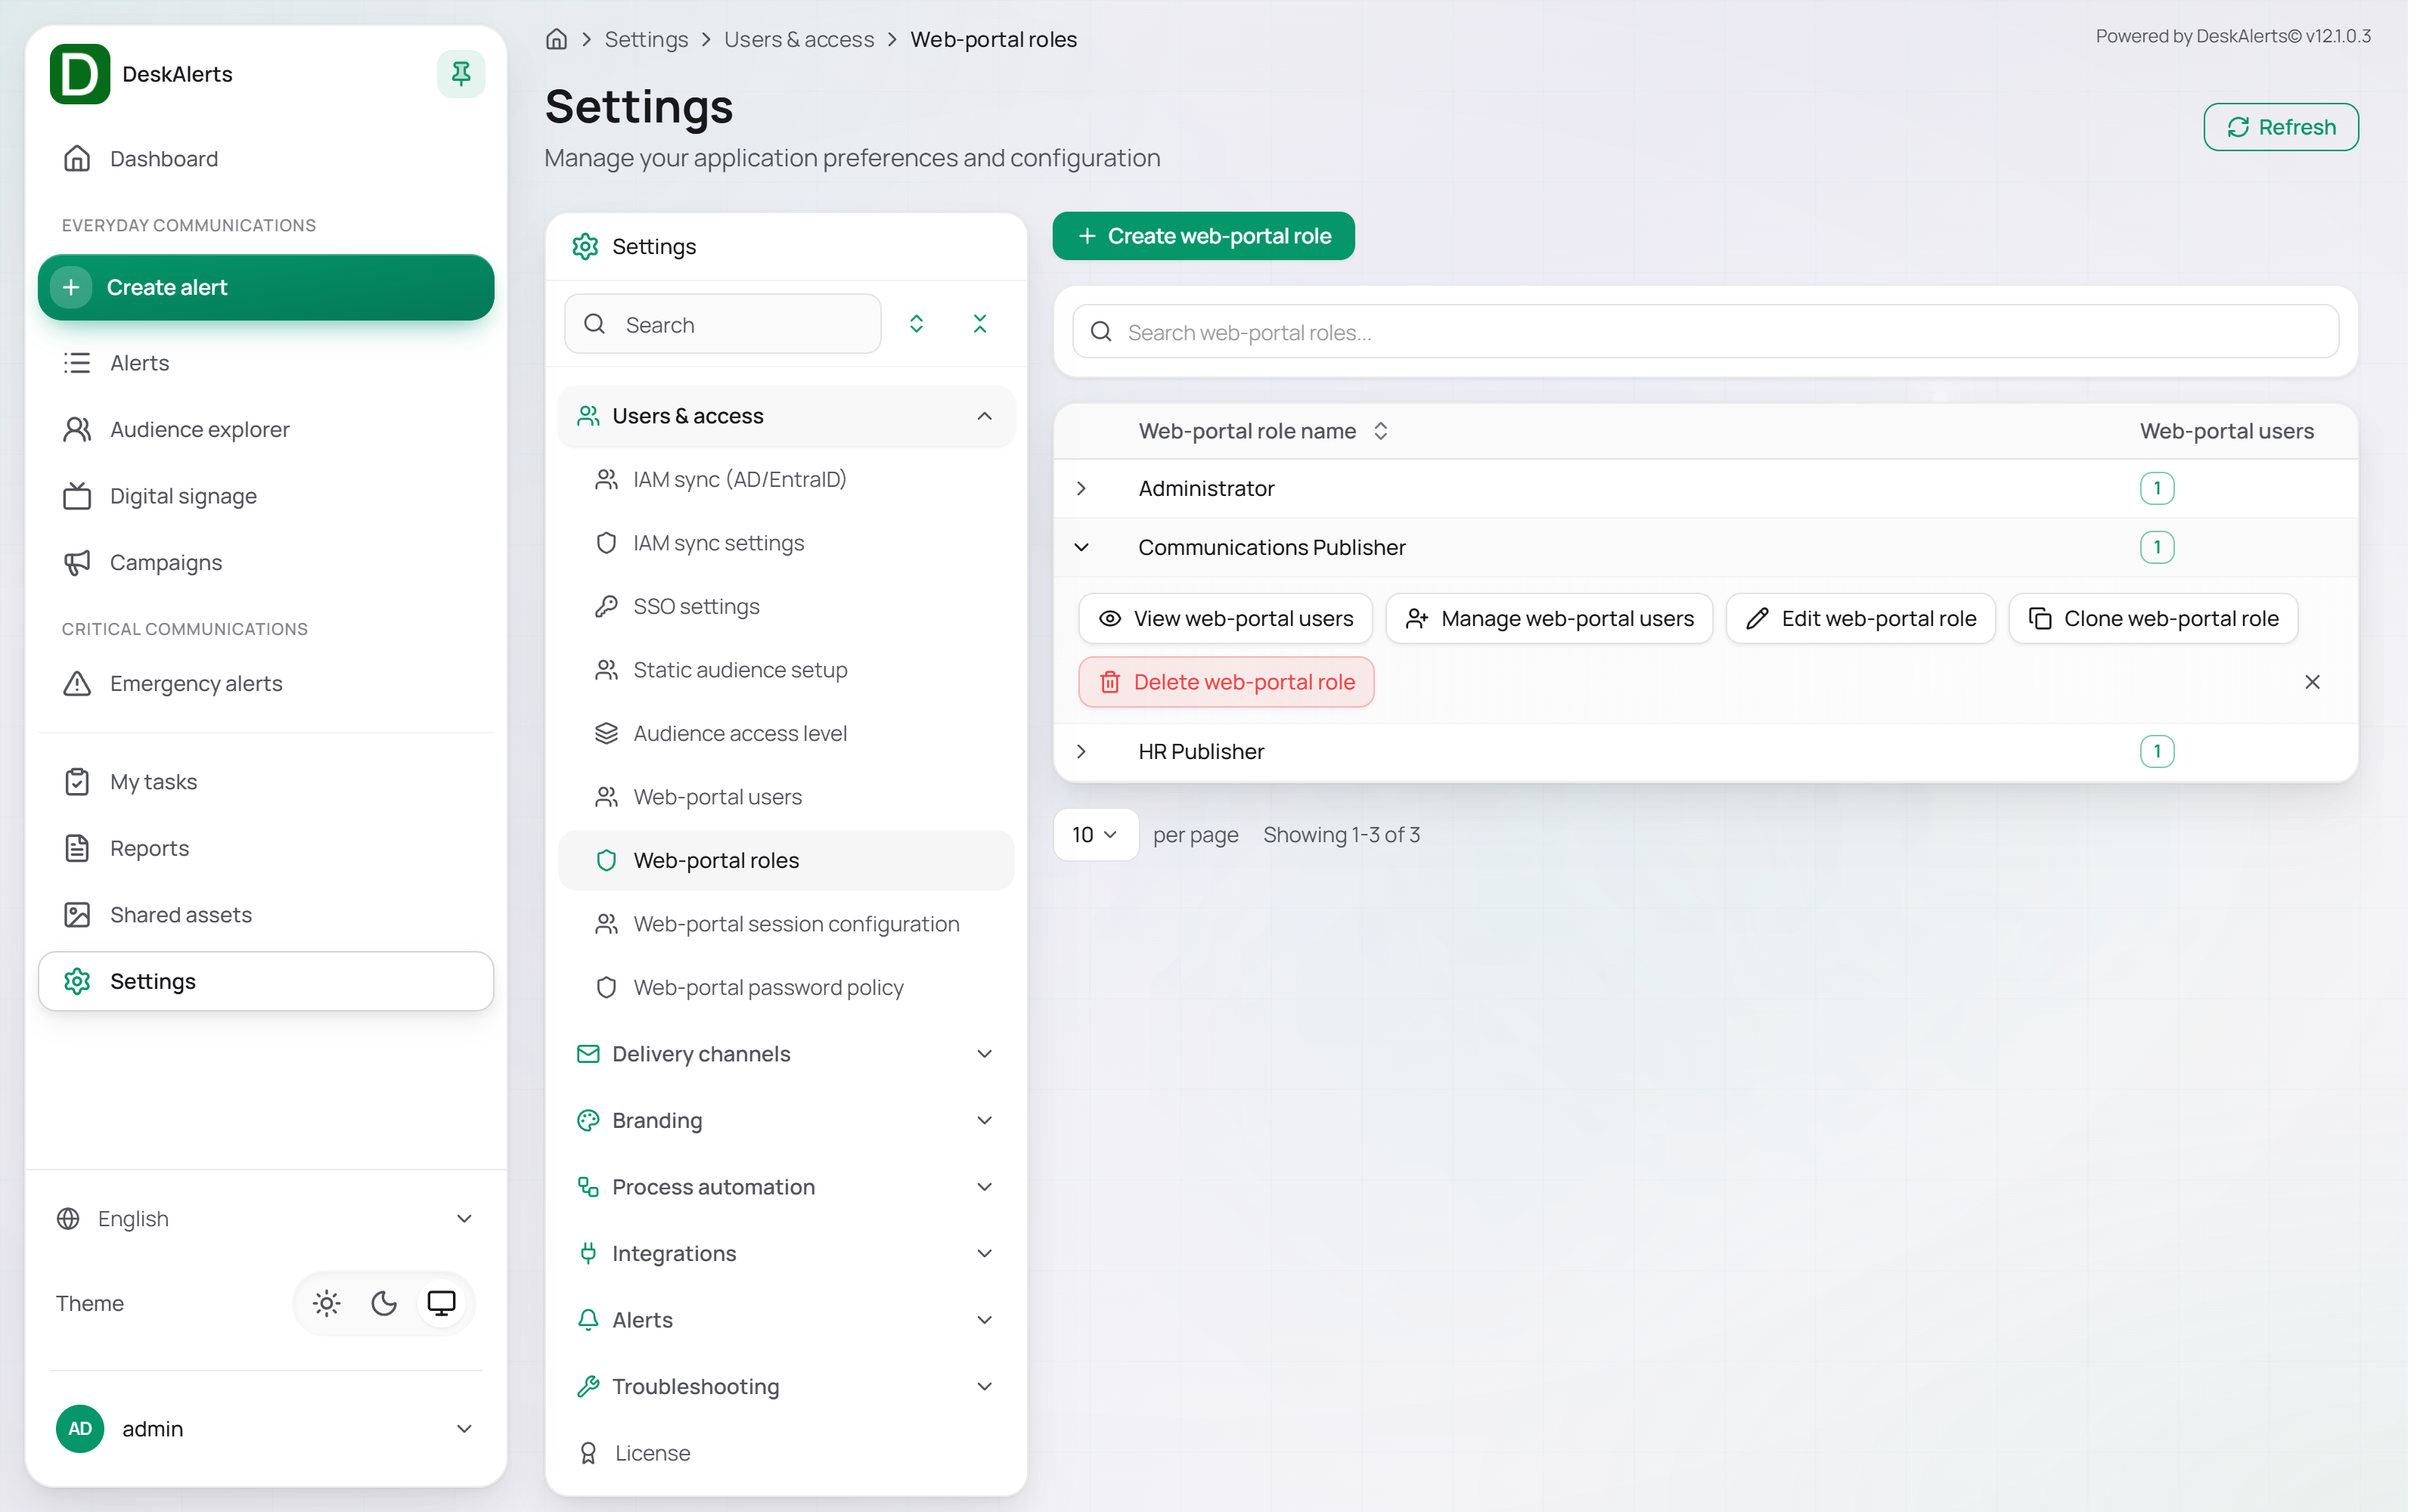
The roles list displays the Web-portal role name and the number of Web-portal users assigned to each role. The built-in Administrator role is always present. Click Create web-portal role to add a role.
Click a role row to open its actions: View web-portal users, Manage web-portal users, Edit web-portal role, Clone web-portal role, and Delete web-portal role.
Viewing and managing role users
Use View web-portal users to open a read-only list of users assigned to the role.
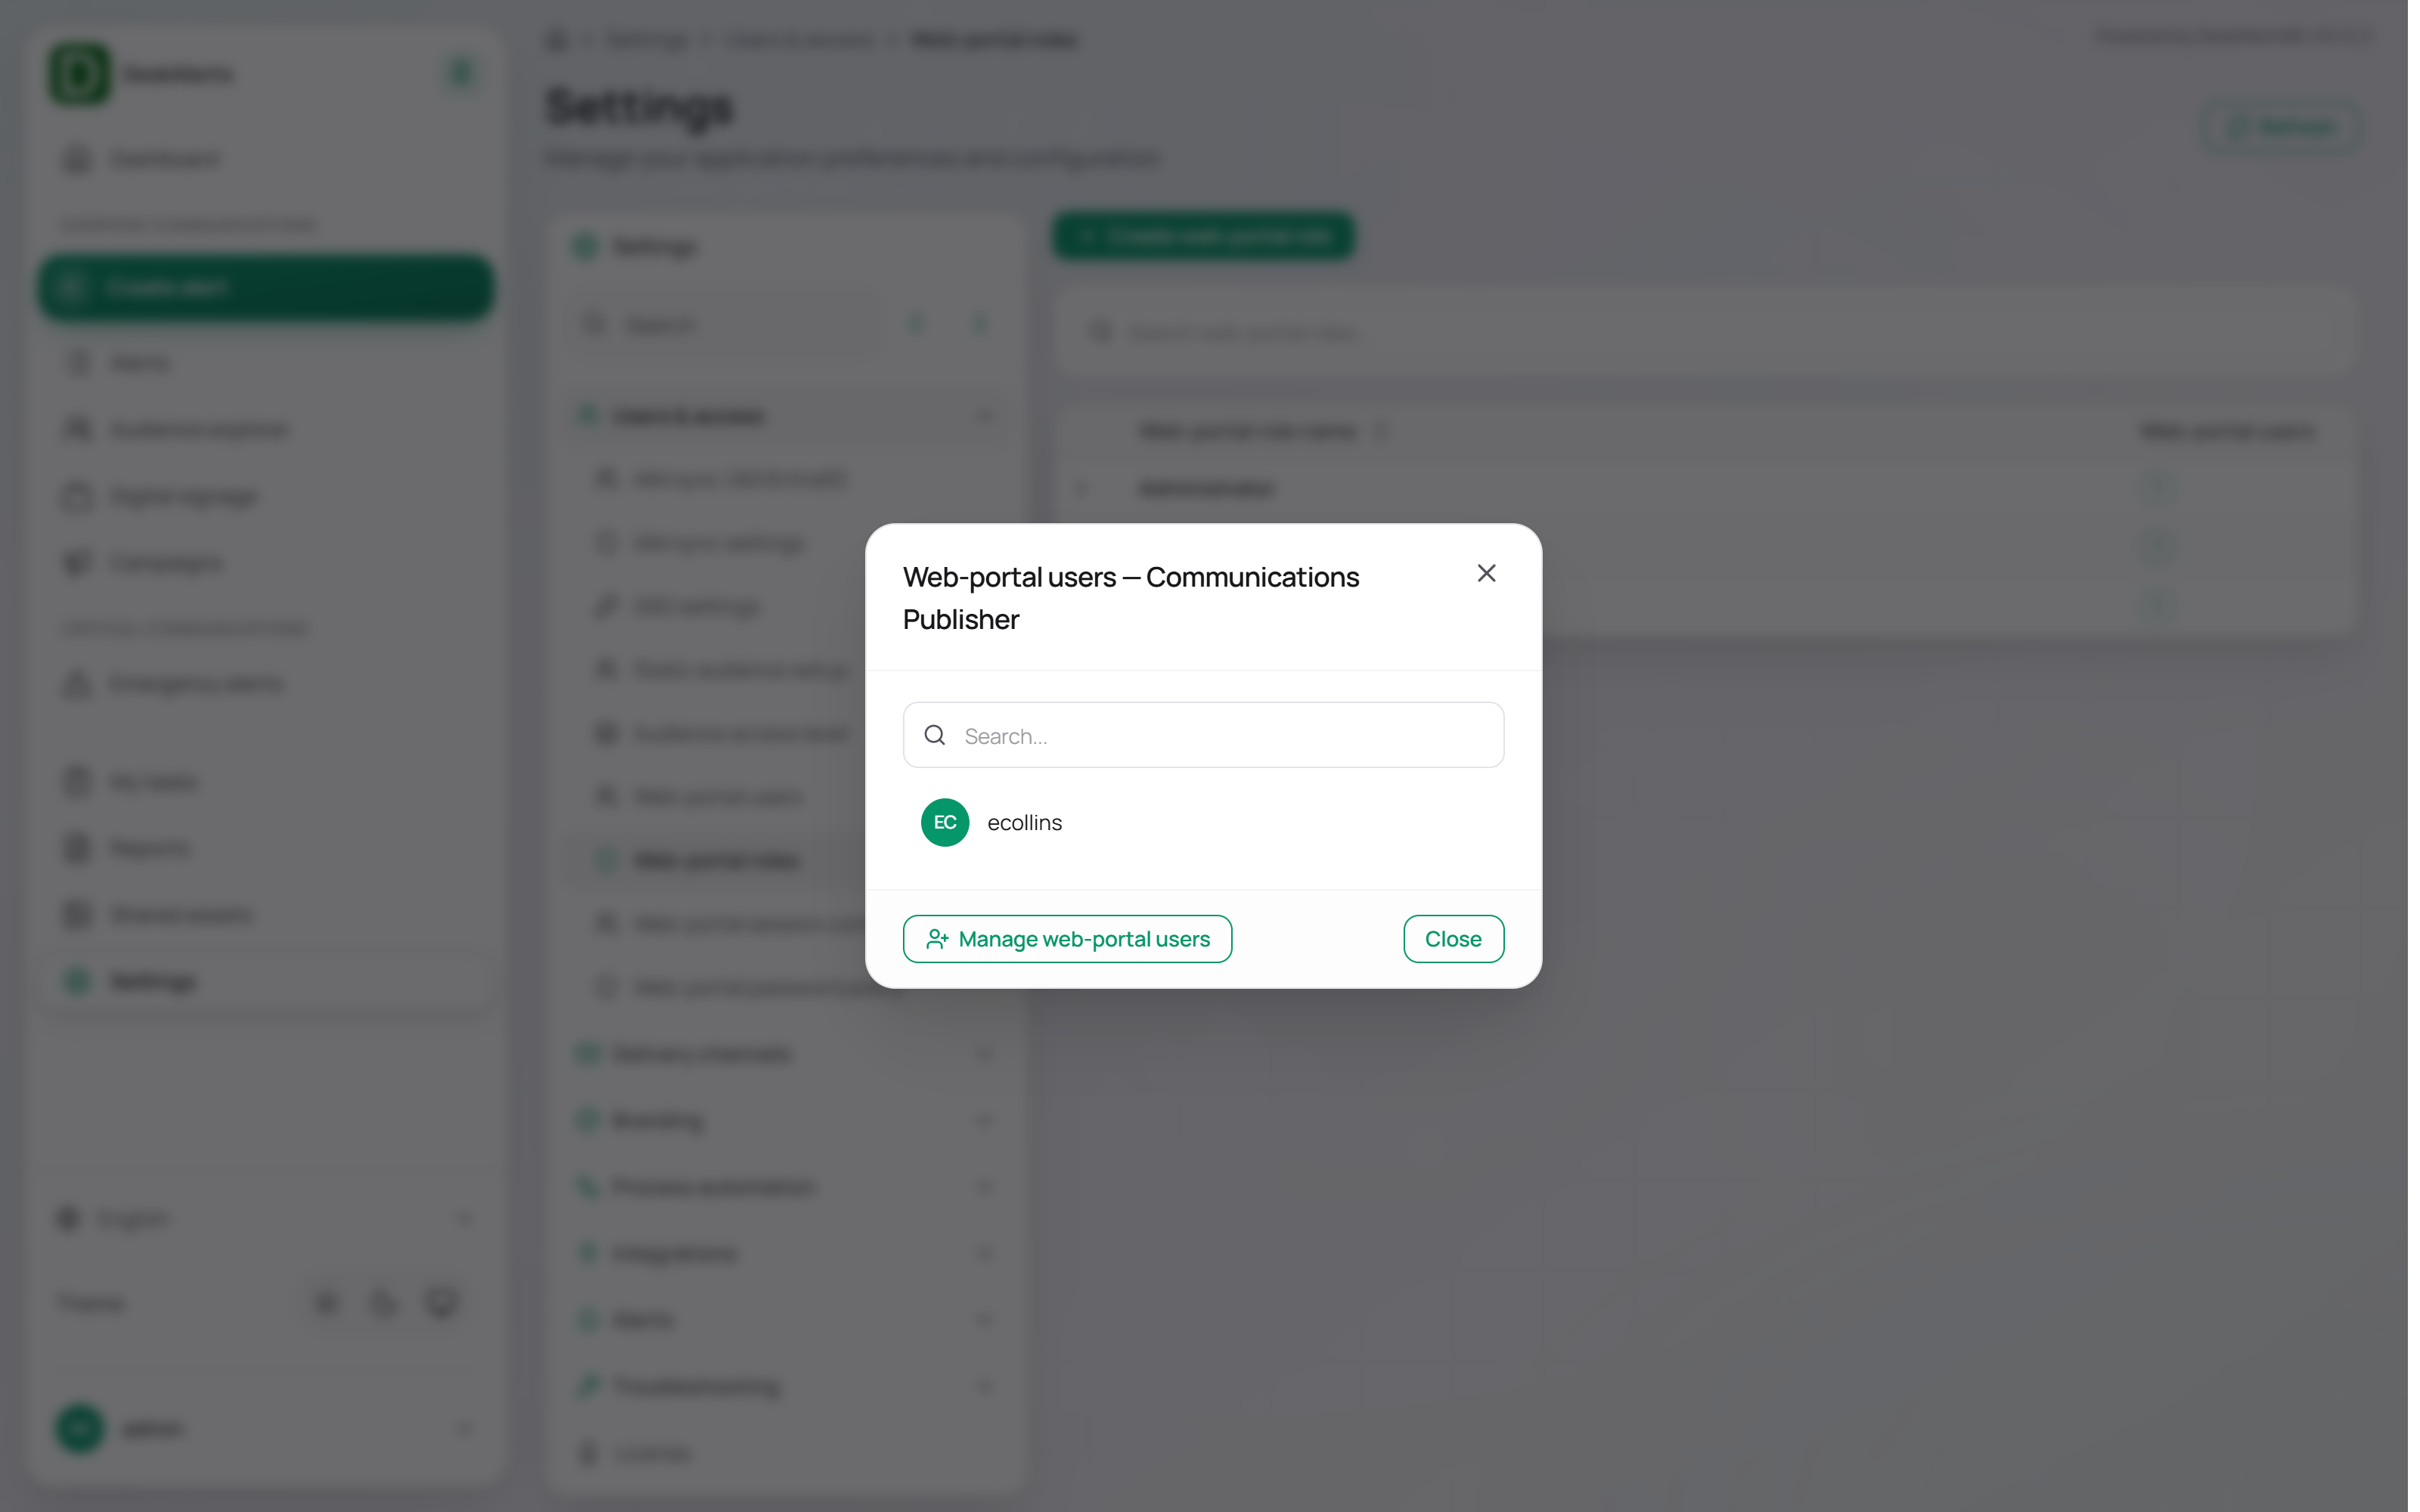
Use Manage web-portal users to add or remove users from the role.
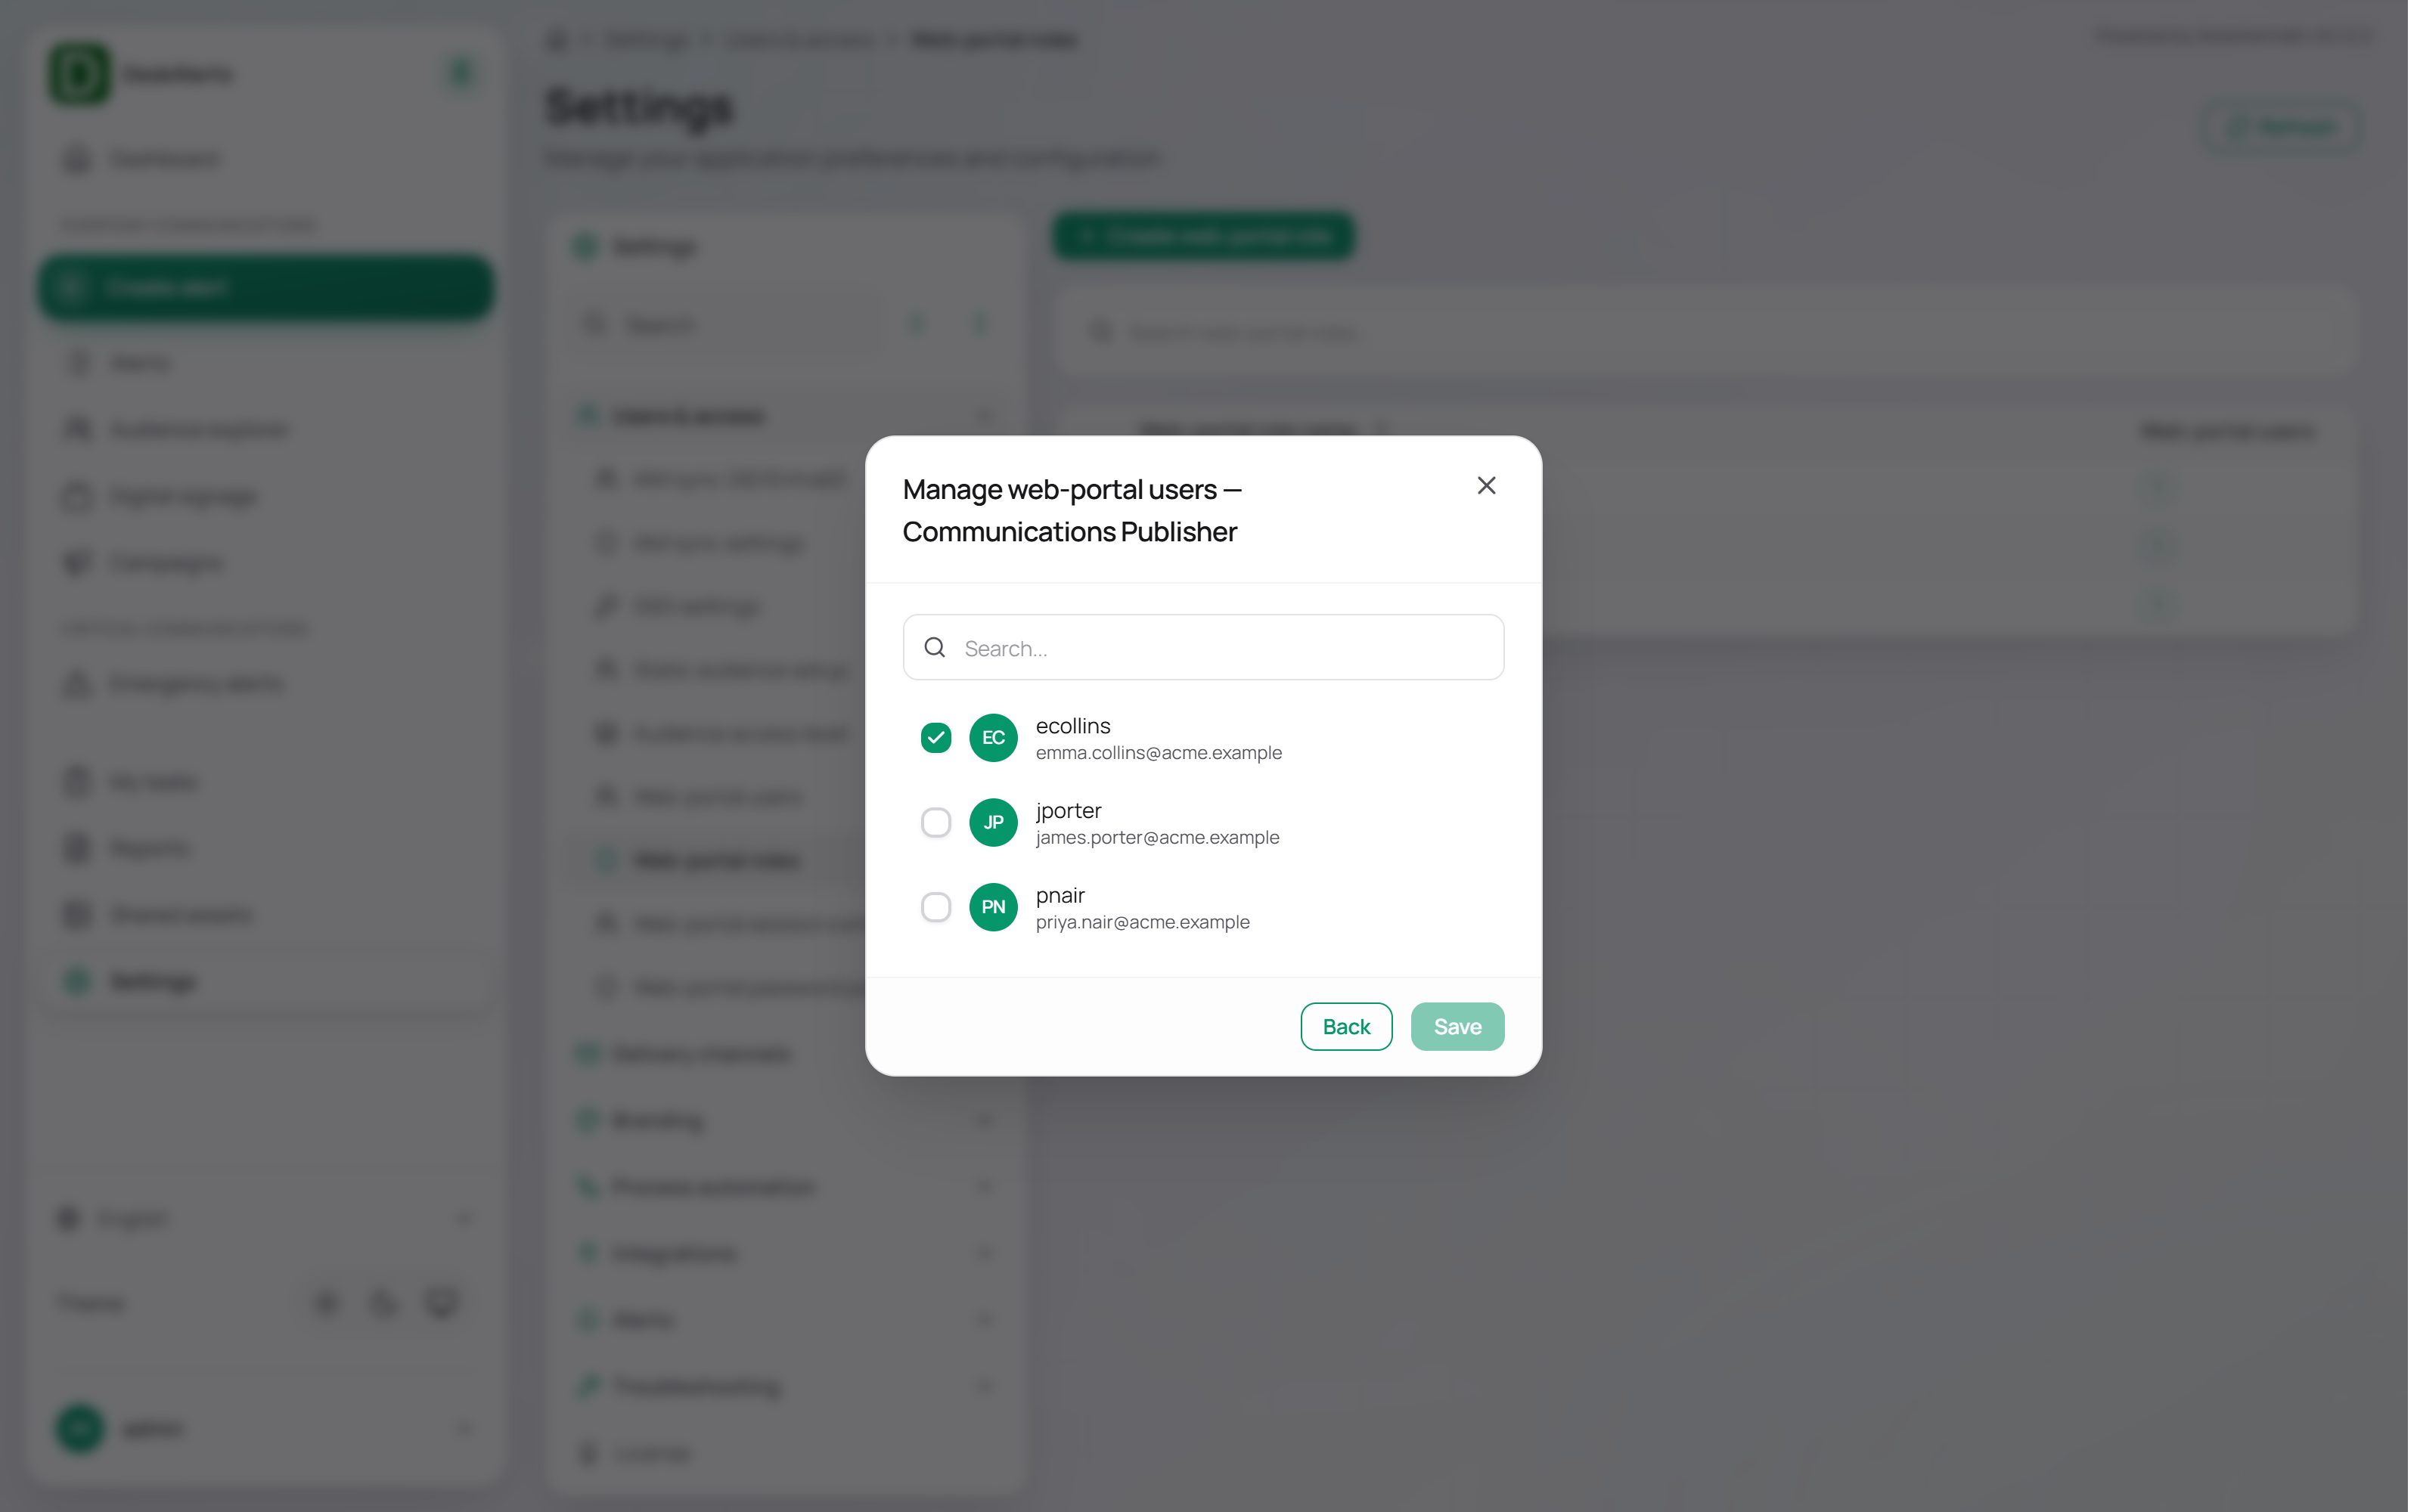
Select users with checkboxes and click Save.
Creating a web-portal role
Click Create web-portal role. The editor opens as a page with the sections General, Directory group mapping, Access permissions, Recipients access, Alert content and report access scope, Skin access, and Assigned web-portal users. Click Create web-portal role at the top of the page to save.
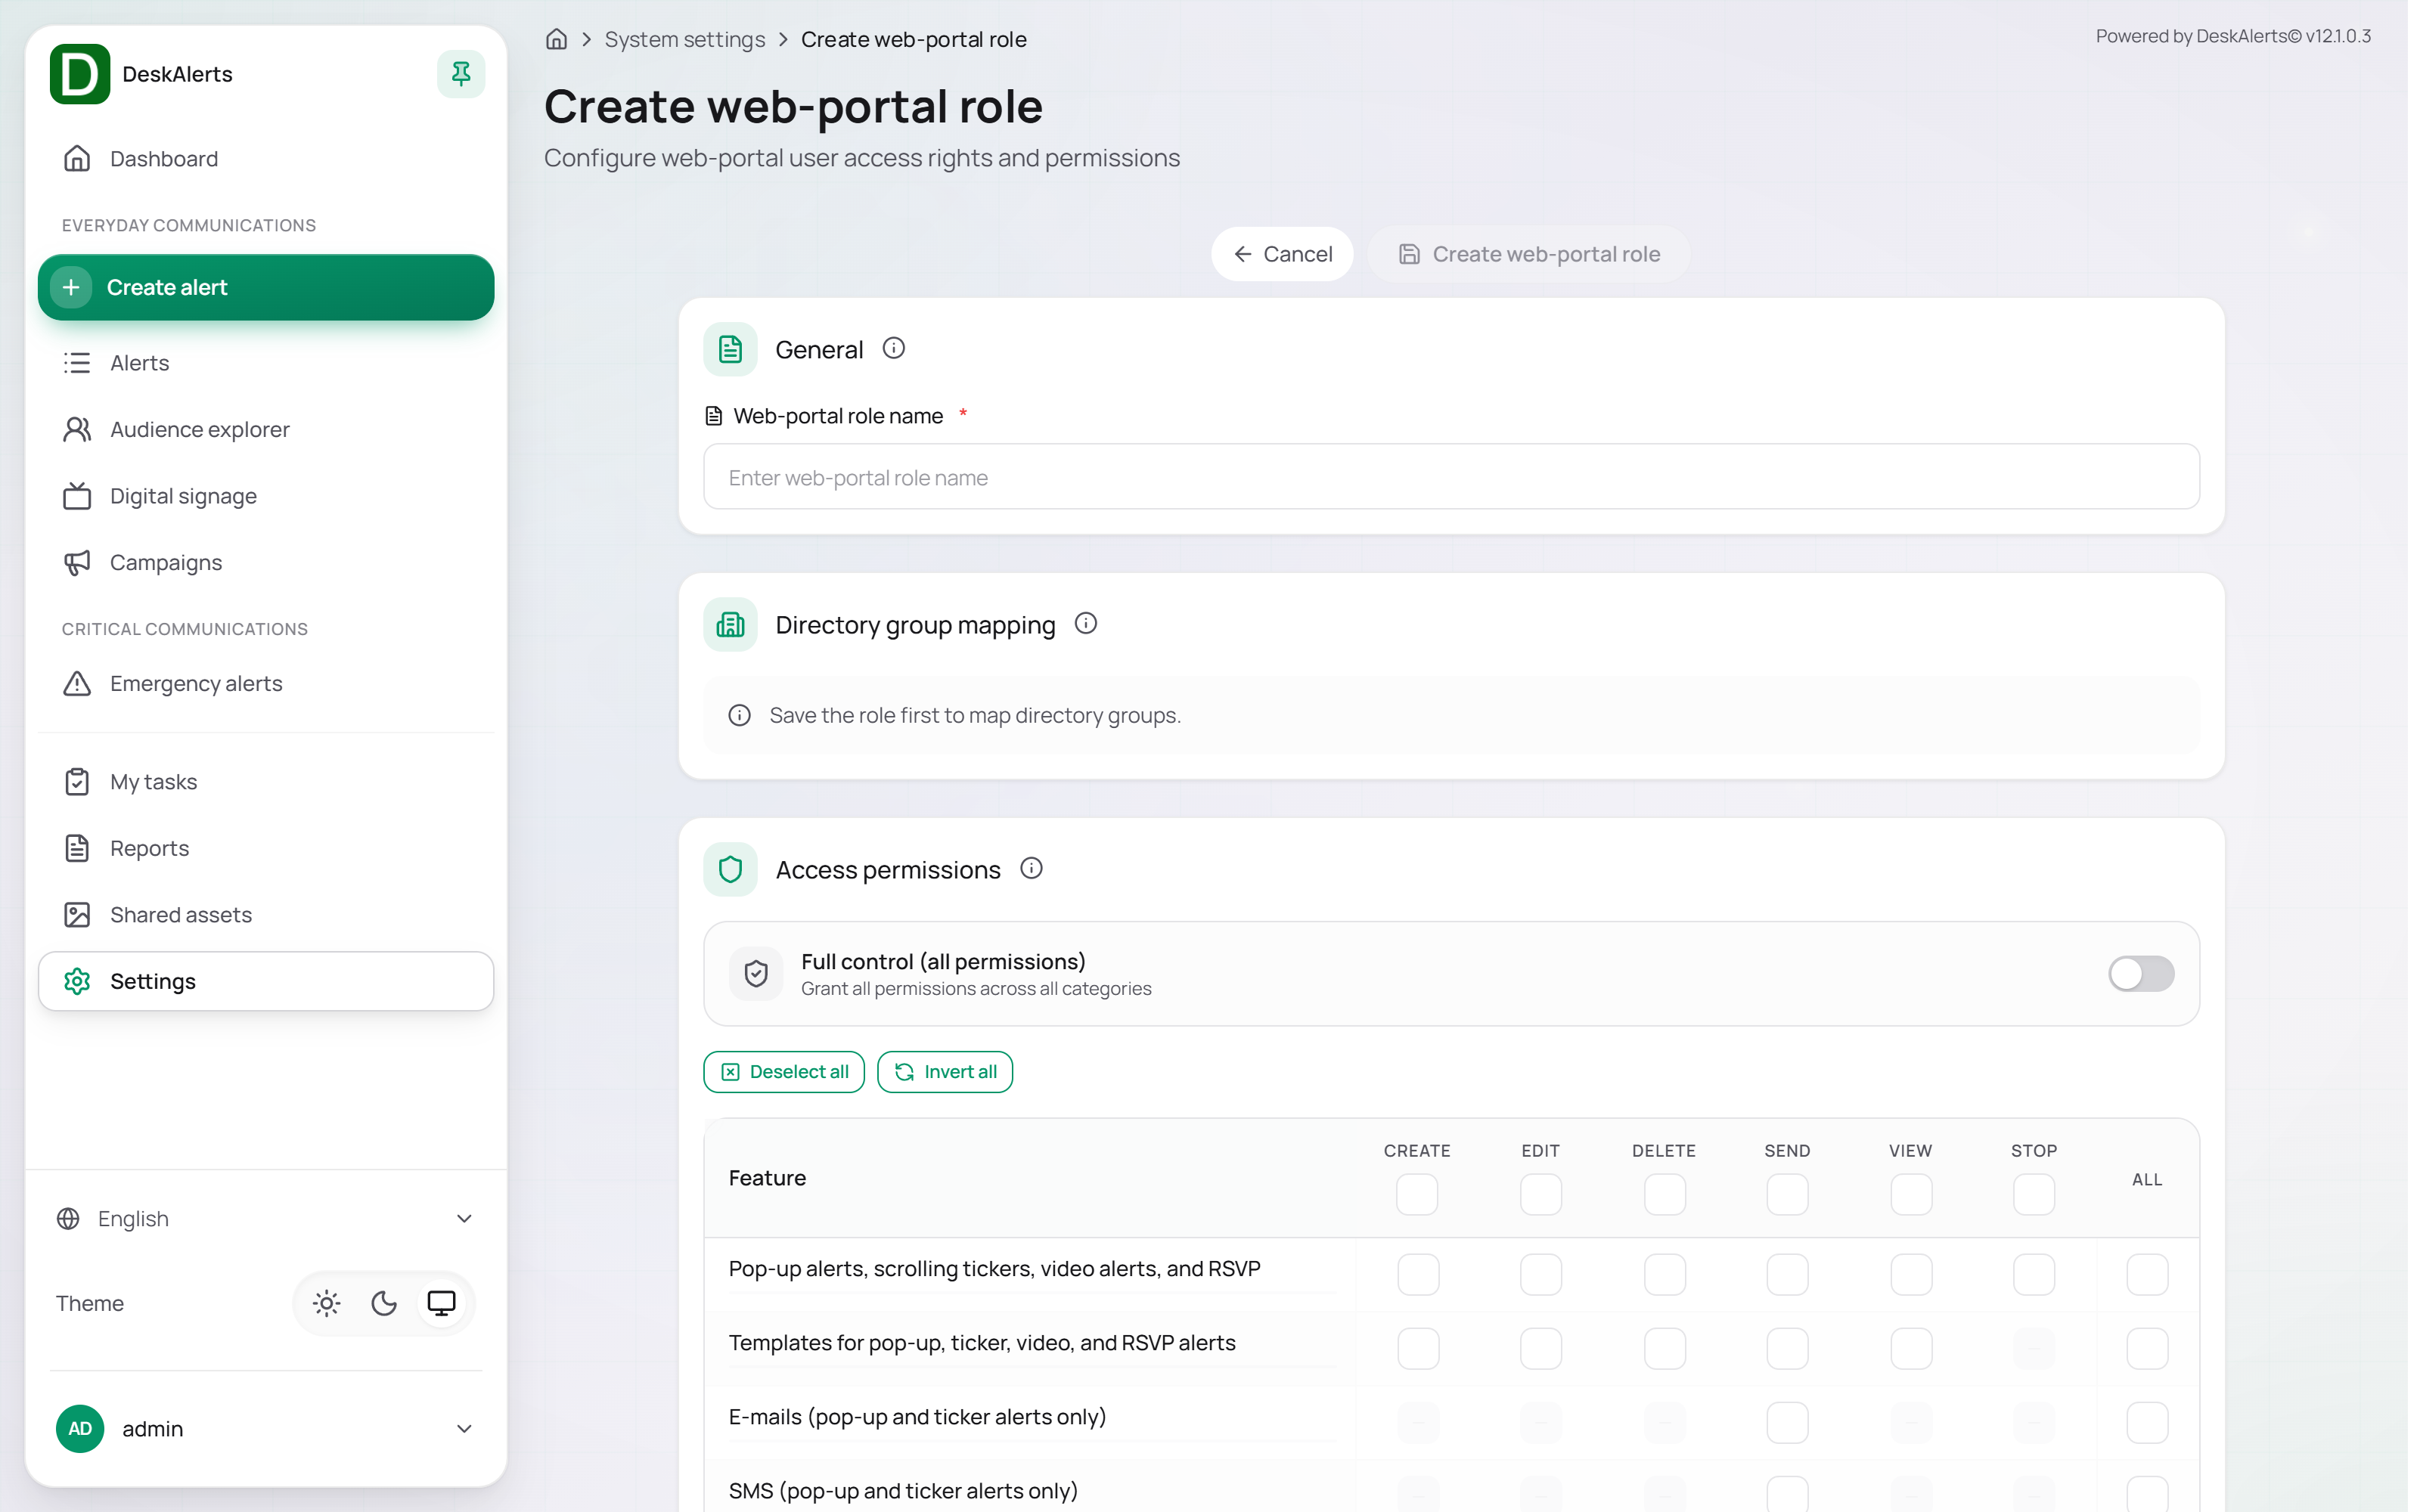
General
| Field | Description |
|---|---|
| Web-portal role name | Required role name, for example Communications Publisher |
Directory group mapping
Directory Group Mapping allows synchronized AD or Azure AD groups to be mapped to a web-portal role.
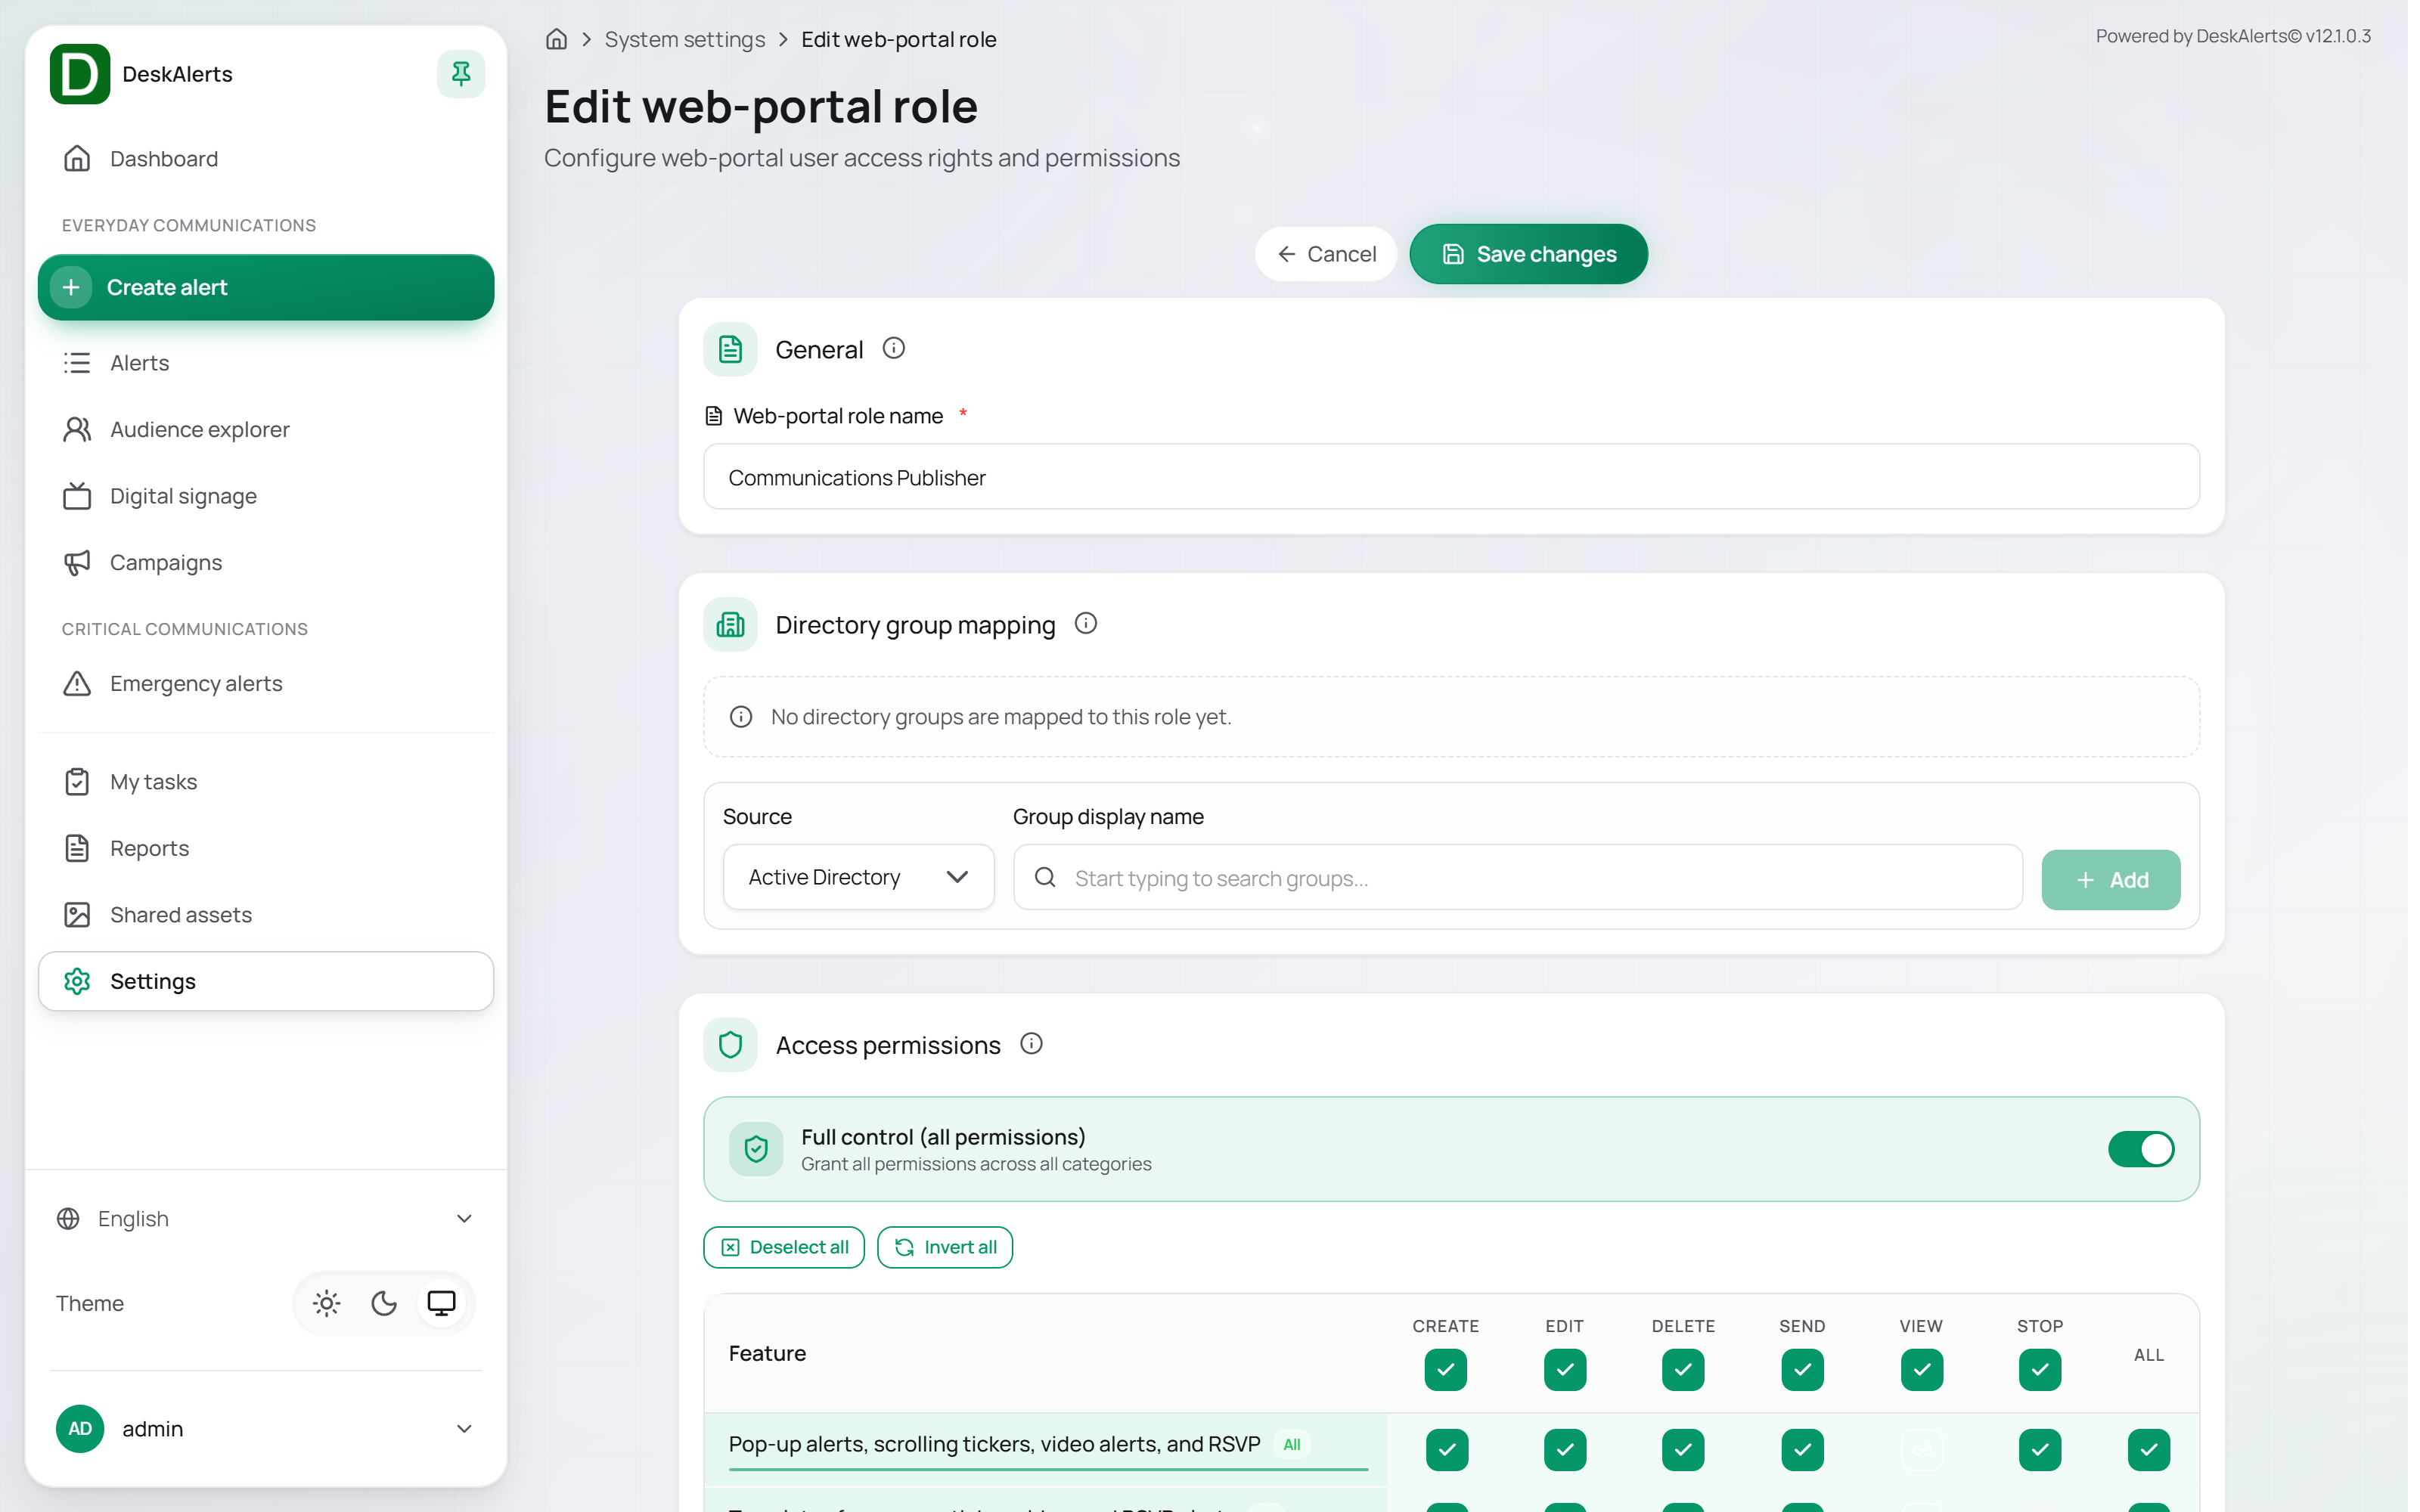
| Field | Description |
|---|---|
| Source | Directory source, such as Active Directory |
| Group display name | Searchable directory group selector |
Note: A role must be saved before directory groups can be mapped.
Access permissions
Access Permissions define which actions a role can perform within each feature area of the web portal.
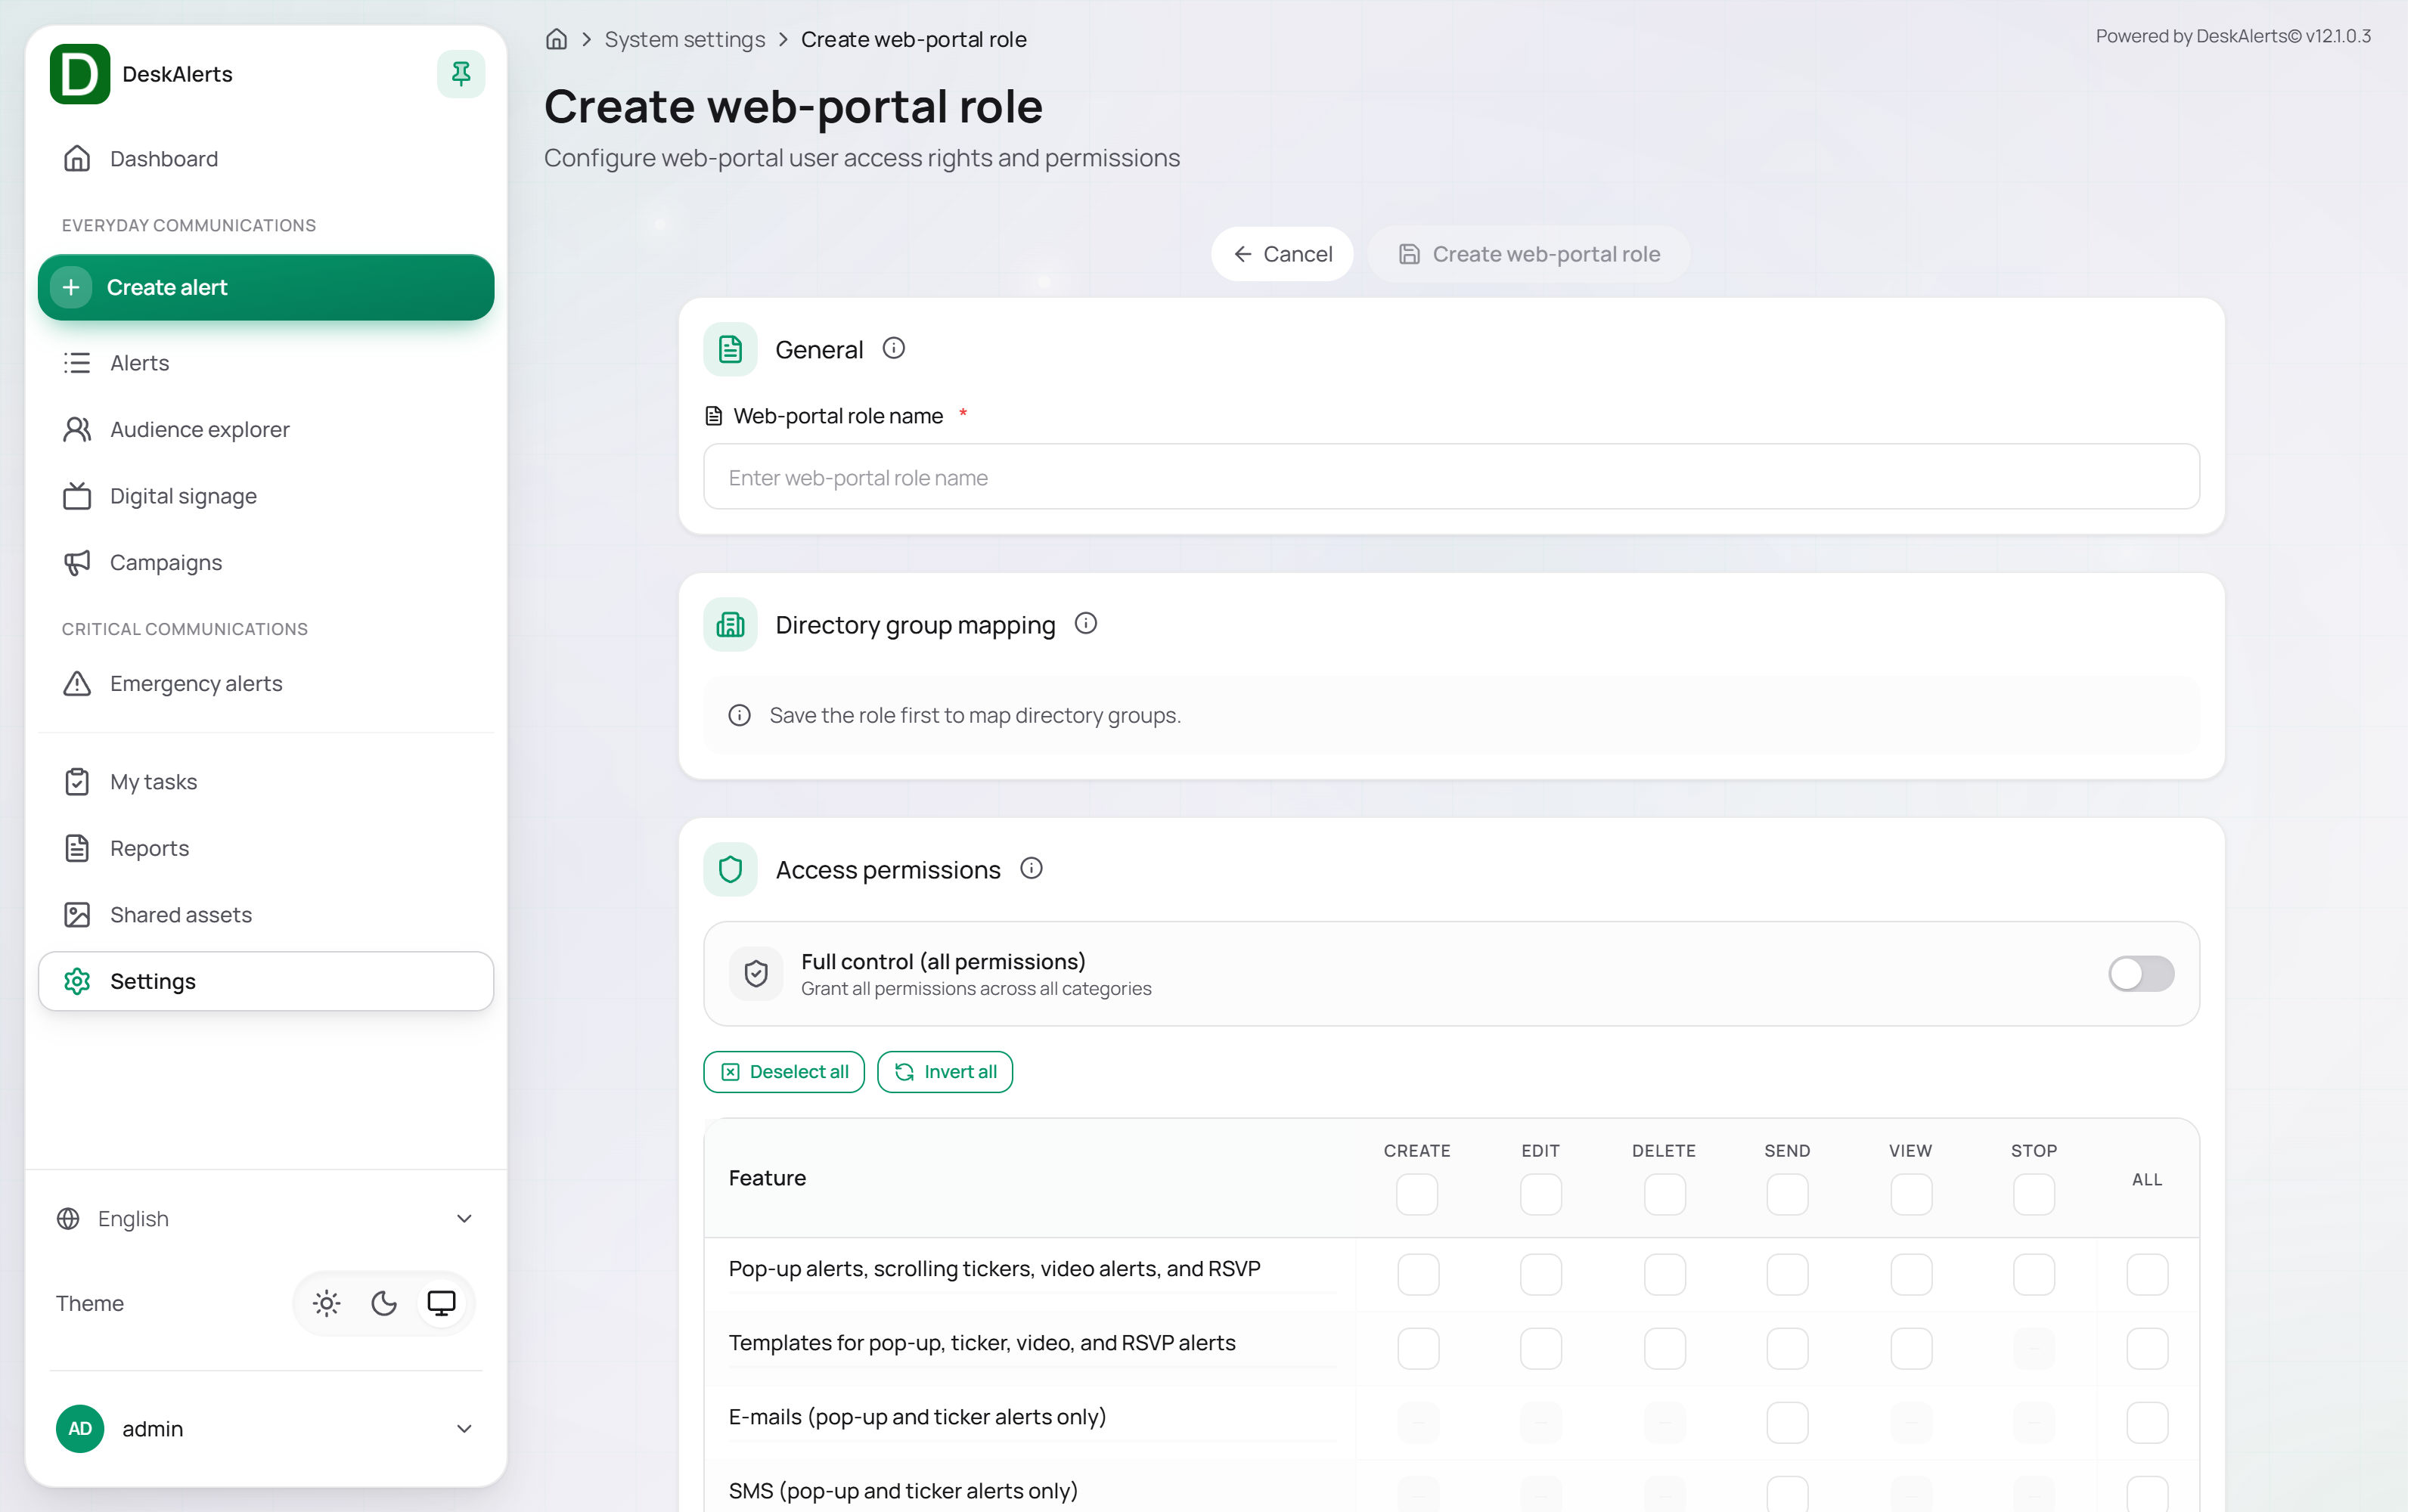
| Permission | Description |
|---|---|
| Create | Allows creating new content (alerts, templates, skins, etc.) |
| Edit | Allows modifying existing content within the role's content scope |
| Delete | Allows permanently removing content |
| Send | Allows publishing and sending alerts to recipients |
| View | Allows viewing content and reports without making changes |
| Stop | Allows stopping active, currently distributing alerts |
| All | Grants all of the above permissions for that specific feature |
The Full control (all permissions) toggle at the top grants every permission across all feature categories at once.
Use Deselect all to clear all permissions, or Invert all to flip the current selection — useful when building restrictive roles where it's faster to start from full access and remove specific permissions. View is granted implicitly when a row has Create, Edit, or Send; the row counter (for example 4/6) shows how many permissions of the row are set.
Feature rows of the permission matrix:
- Pop-up alerts, scrolling tickers, video alerts, and RSVP
- Templates for pop-up, ticker, video, and RSVP alerts
- E-mails, SMS, Text to call, and MS Teams (pop-up and ticker alerts only; Send only)
- Meeting alerts
- Digital Signage, and Layouts for Digital Signage
- Polls, Quizzes, and Surveys, and their templates
- Campaigns
- Content Plus
- Microtraining
- User Engagement and Alerts Statistics Reports
- User Action Log (Report)
- Screensavers, Wallpapers, and Lockscreens
- Emergency Alerts
- Color codes
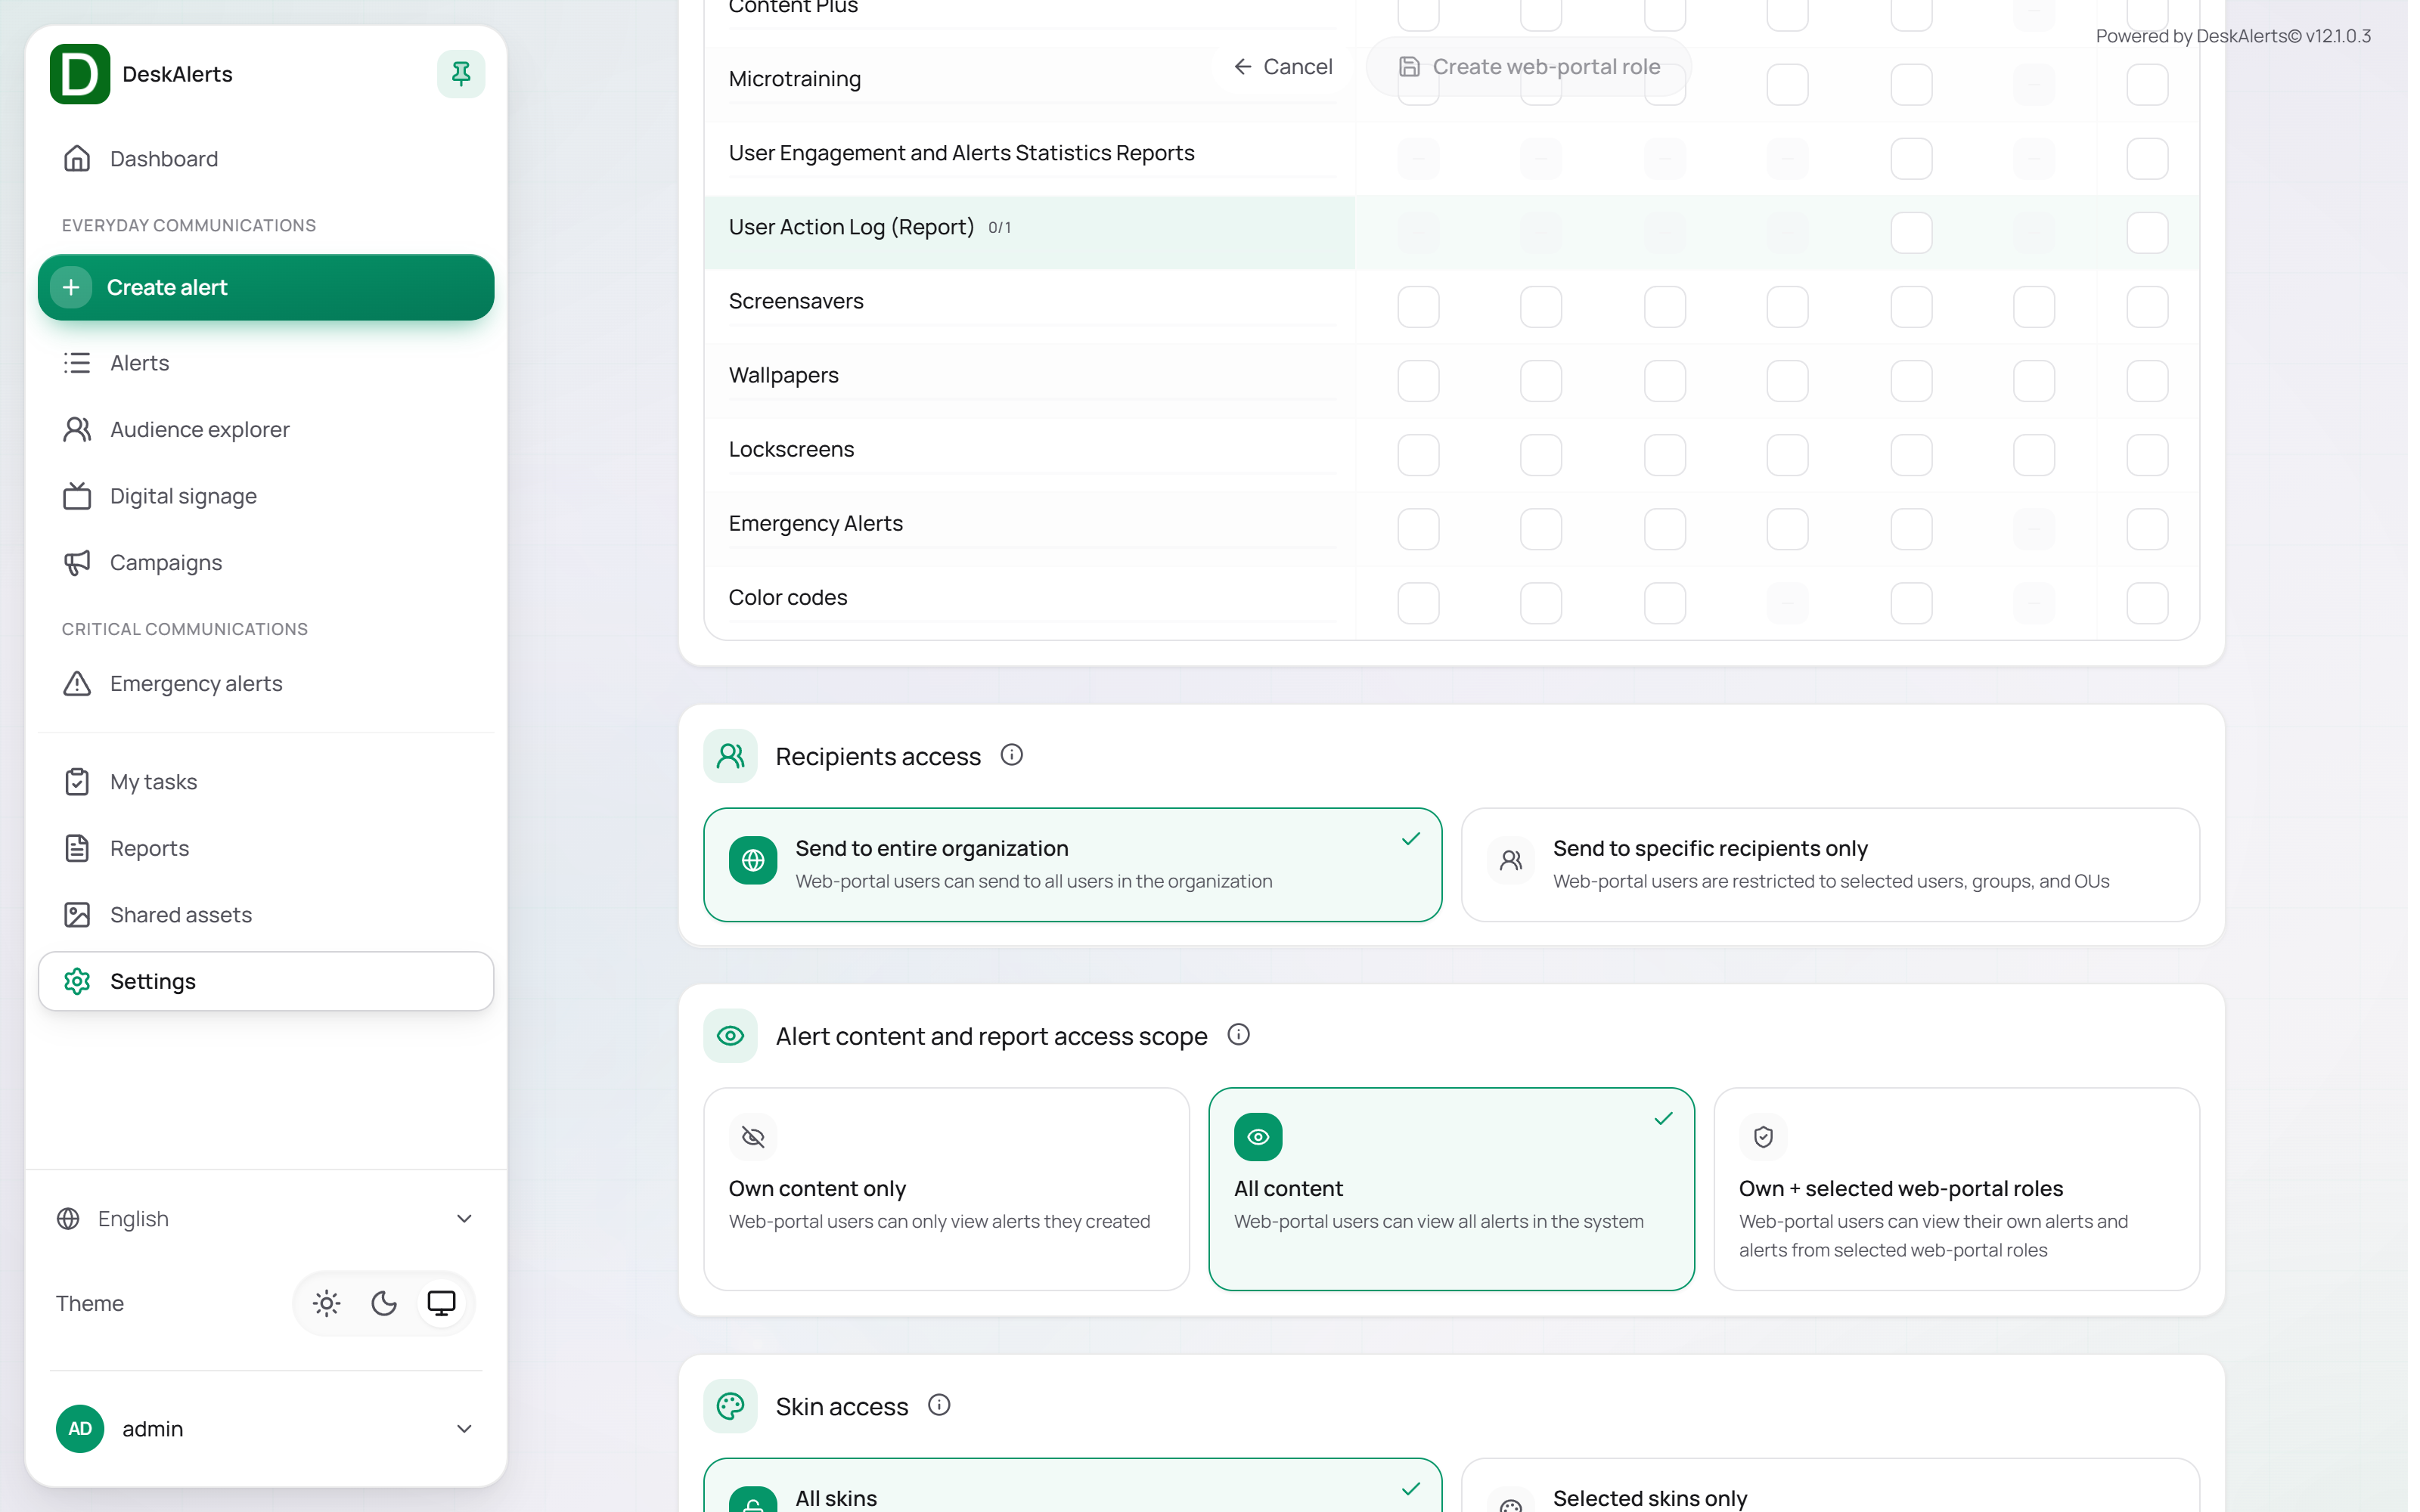
Recipients access
Recipients Access controls who users assigned to the role can target.
| Option | Description |
|---|---|
| Send to entire organization | Users can target all available recipients |
| Send to specific recipients only | Users are restricted to selected users, groups, and OUs |
Alert content and report access scope
| Option | Description |
|---|---|
| Own content only | Users can view only alerts they created |
| All content | Users can view all alerts and reports |
| Own + selected web-portal roles | Users can view their own content and content created by selected roles |
Skin access
| Option | Description |
|---|---|
| All skins | Users can use all available skins |
| Selected skins only | Users can use only selected skins |
Assigned web-portal users
Displays users currently assigned to the role. Use Manage web-portal users to update assignments.
Web-portal session configuration
Web-portal session configuration controls authentication behavior, session limits, and session expiration for web-portal users.
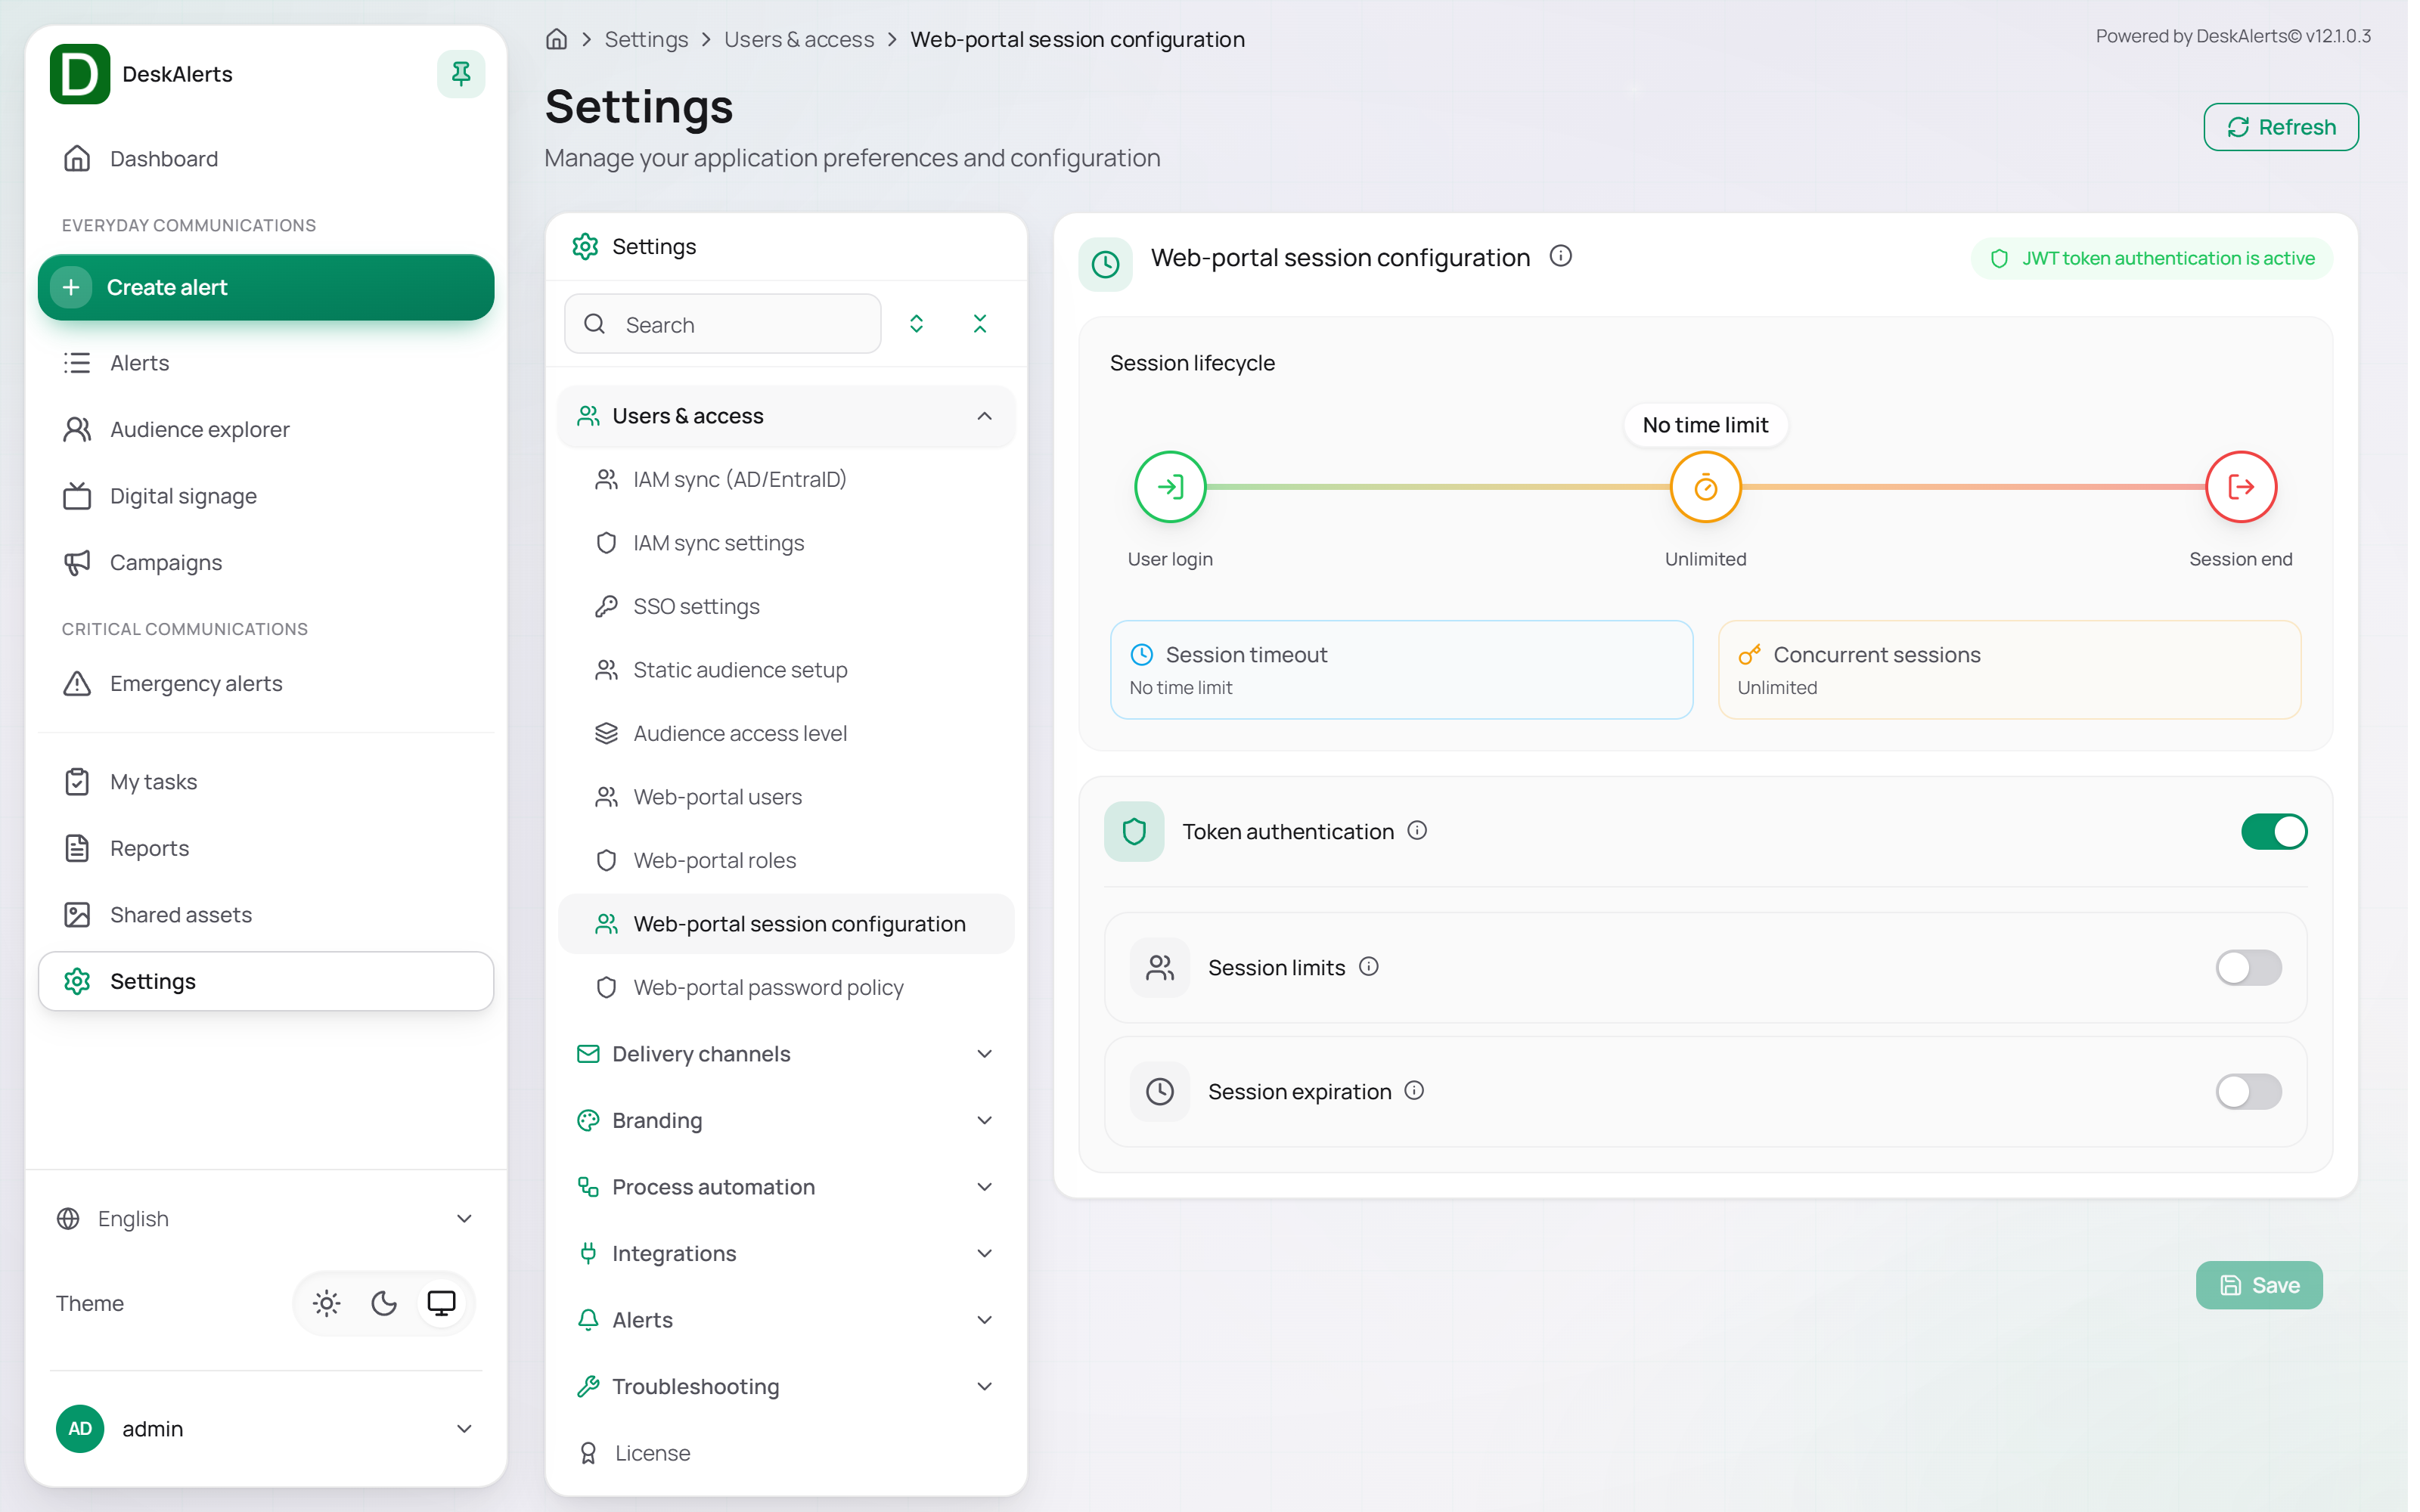
The Session lifecycle diagram at the top of the page visualizes the current policy from User Login through Session Timeout to Session End, together with the current values — for example, No time limit and Unlimited concurrent sessions. A status badge above the diagram indicates whether JWT token authentication is active.
| Section | Description |
|---|---|
| Token authentication | Enables JWT (JSON Web Token) authentication for web-portal sessions |
| Session limits | Switch it on to set Max sessions per user; off means Unlimited |
| Session expiration | Switch it on to set Session timeout; off means No time limit |
The diagram at the top updates as you change the values (for example Max 5 sessions). Click Save after making changes, or Reset to discard them.
Web-portal password policy
Web-portal password policy defines the password strength requirements, expiration rules, account lockout behavior, and additional security controls for all web-portal users.
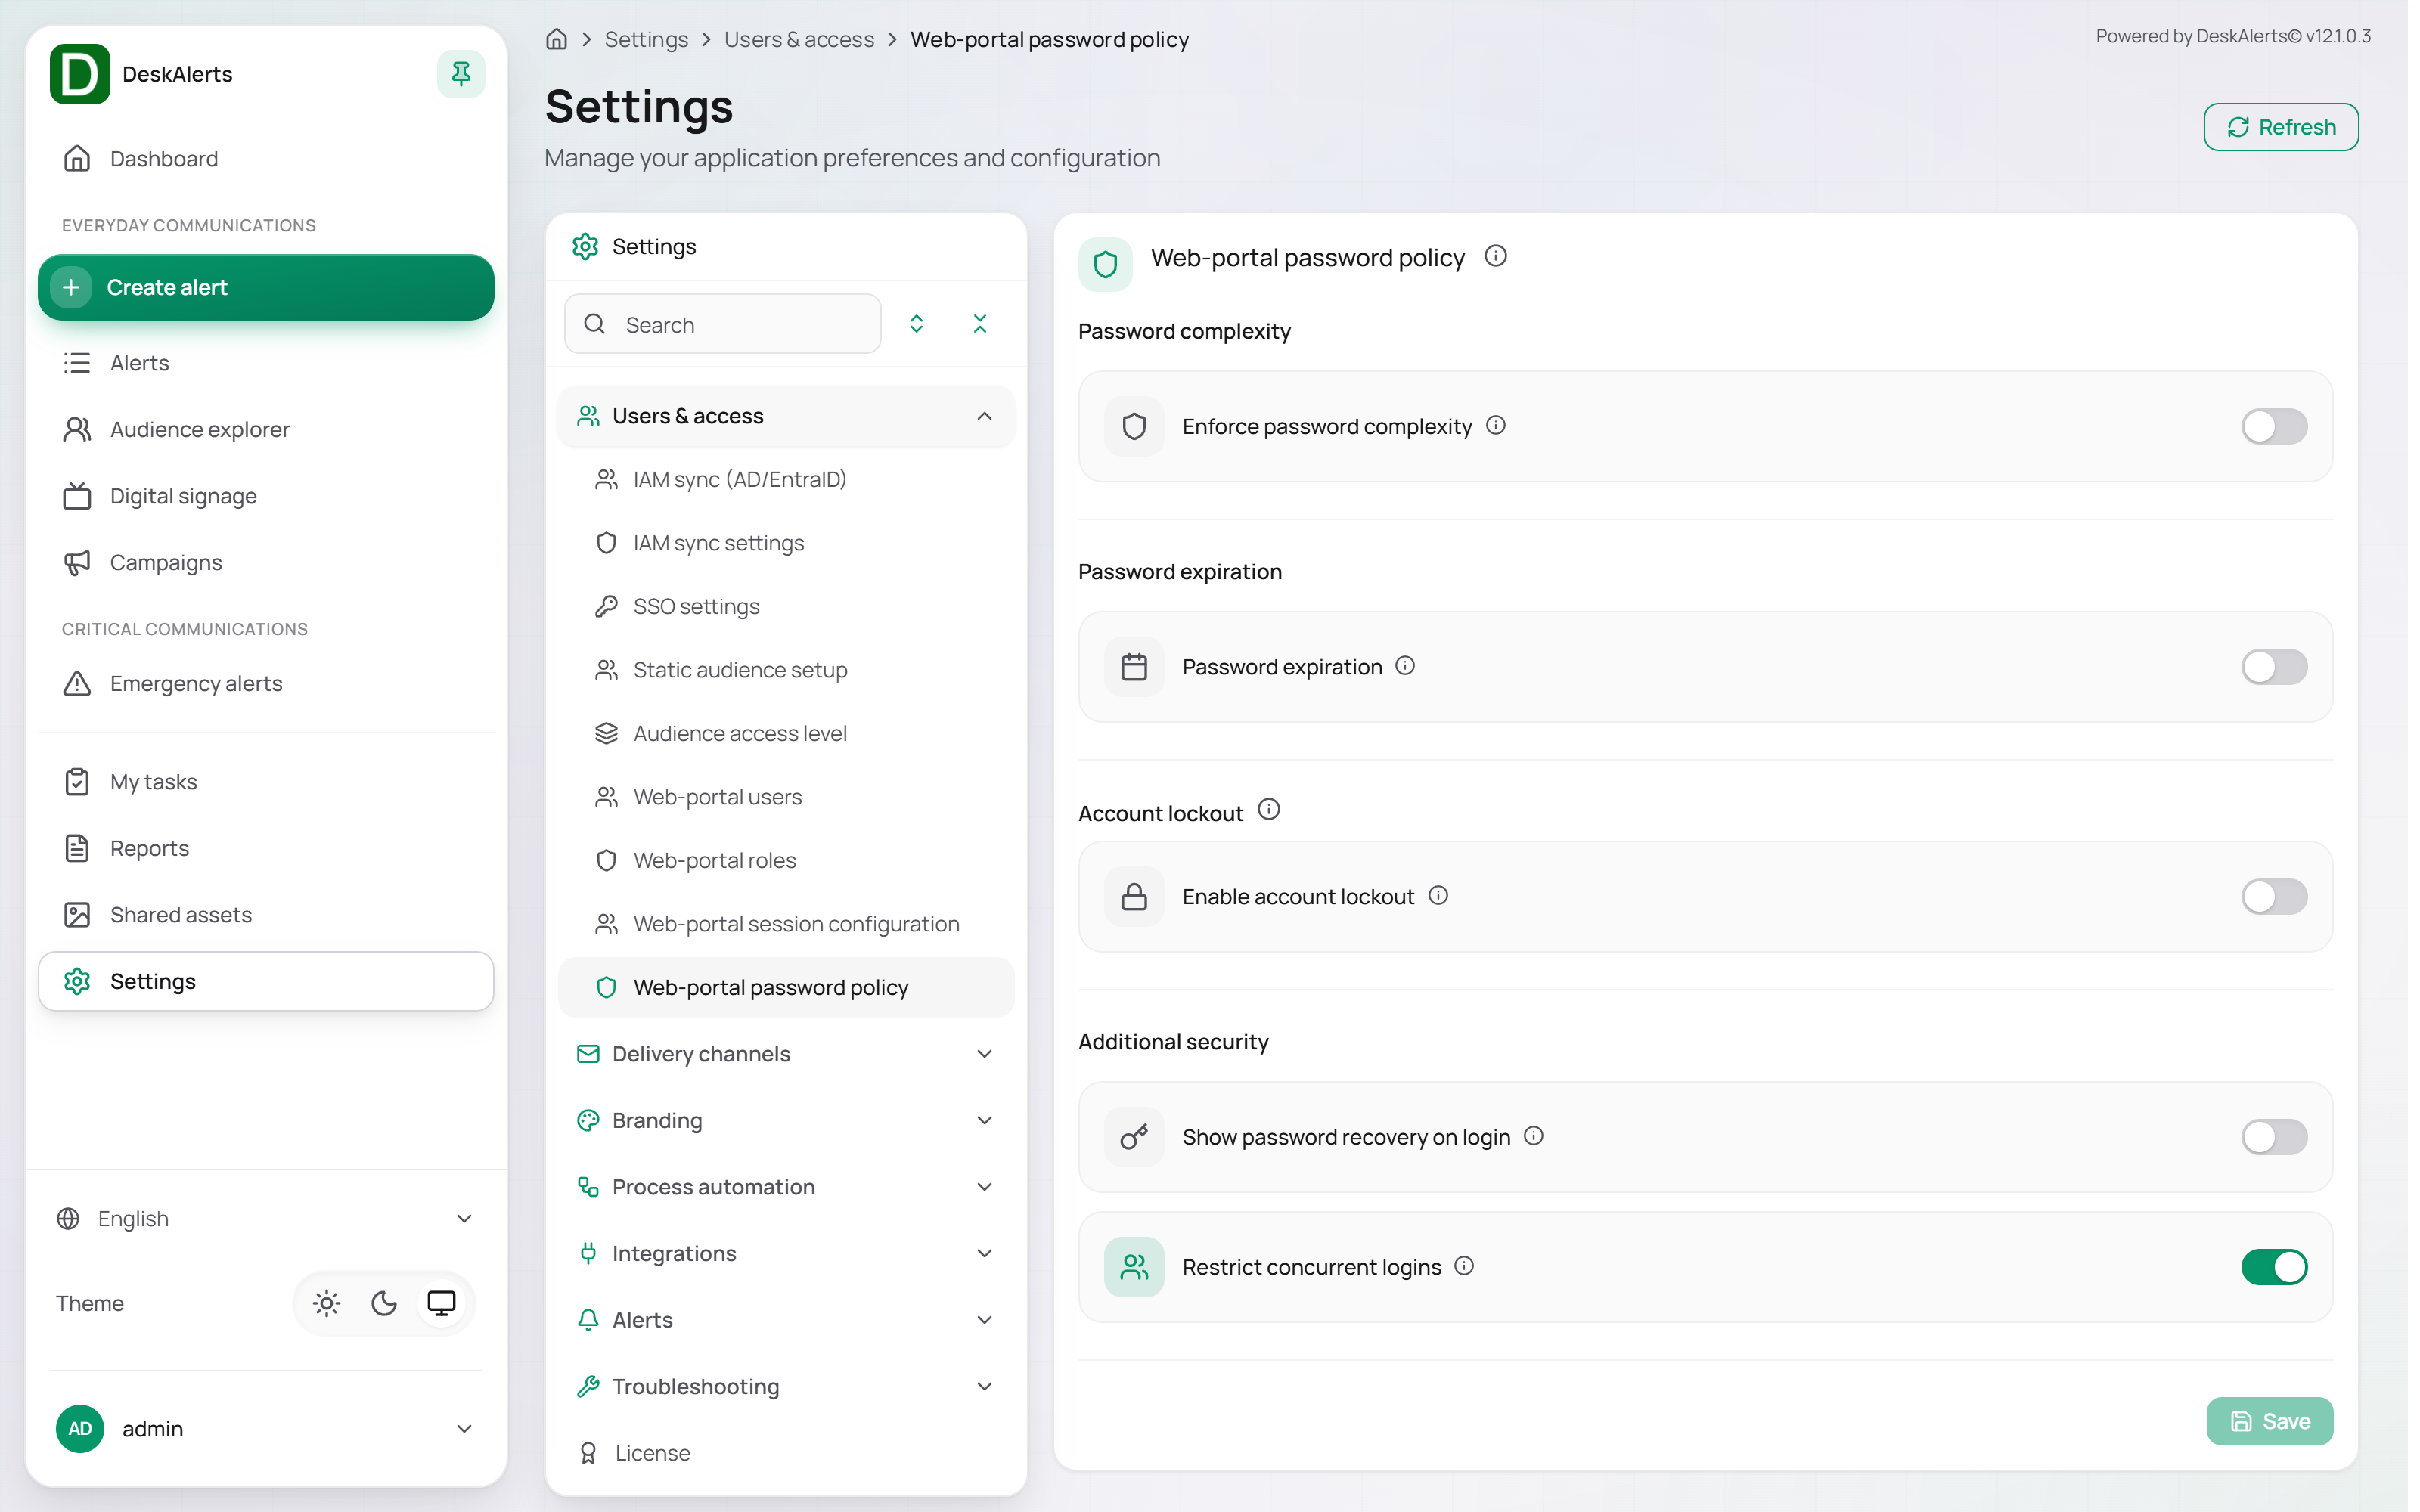
Password complexity
Toggle Enforce password complexity to require all web-portal passwords to meet the configured rules. When enabled, the following fields become active:
| Setting | Description |
|---|---|
| Minimum password length | The minimum number of characters a password must contain |
| Maximum password length | The maximum number of characters allowed in a password |
| Minimum lowercase | The minimum number of lowercase letters required |
| Minimum uppercase | The minimum number of uppercase letters required |
| Minimum digits | The minimum number of numeric characters required |
| Minimum symbols | The minimum number of special characters (e.g., !, @, #) required |
| Password history count | The number of previous passwords that cannot be reused. Set to 1 to prevent reuse of the most recent password |
Password expiration
Toggle Password Expiration to force web-portal users to change their passwords periodically. When enabled:
| Setting | Description |
|---|---|
| Password expiration days | The number of days after which a password expires and must be changed |
| Days before change reminder | How many days before expiration users are notified to change their password. Set to -1 to disable reminders |
Account lockout
Toggle Enable account lockout to automatically lock accounts after a series of failed login attempts, protecting against brute-force attacks.
⚠ Be careful with lockout settings. Too strict settings may lock out legitimate users.
| Setting | Description |
|---|---|
| Maximum failed attempts | The number of consecutive failed login attempts before the account is locked (e.g., 3) |
| Lockout duration (minutes) | How long the account remains locked before it is automatically unlocked (e.g., 100 minutes) |
Lockout notification
| Setting | Description |
|---|---|
| Lockout notification email | An optional email address that receives a notification when an account is locked. The default message informs the recipient that their account has been locked and instructs them to contact their DeskAlerts administrator |
Additional security
| Setting | Description |
|---|---|
| Show password recovery on login | Displays a Forgot Password link on the web-portal login page. The user enters the user name and receives an email with a reset link that is valid for 15 minutes and can be used once. Recovery works only for accounts created in the portal that have a valid email address — directory and SSO accounts change their password in the directory — and needs the SMTP settings under Auxiliary Delivery Channels → Email. See Signing In and Roles for the messages the user may see |
| Restrict concurrent logins | Prevents the same account from being logged in from multiple sessions simultaneously. If a new login occurs, the existing session is terminated |
Click Save to apply the policy, or Reset to discard unsaved changes.