Hosting DeskAlerts Server on Azure
You can host the DeskAlerts server on any cloud platform that supports Windows virtual machines.
This guide explains how to deploy DeskAlerts in a two-tier architecture on Microsoft Azure using a virtual machine for the application tier and Azure SQL Database for the database tier.
💡 Use this as a reference and adjust settings to fit your organization’s needs.
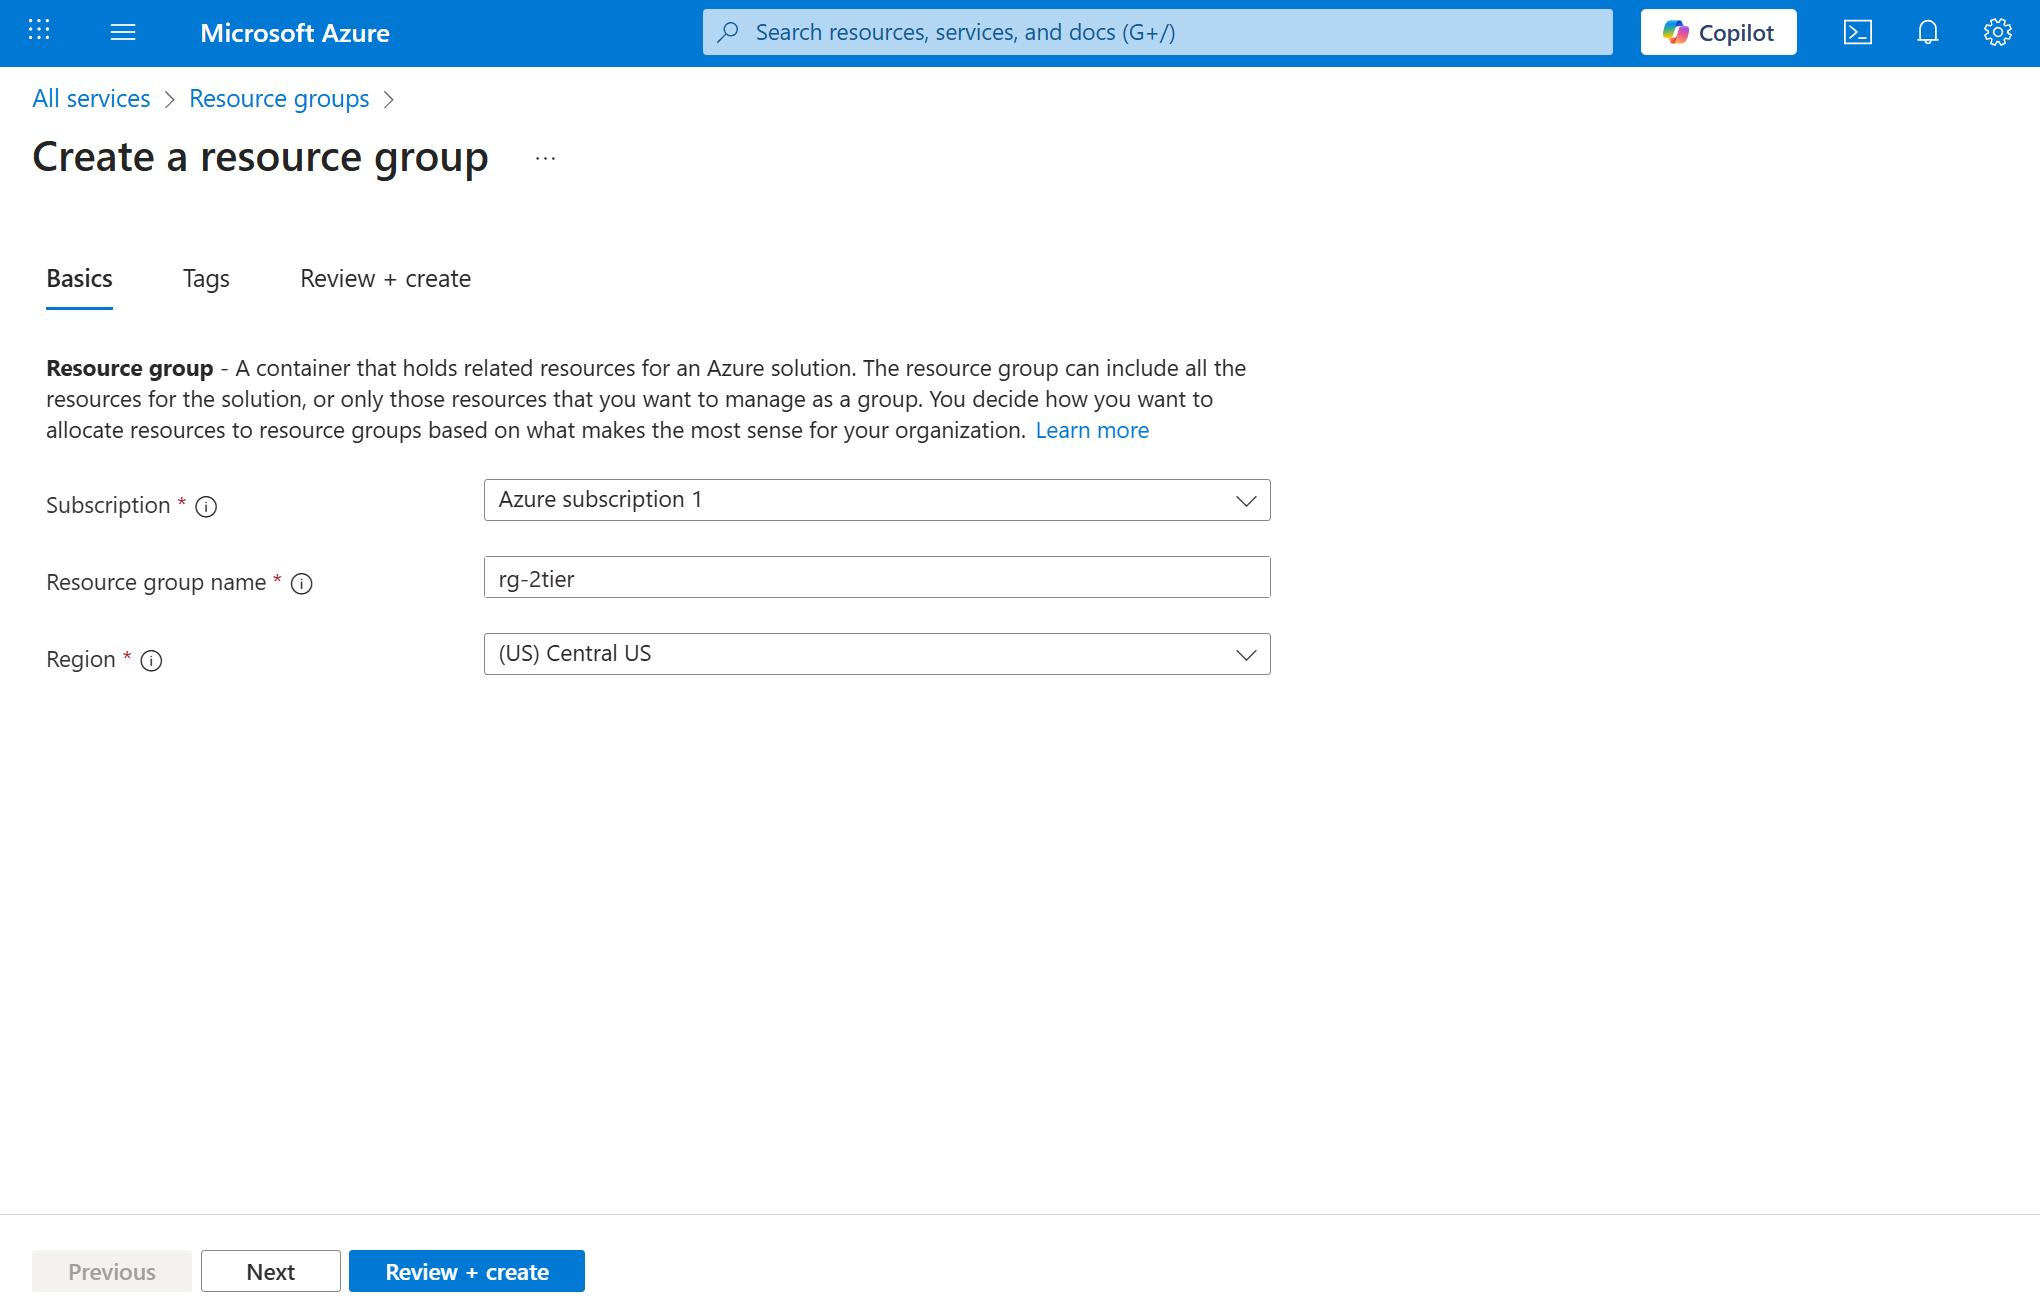
1. Create a Resource Group
If you do not have an existing Resource group, please create a new one
- Go to Resource groups > Create.
- Select active Subscription from the list.
- Resource group name
rg-2tier - Region
Central US(use your preferred region here)
- Click Review + create > Create
Please specify this resource group and region for every resource in this guide.
2. Create a Virtual Network
- Go to Virtual networks > Create.
- Virtual network name
vnet-2tier
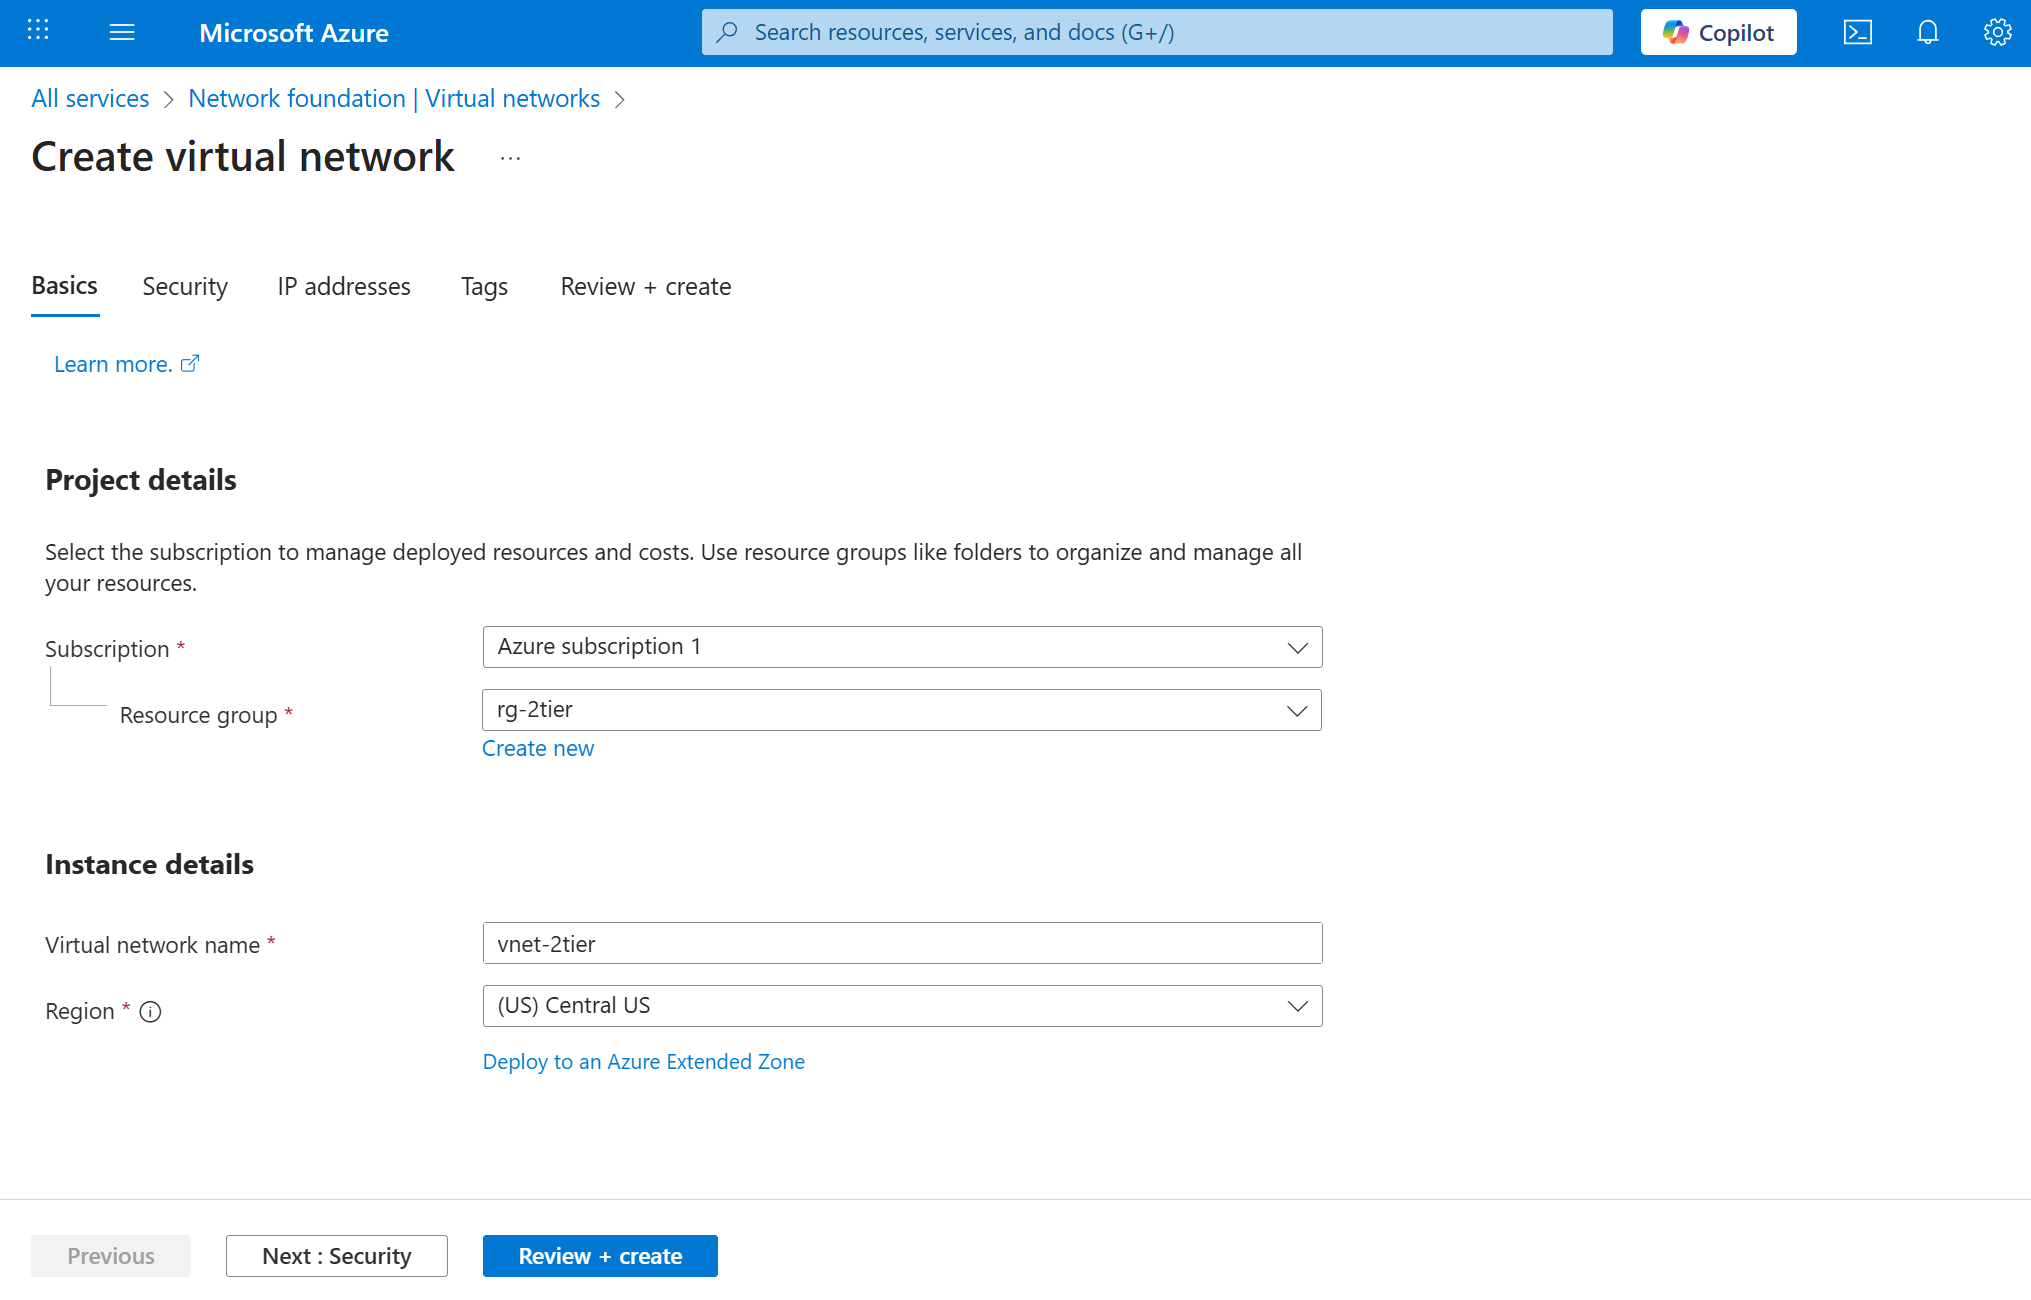
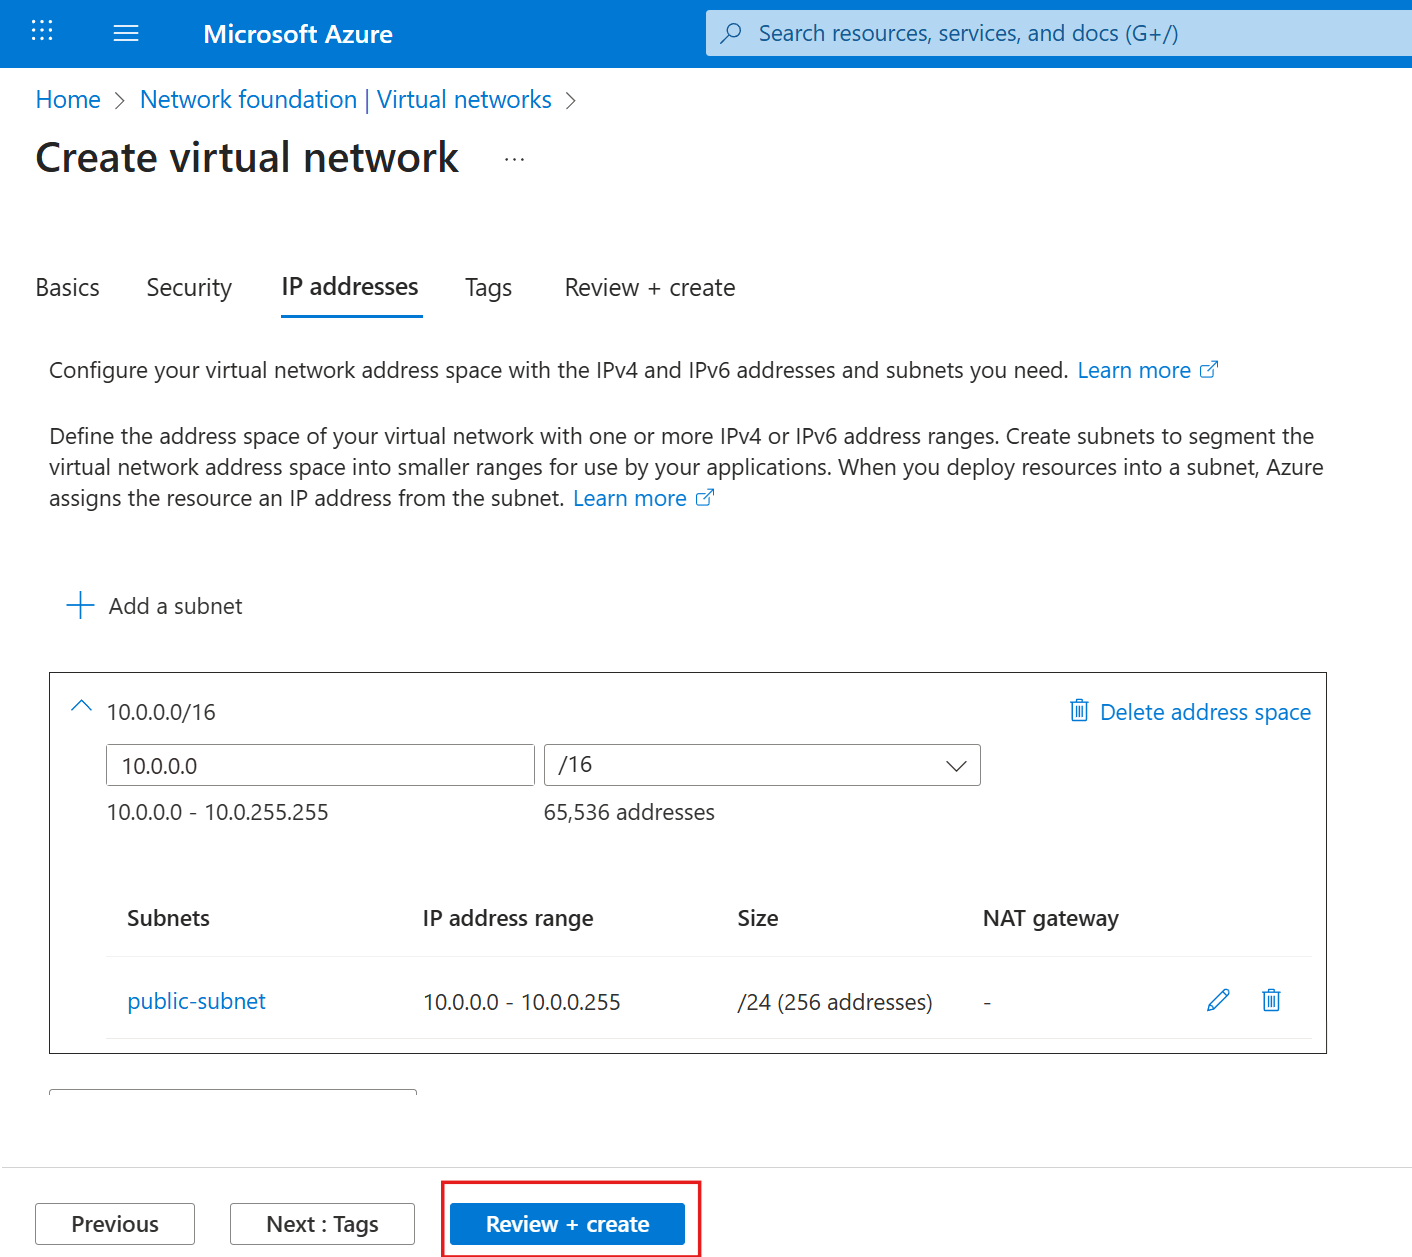
- In "IP addresses" tab Set address space (e.g.,
10.0.0.0/16). - Using the pencil button rename the
defaulttopublic-subnetand click save:

- Click Review + create > Create
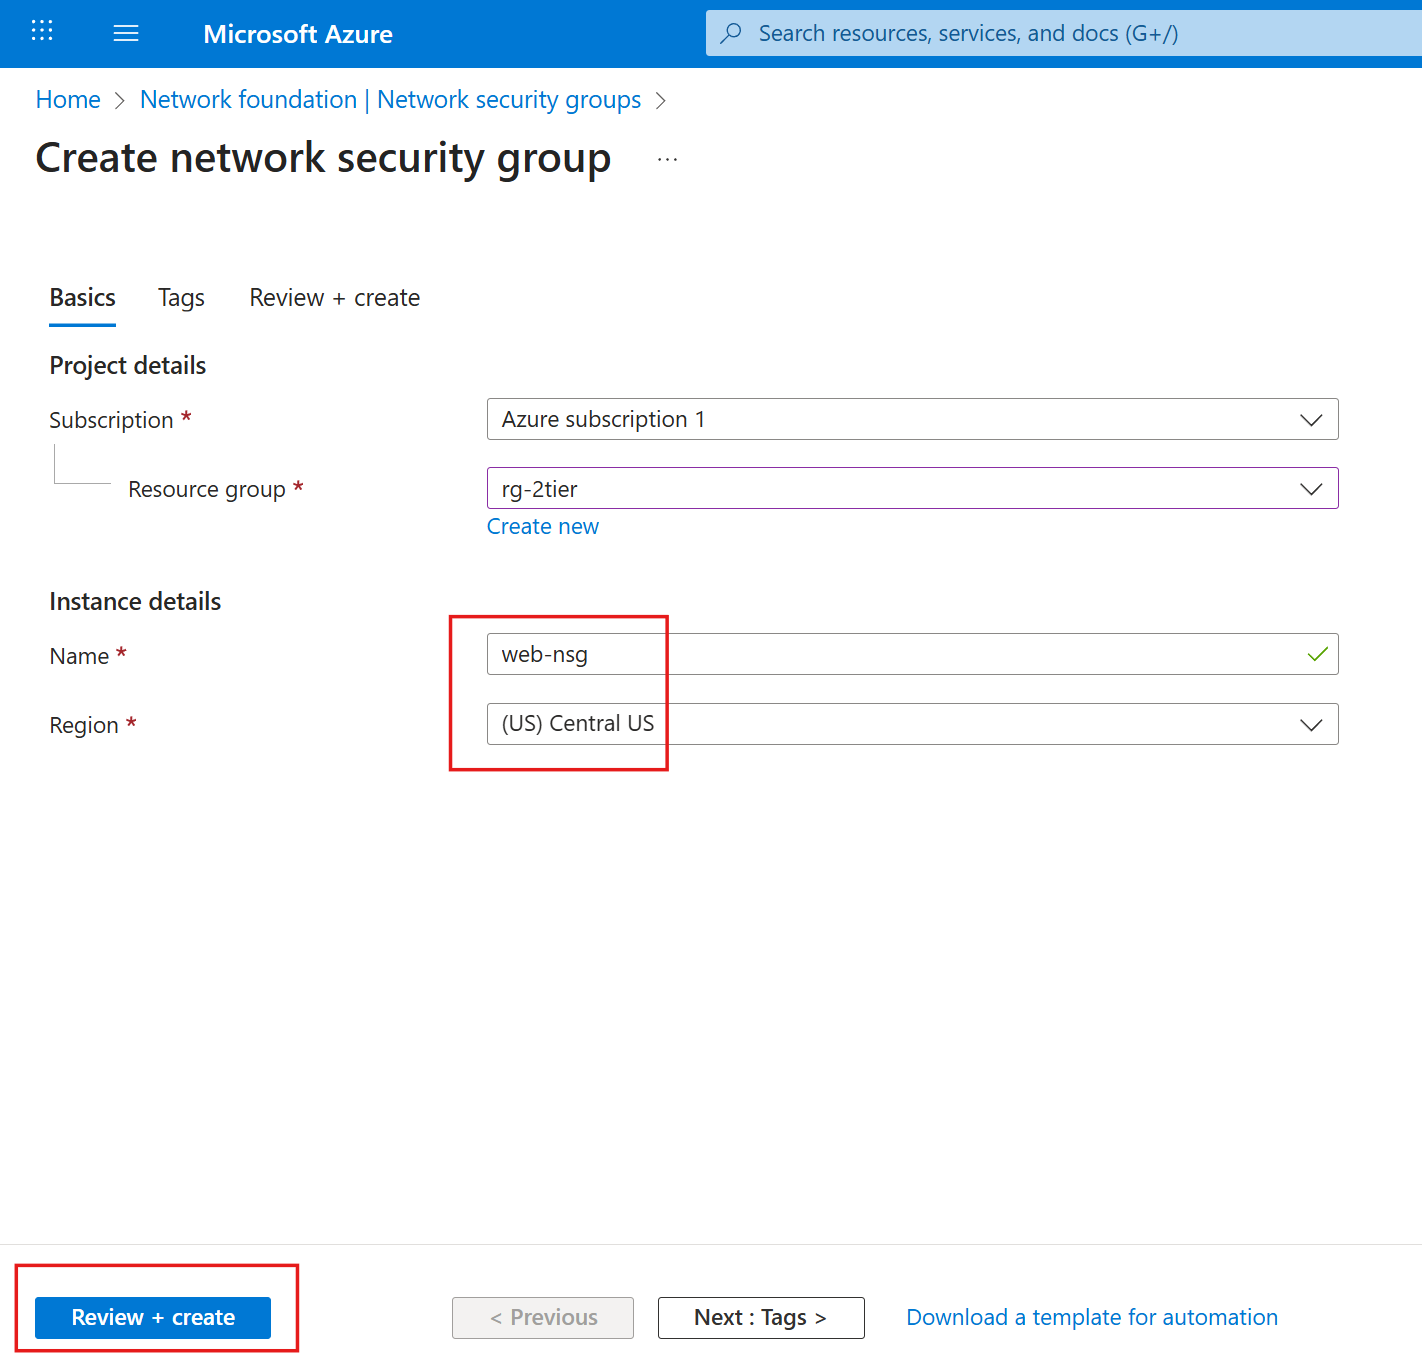
3. Create a Network Security Group
- Go to Network security groups > Create.
- Name
web-nsg - Click Review + create > Create
- After NSG finishes deployment, click Go to resource

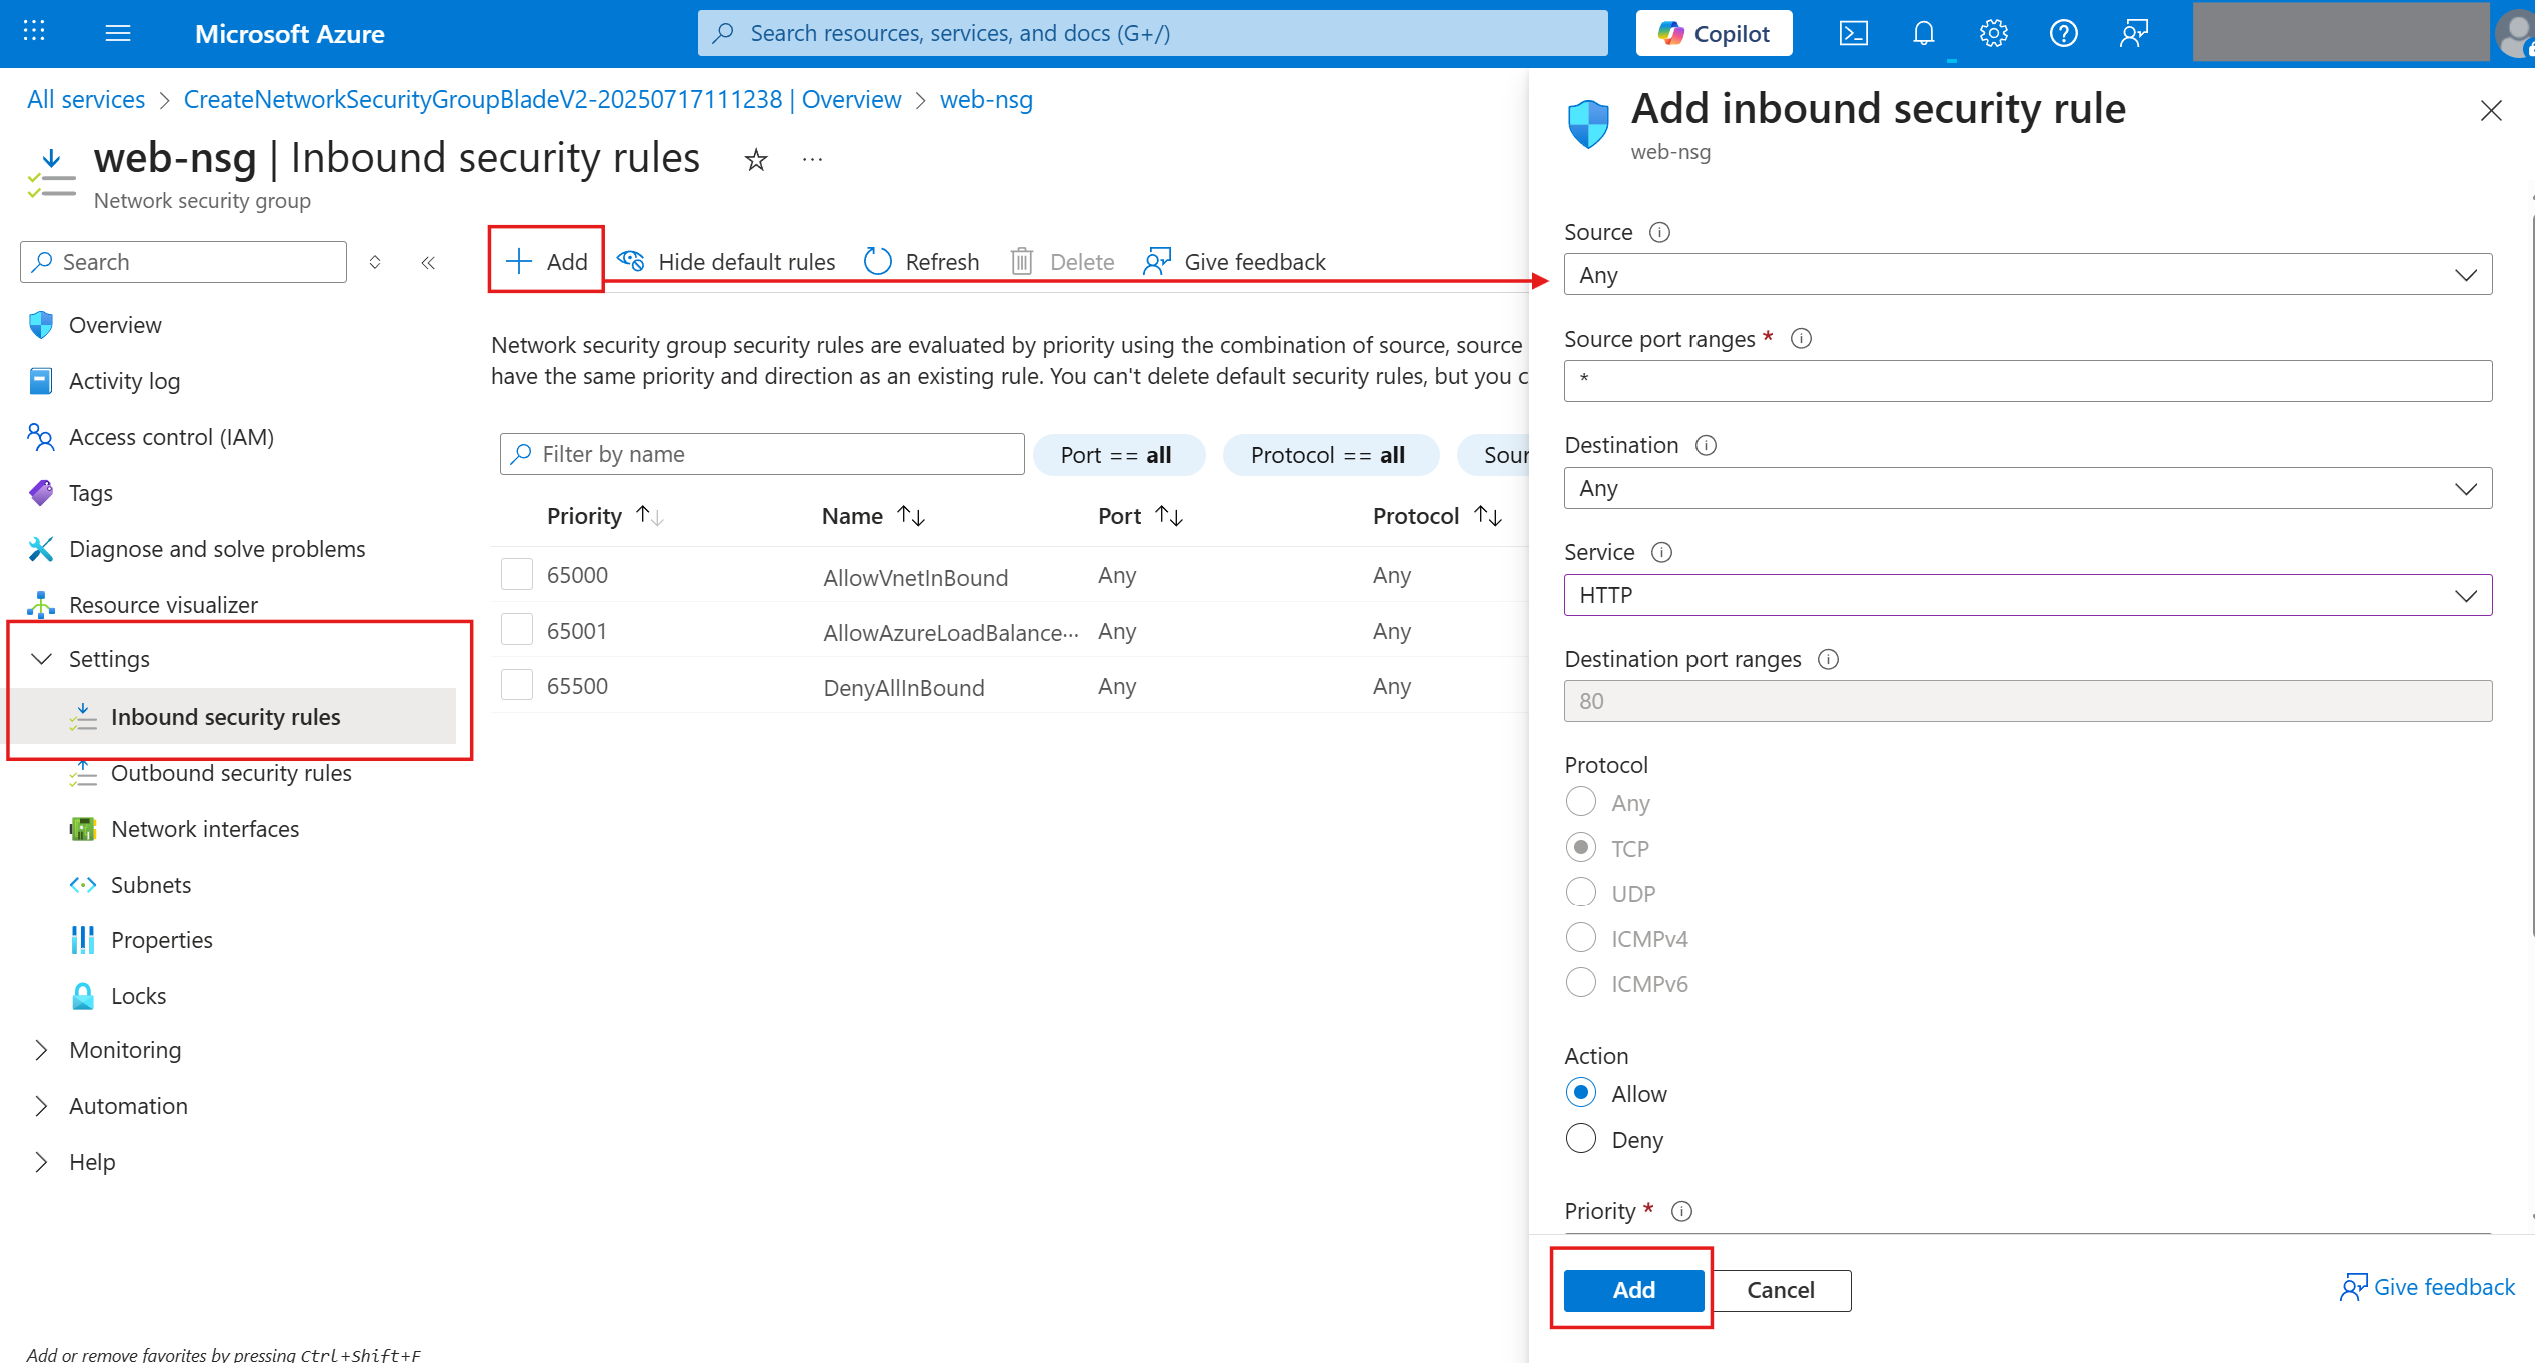
Click Settings > Inbound security rules > Add
- Add inbound rule:
- Source: Any
- Source port ranges: *
- Destination: Any
- Service: HTTP
- Action: Allow
- Priority: 100
- Description : Web traffic
- Click Add
Same way add another rule
- Add inbound rule:
- Source: Any
- Source port ranges: *
- Destination: Any
- Service: HTTPS
- Action: Allow
- Priority: 110
- Description : Web traffic
- Click "Add"
Following the same steps, add a third rule that will allow you to connect to the web server via RDP:
- Add inbound rule:
- Source: My IP address
- Source port ranges: *
- Destination: Any
- Service: RDP
- Action: Allow
- Priority: 120
- Description : Management traffic
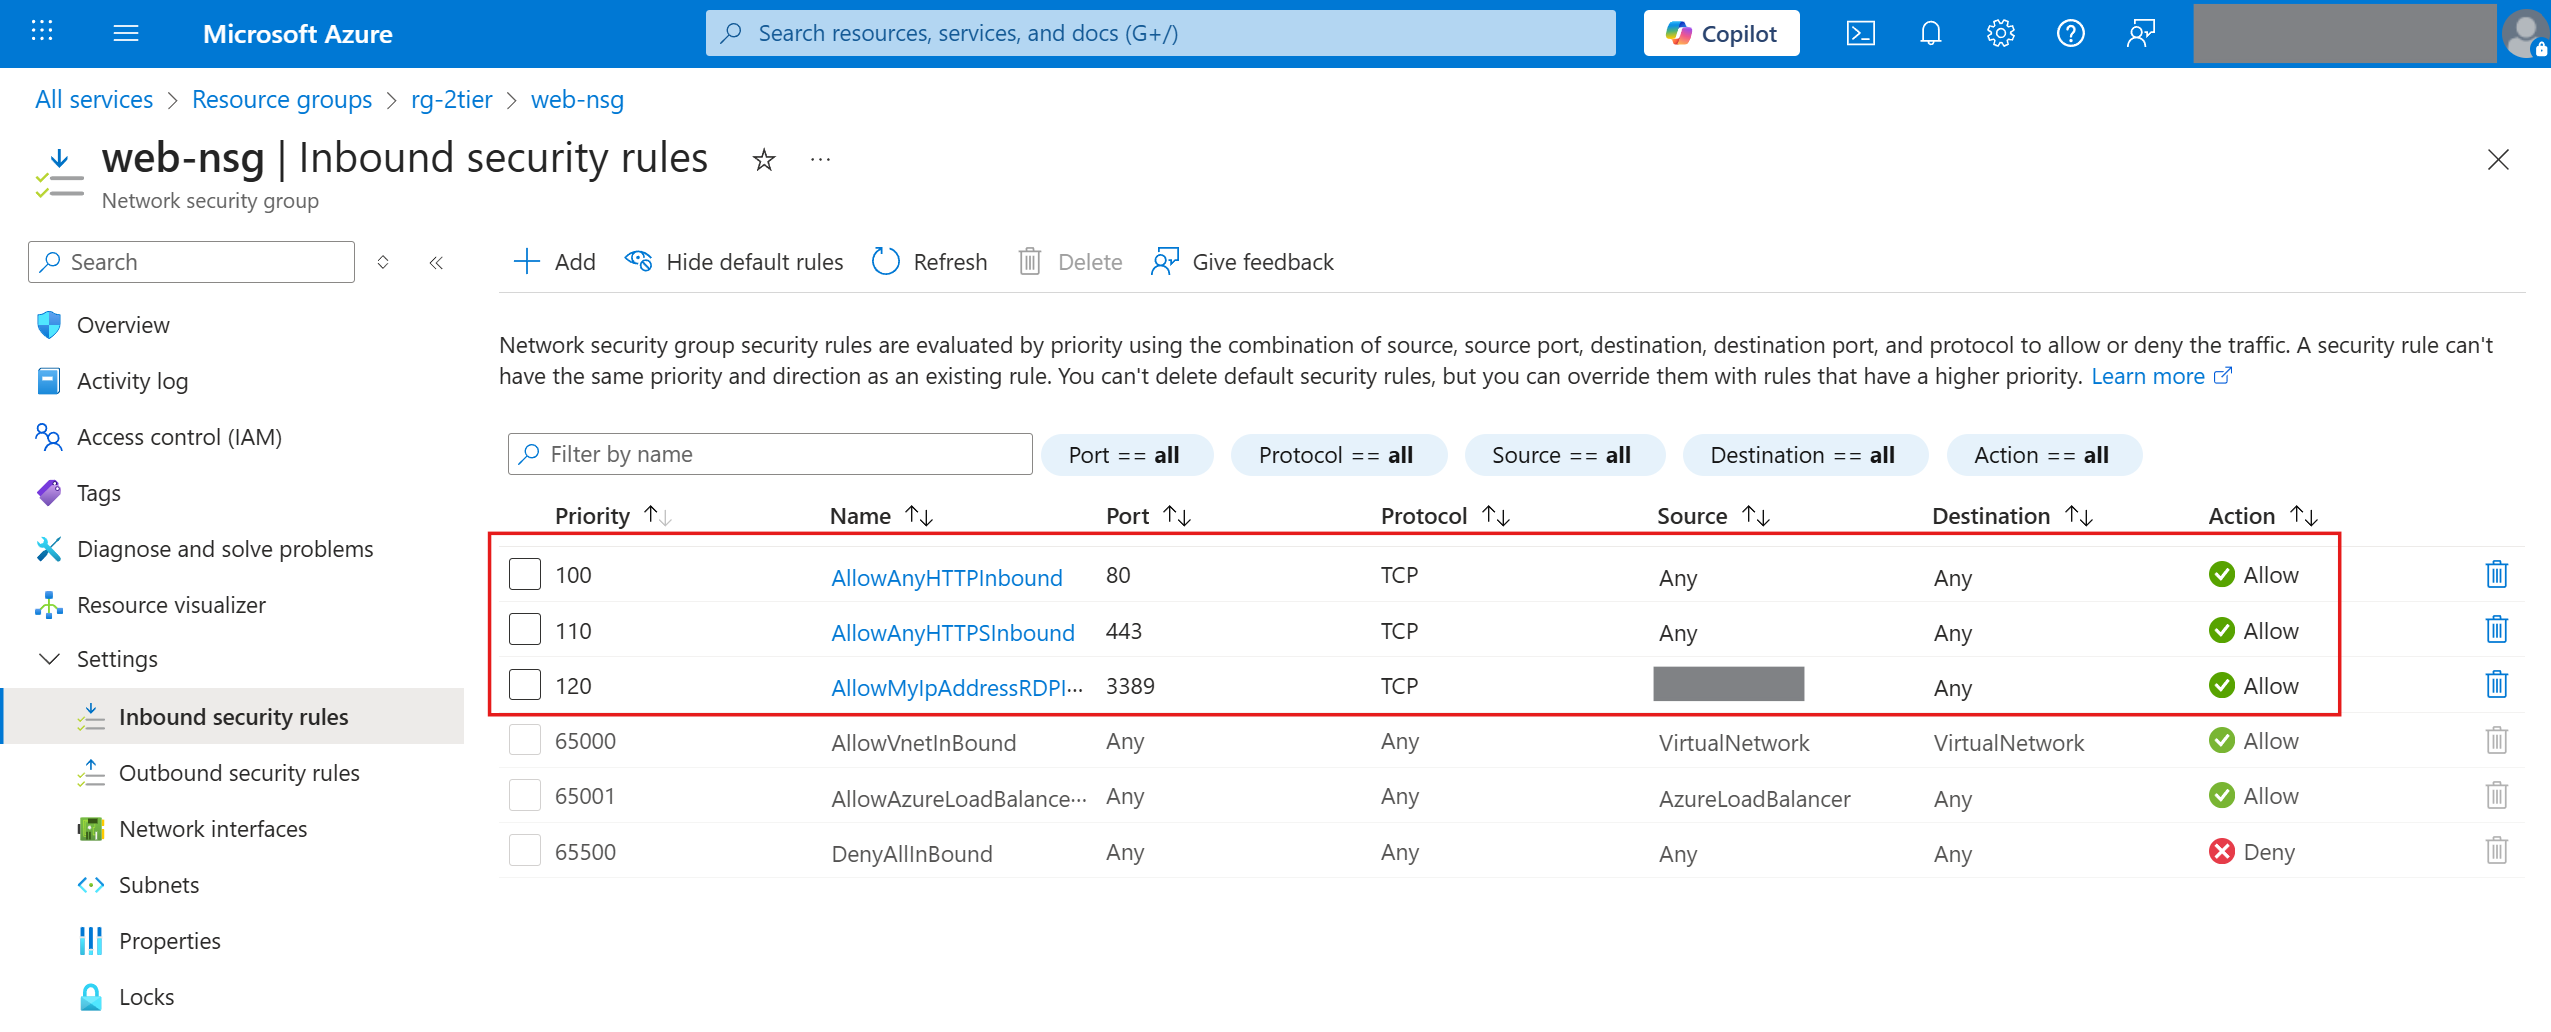
You should see three inbound rules after completing this step:
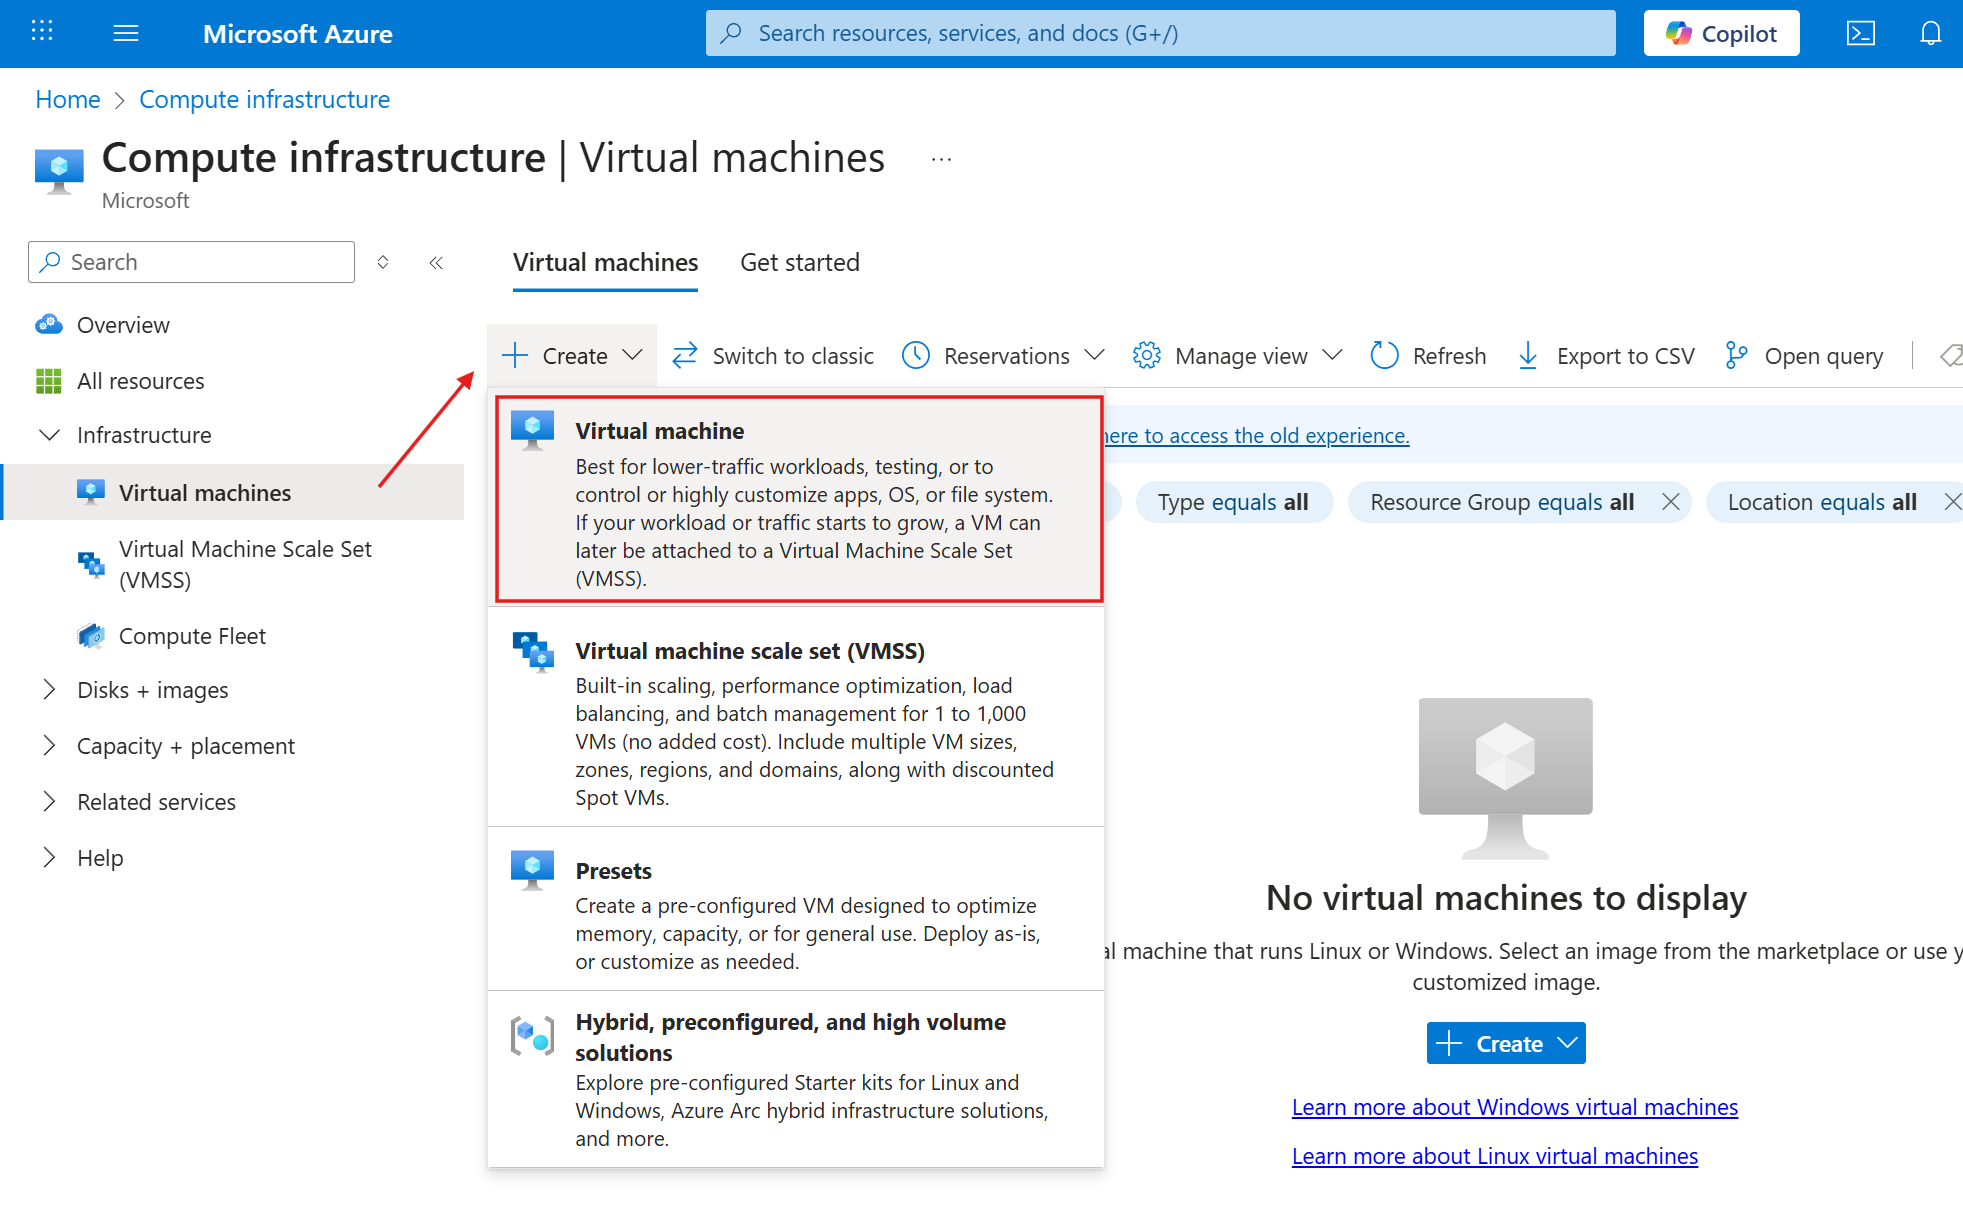
4. Create a Windows Server virtual machine
- Go to Virtual machines > Create.
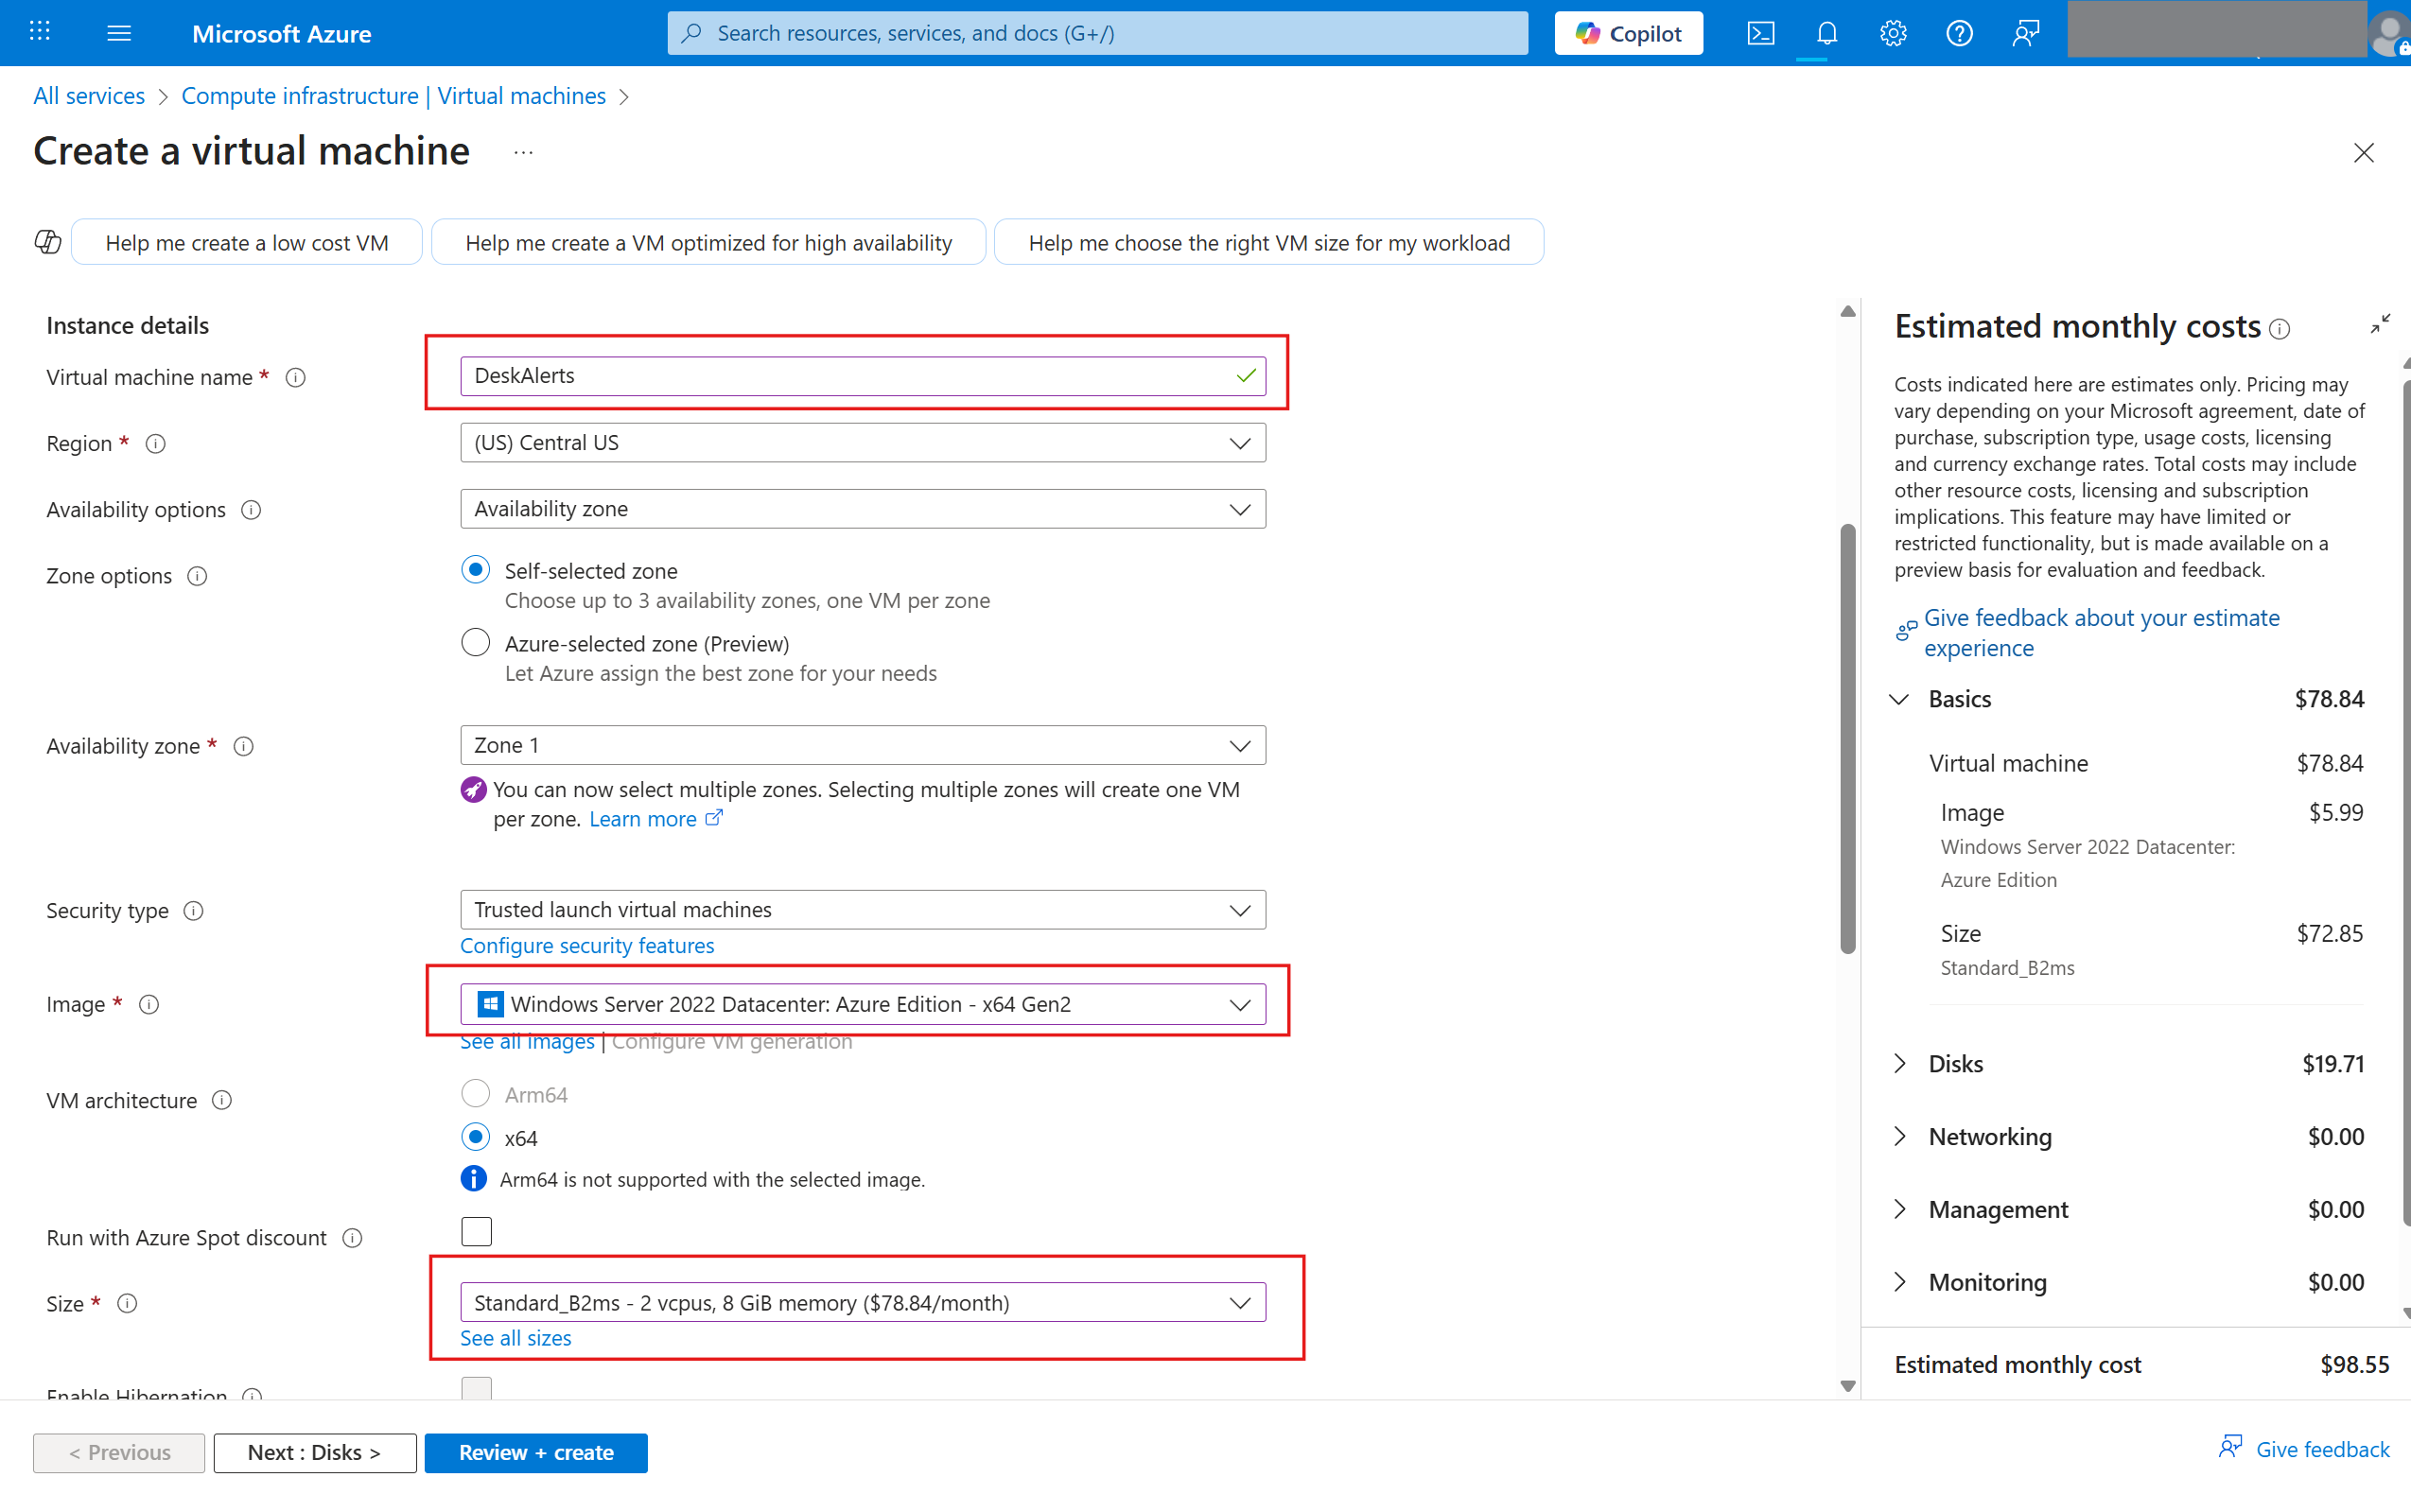
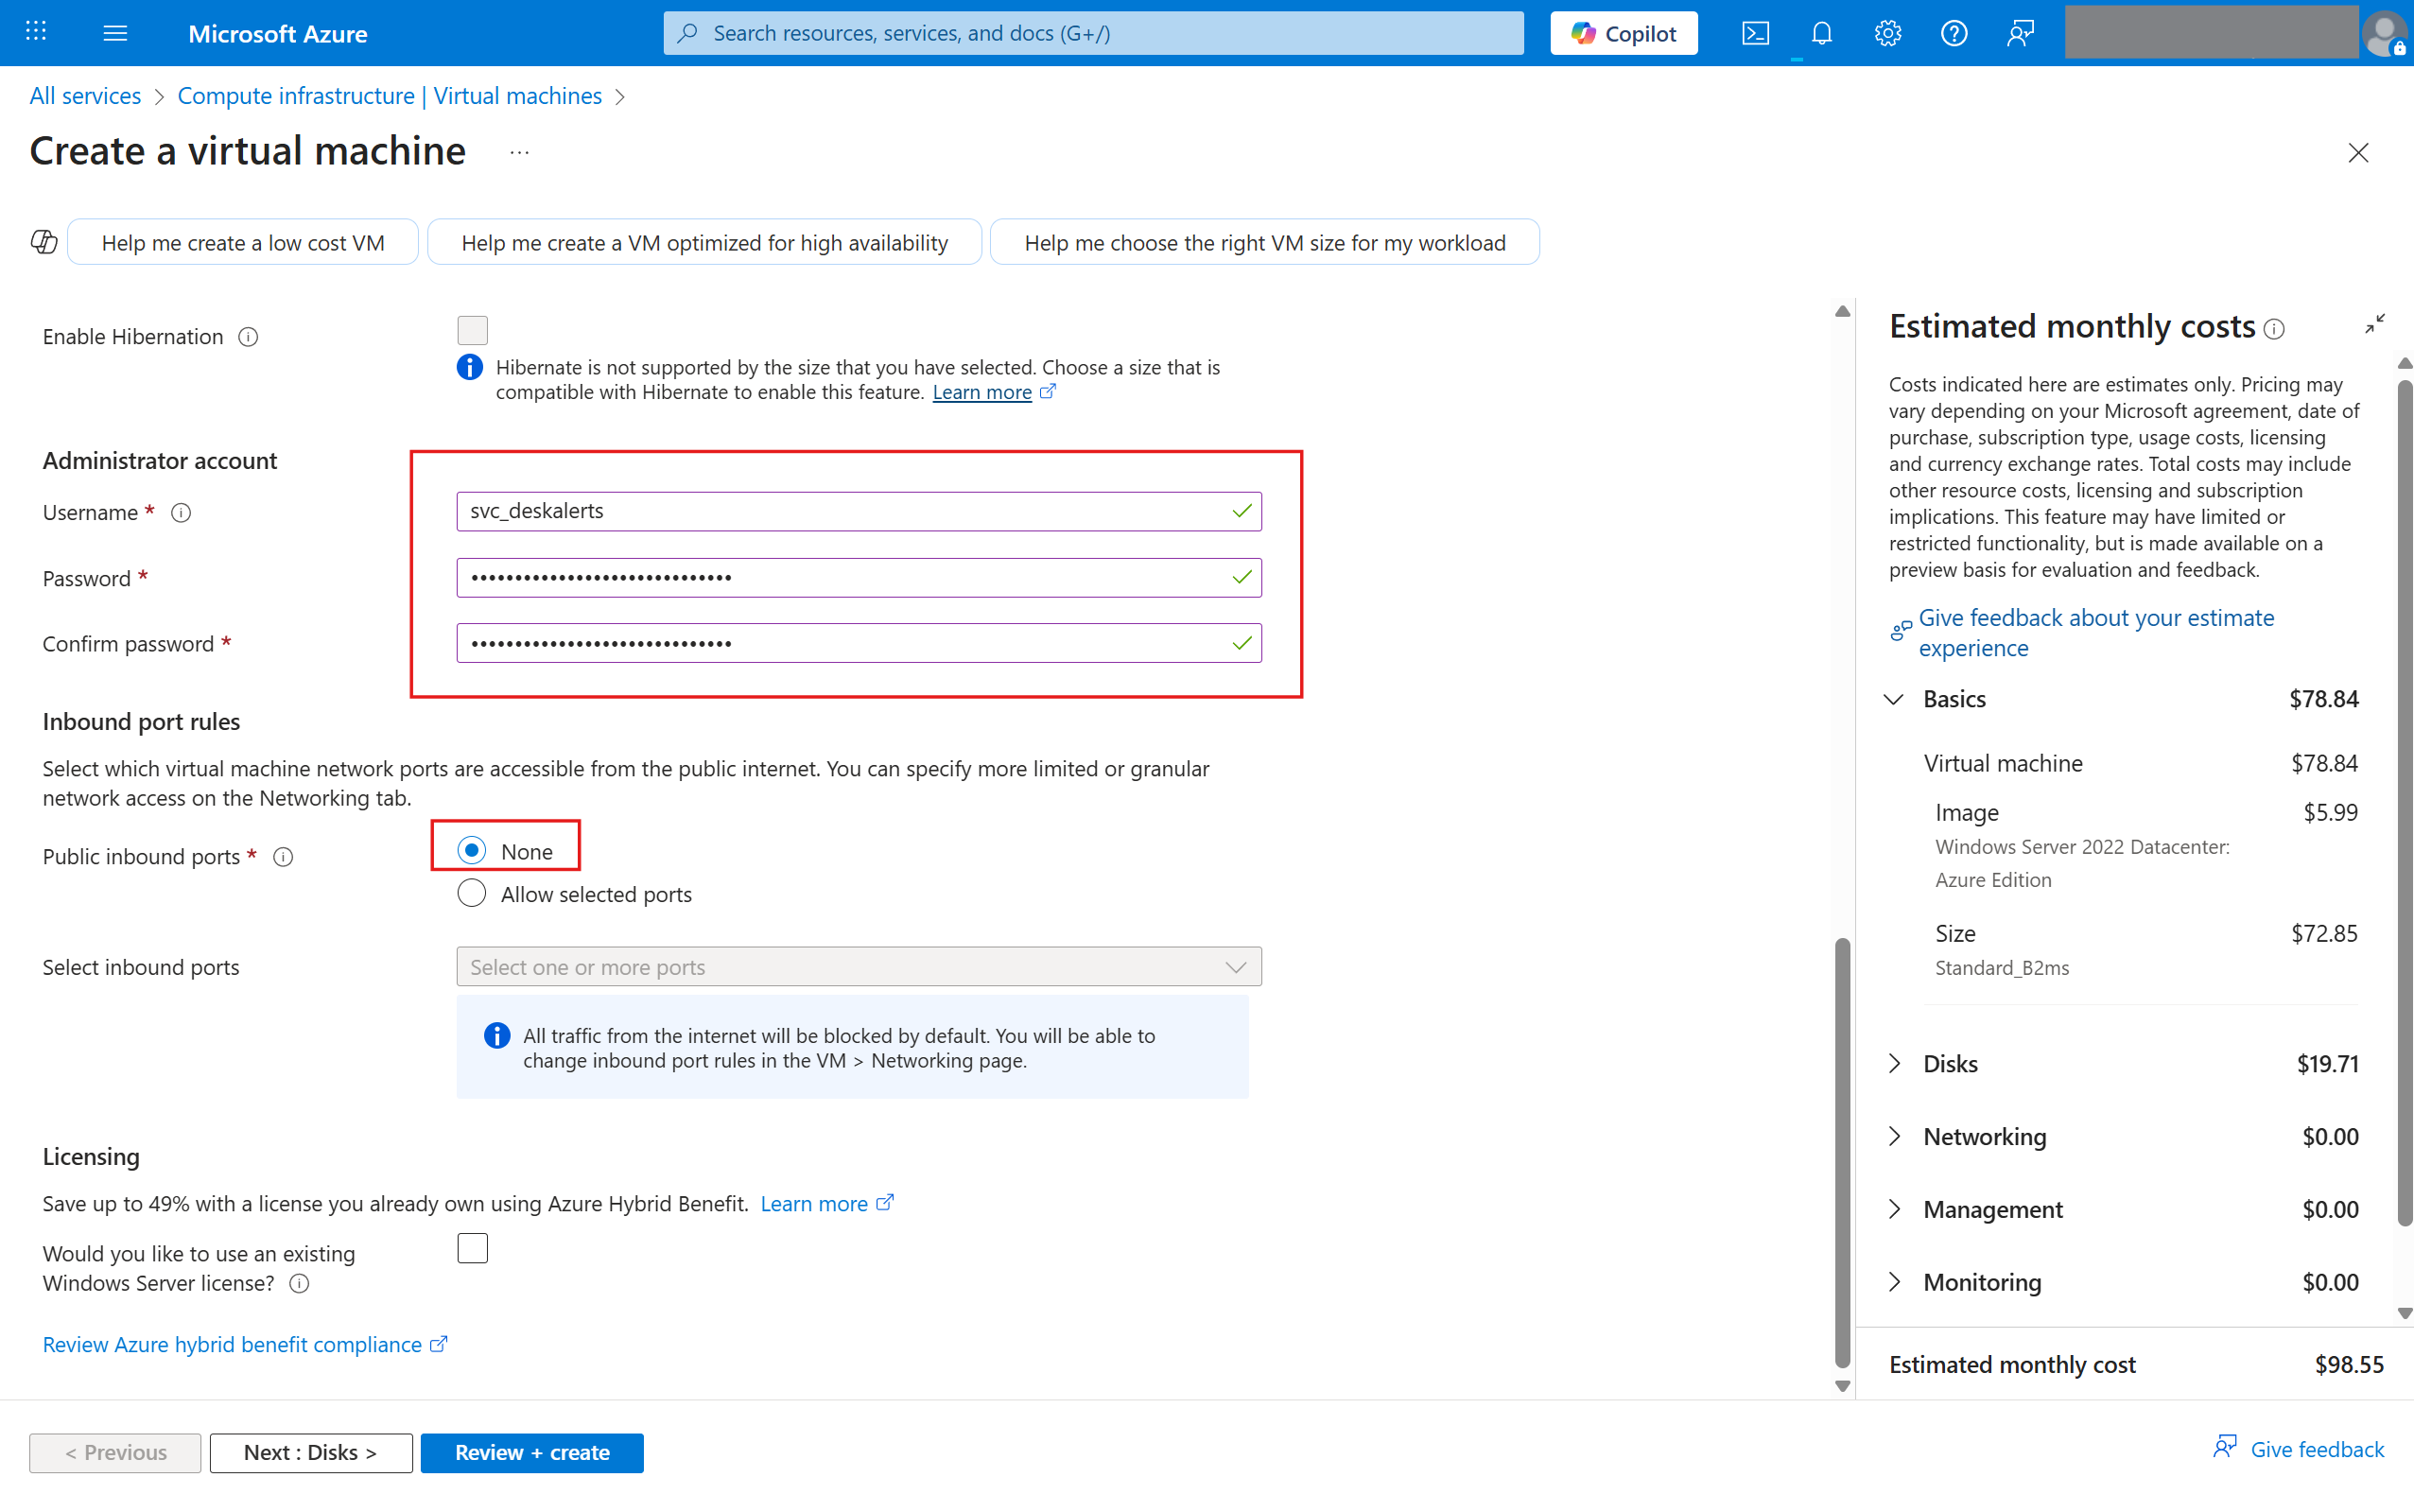
- Specify Basic parameters:
- Virtual machine name:
DeskAlerts - Image:
Windows Server 2022 Datacenter: Azure Edition - x64 Gen2(or any other supported by DeskAlerts) - Size:
Standard_B2ms - 2 vcpus, 8 GiB memory(Adjust according to the system requirements) - Administrator account:
- Username:
svc_deskalerts(or any other non-reserved name) - Password: specify a strong password
- Username:
- Public inbound ports:
None
- Virtual machine name:
You can adjust the system Disk size in the Disks tab according to your requirements, or leave it as default
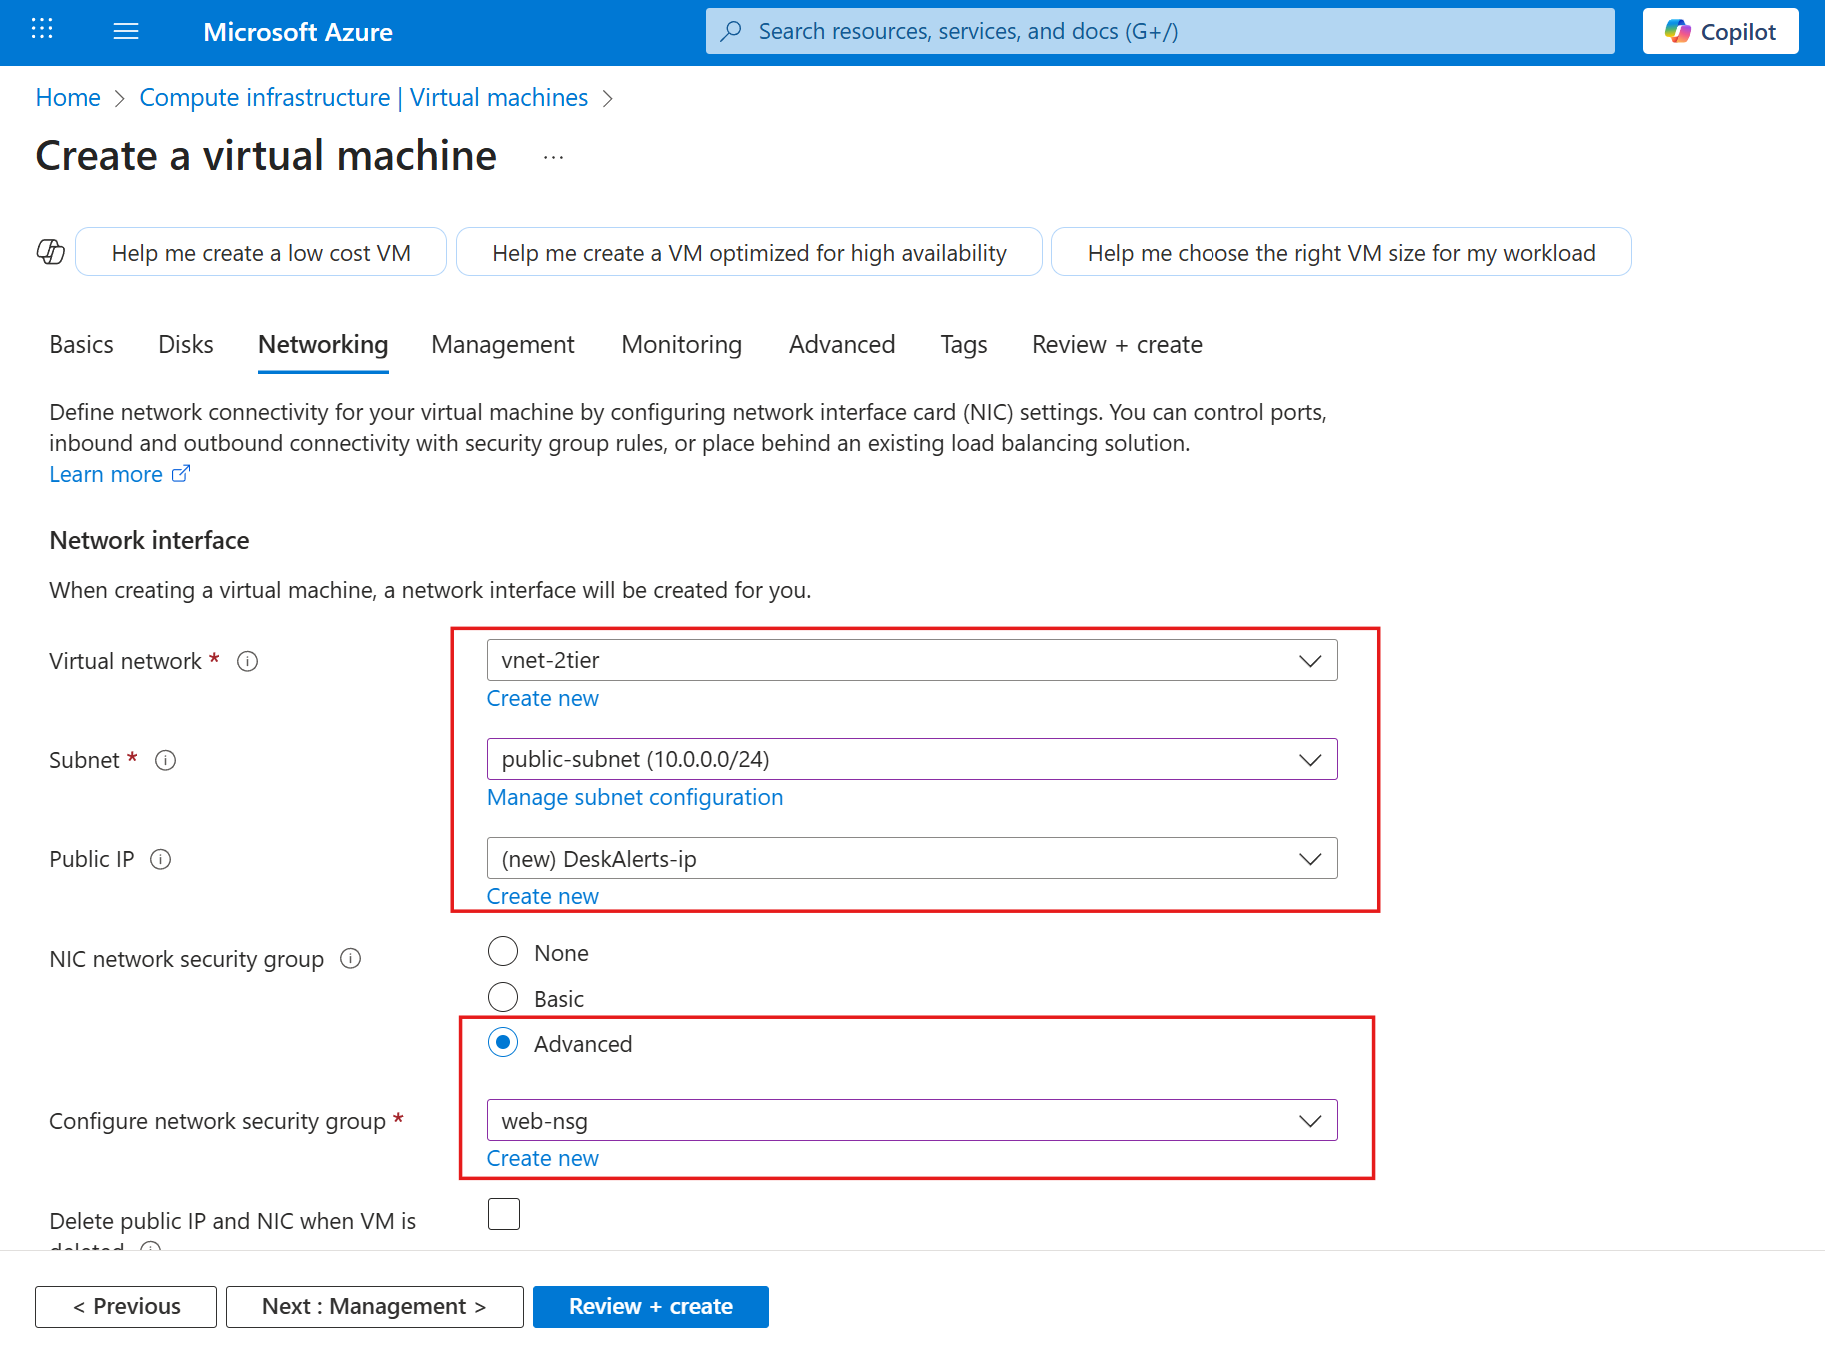
- Specify Network parameters:
- Virtual network:
vnet-2tier - Subnet:
public-subnet (10.0.0.0/24) - NIC network security group:
Advanced - Configure network security group:
web-nsg
- Virtual network:
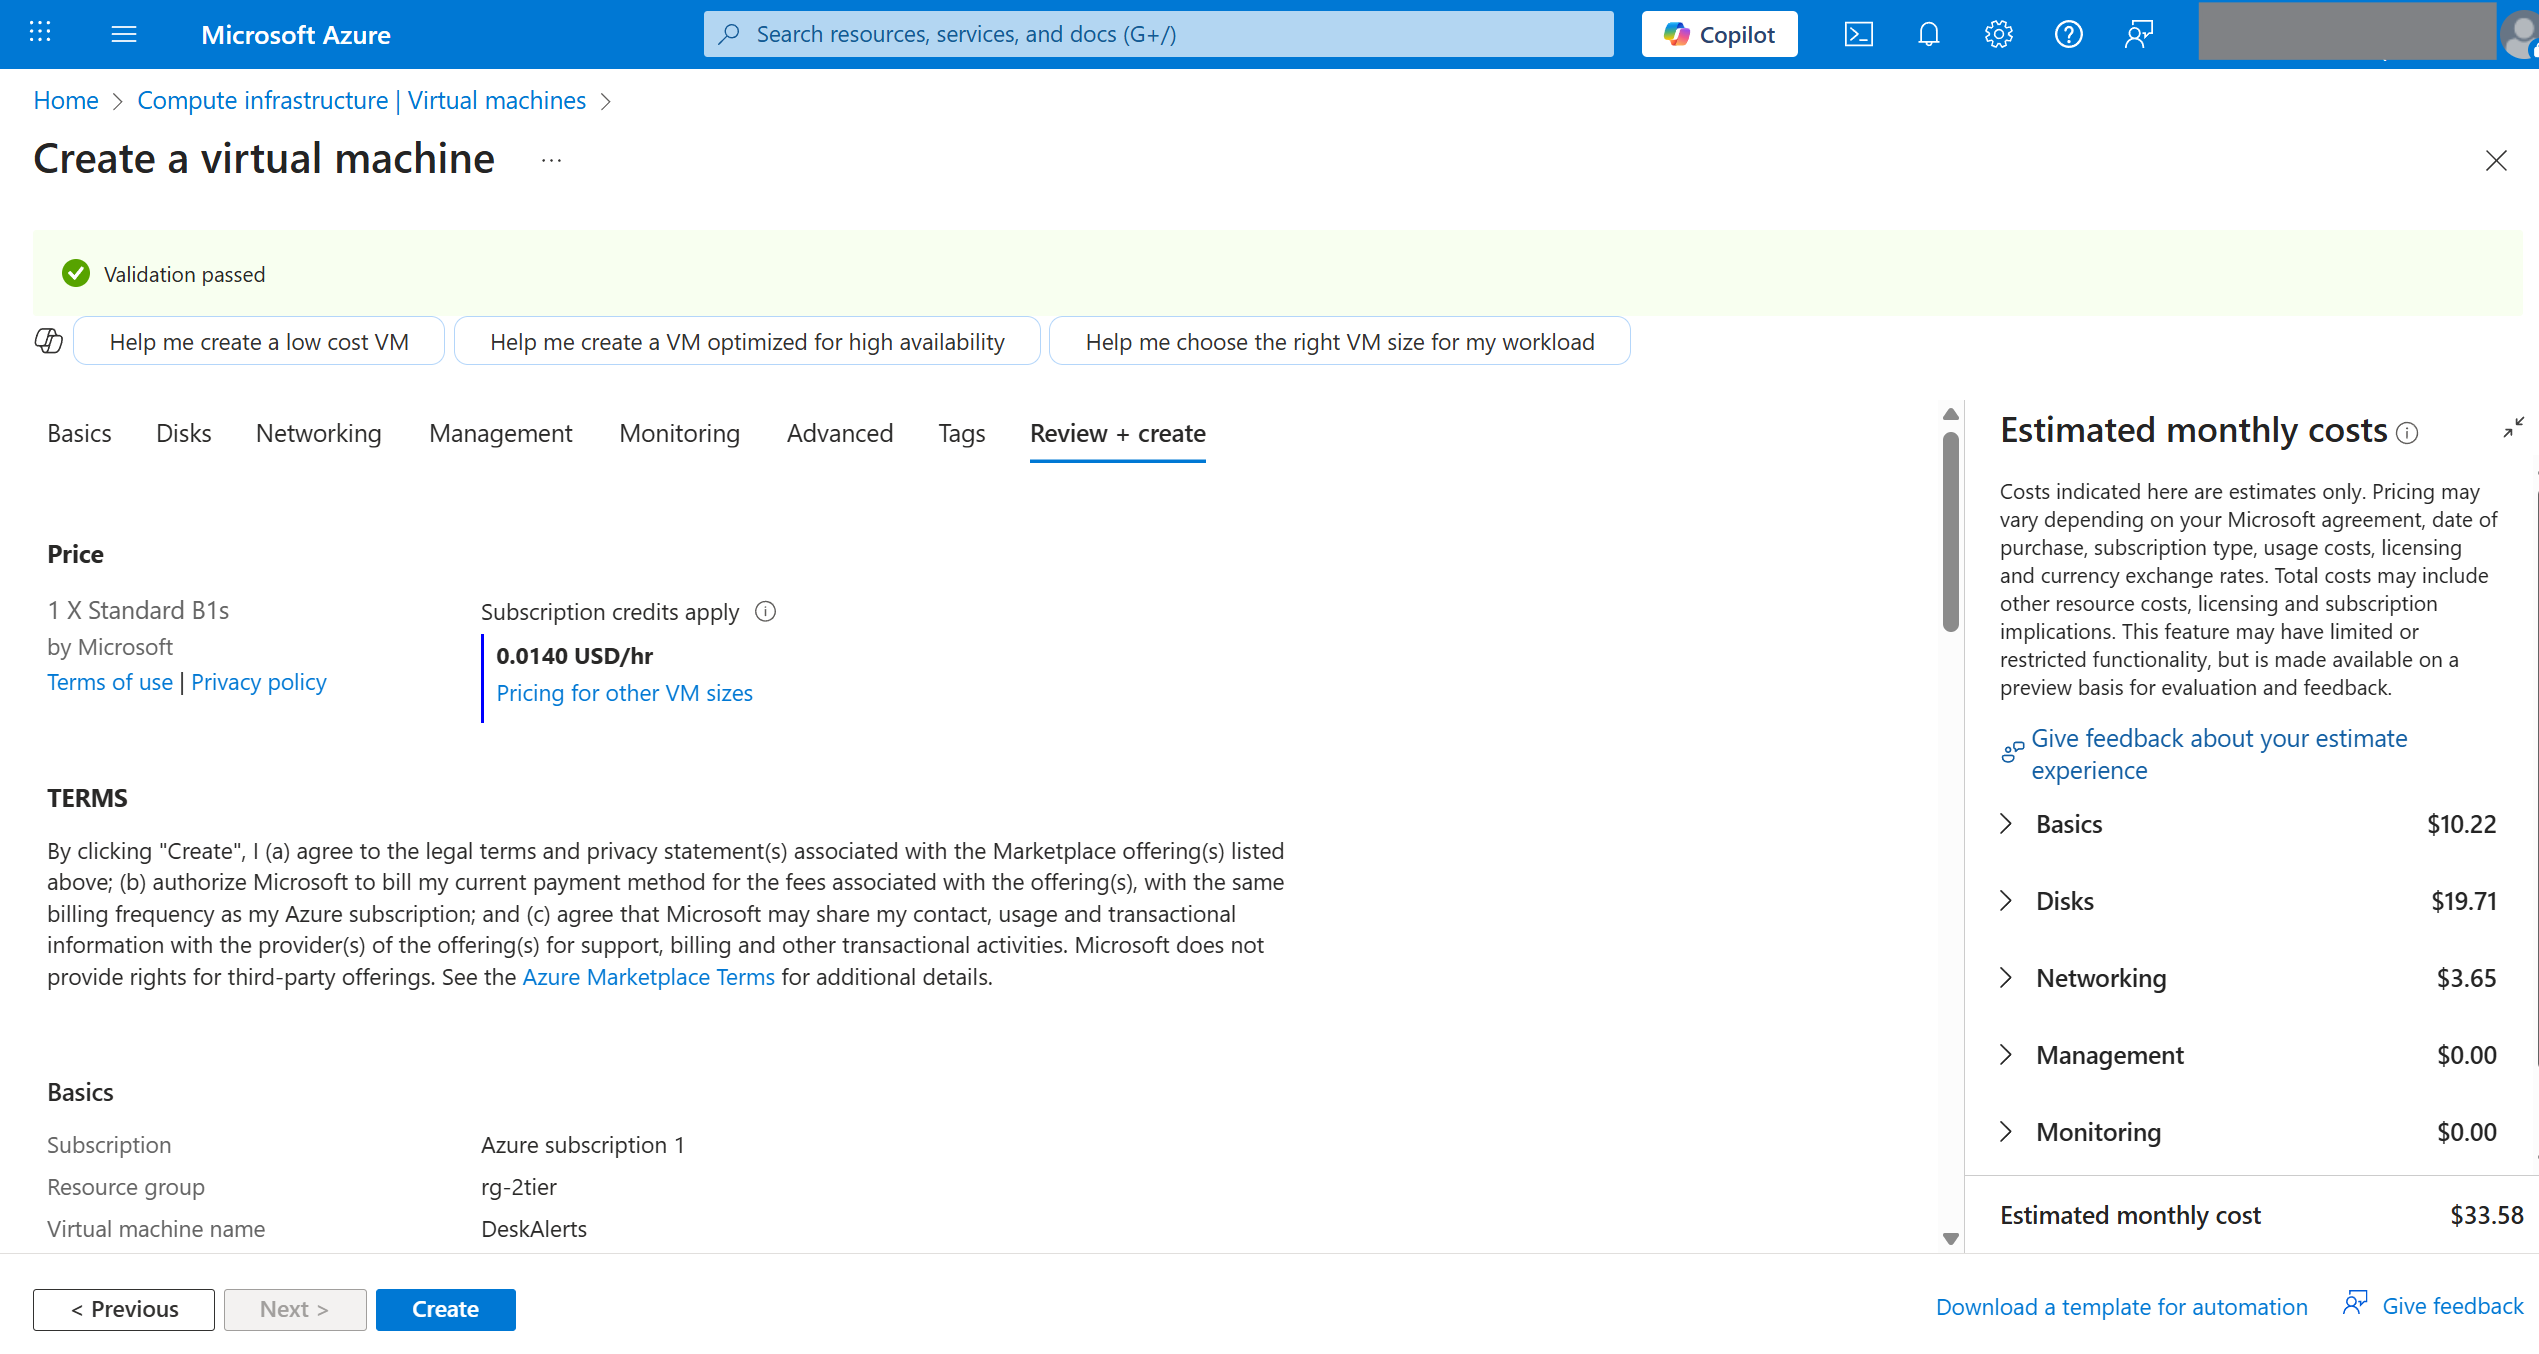
- Click Review + create > Create
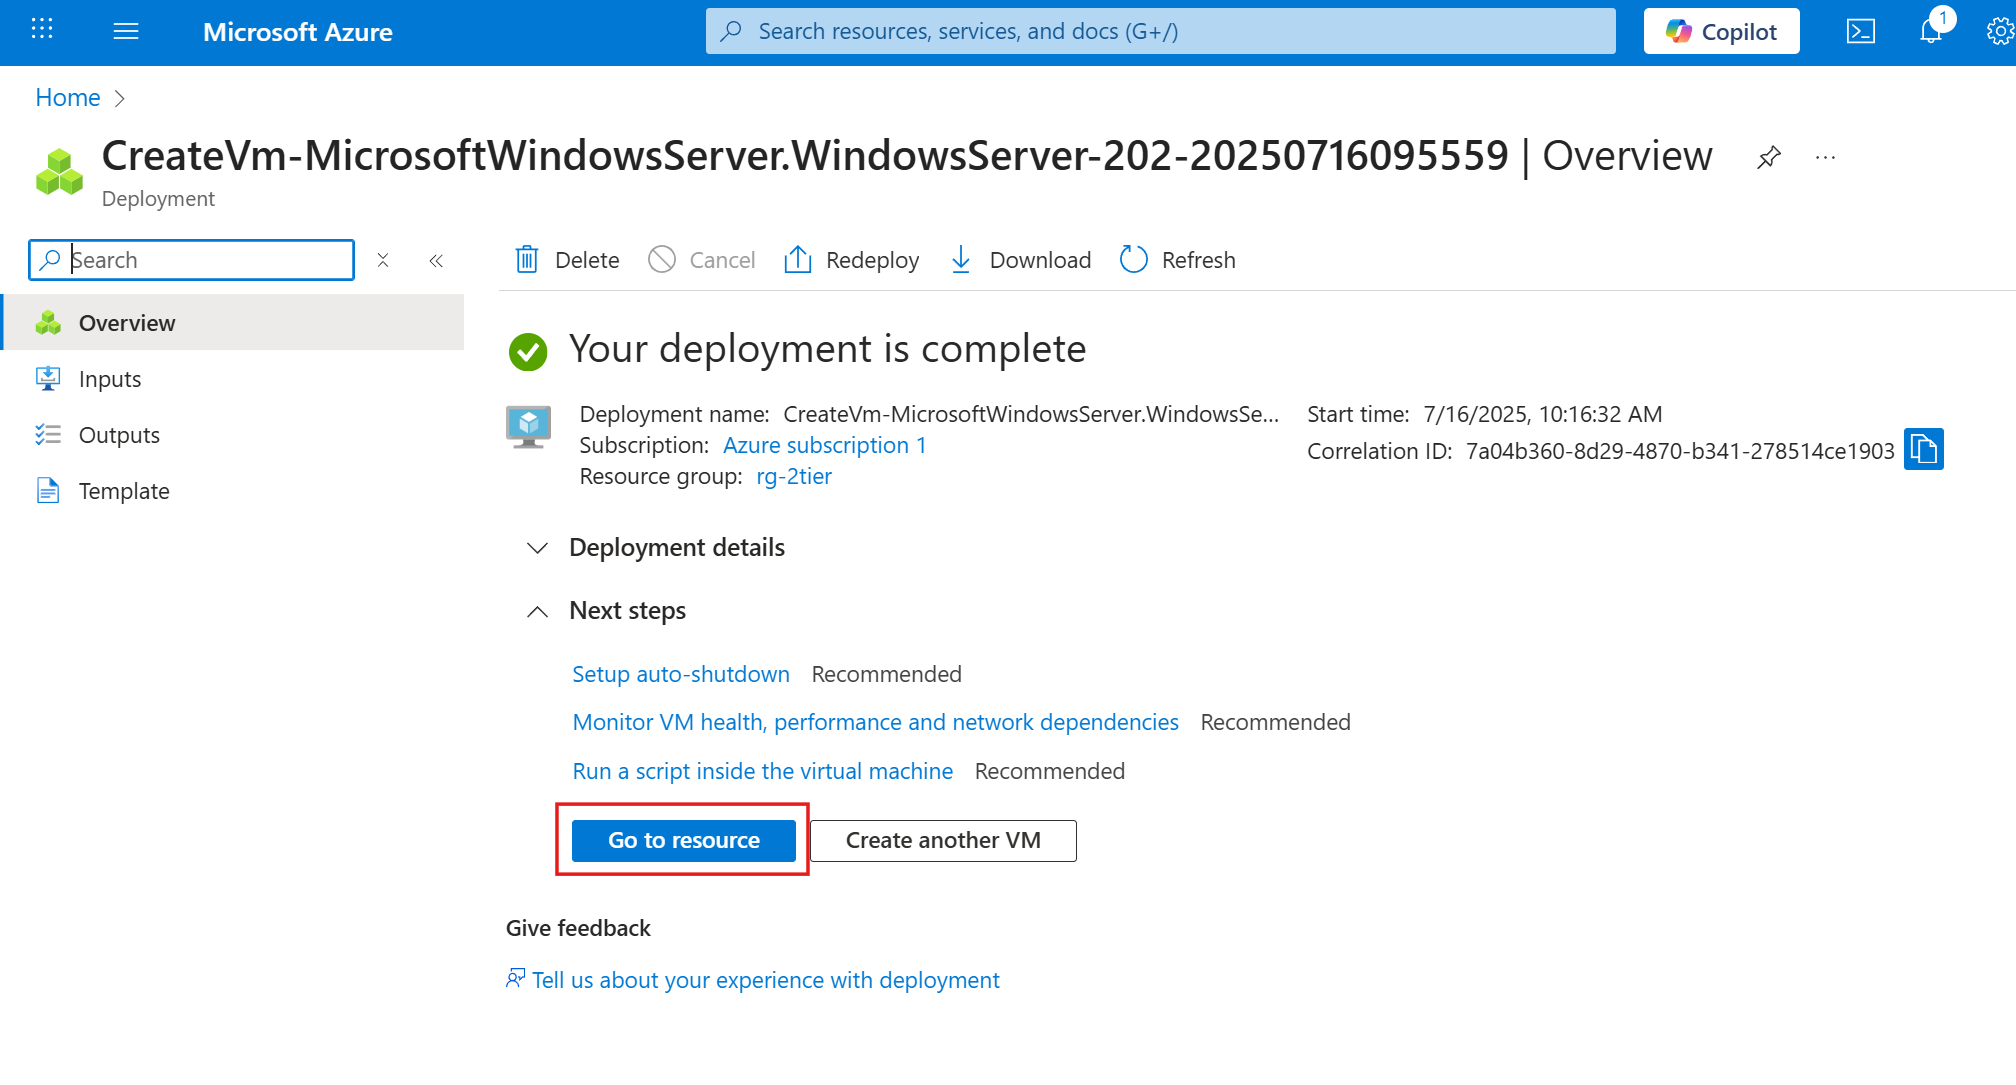
When deployment finishes and click Go to resource
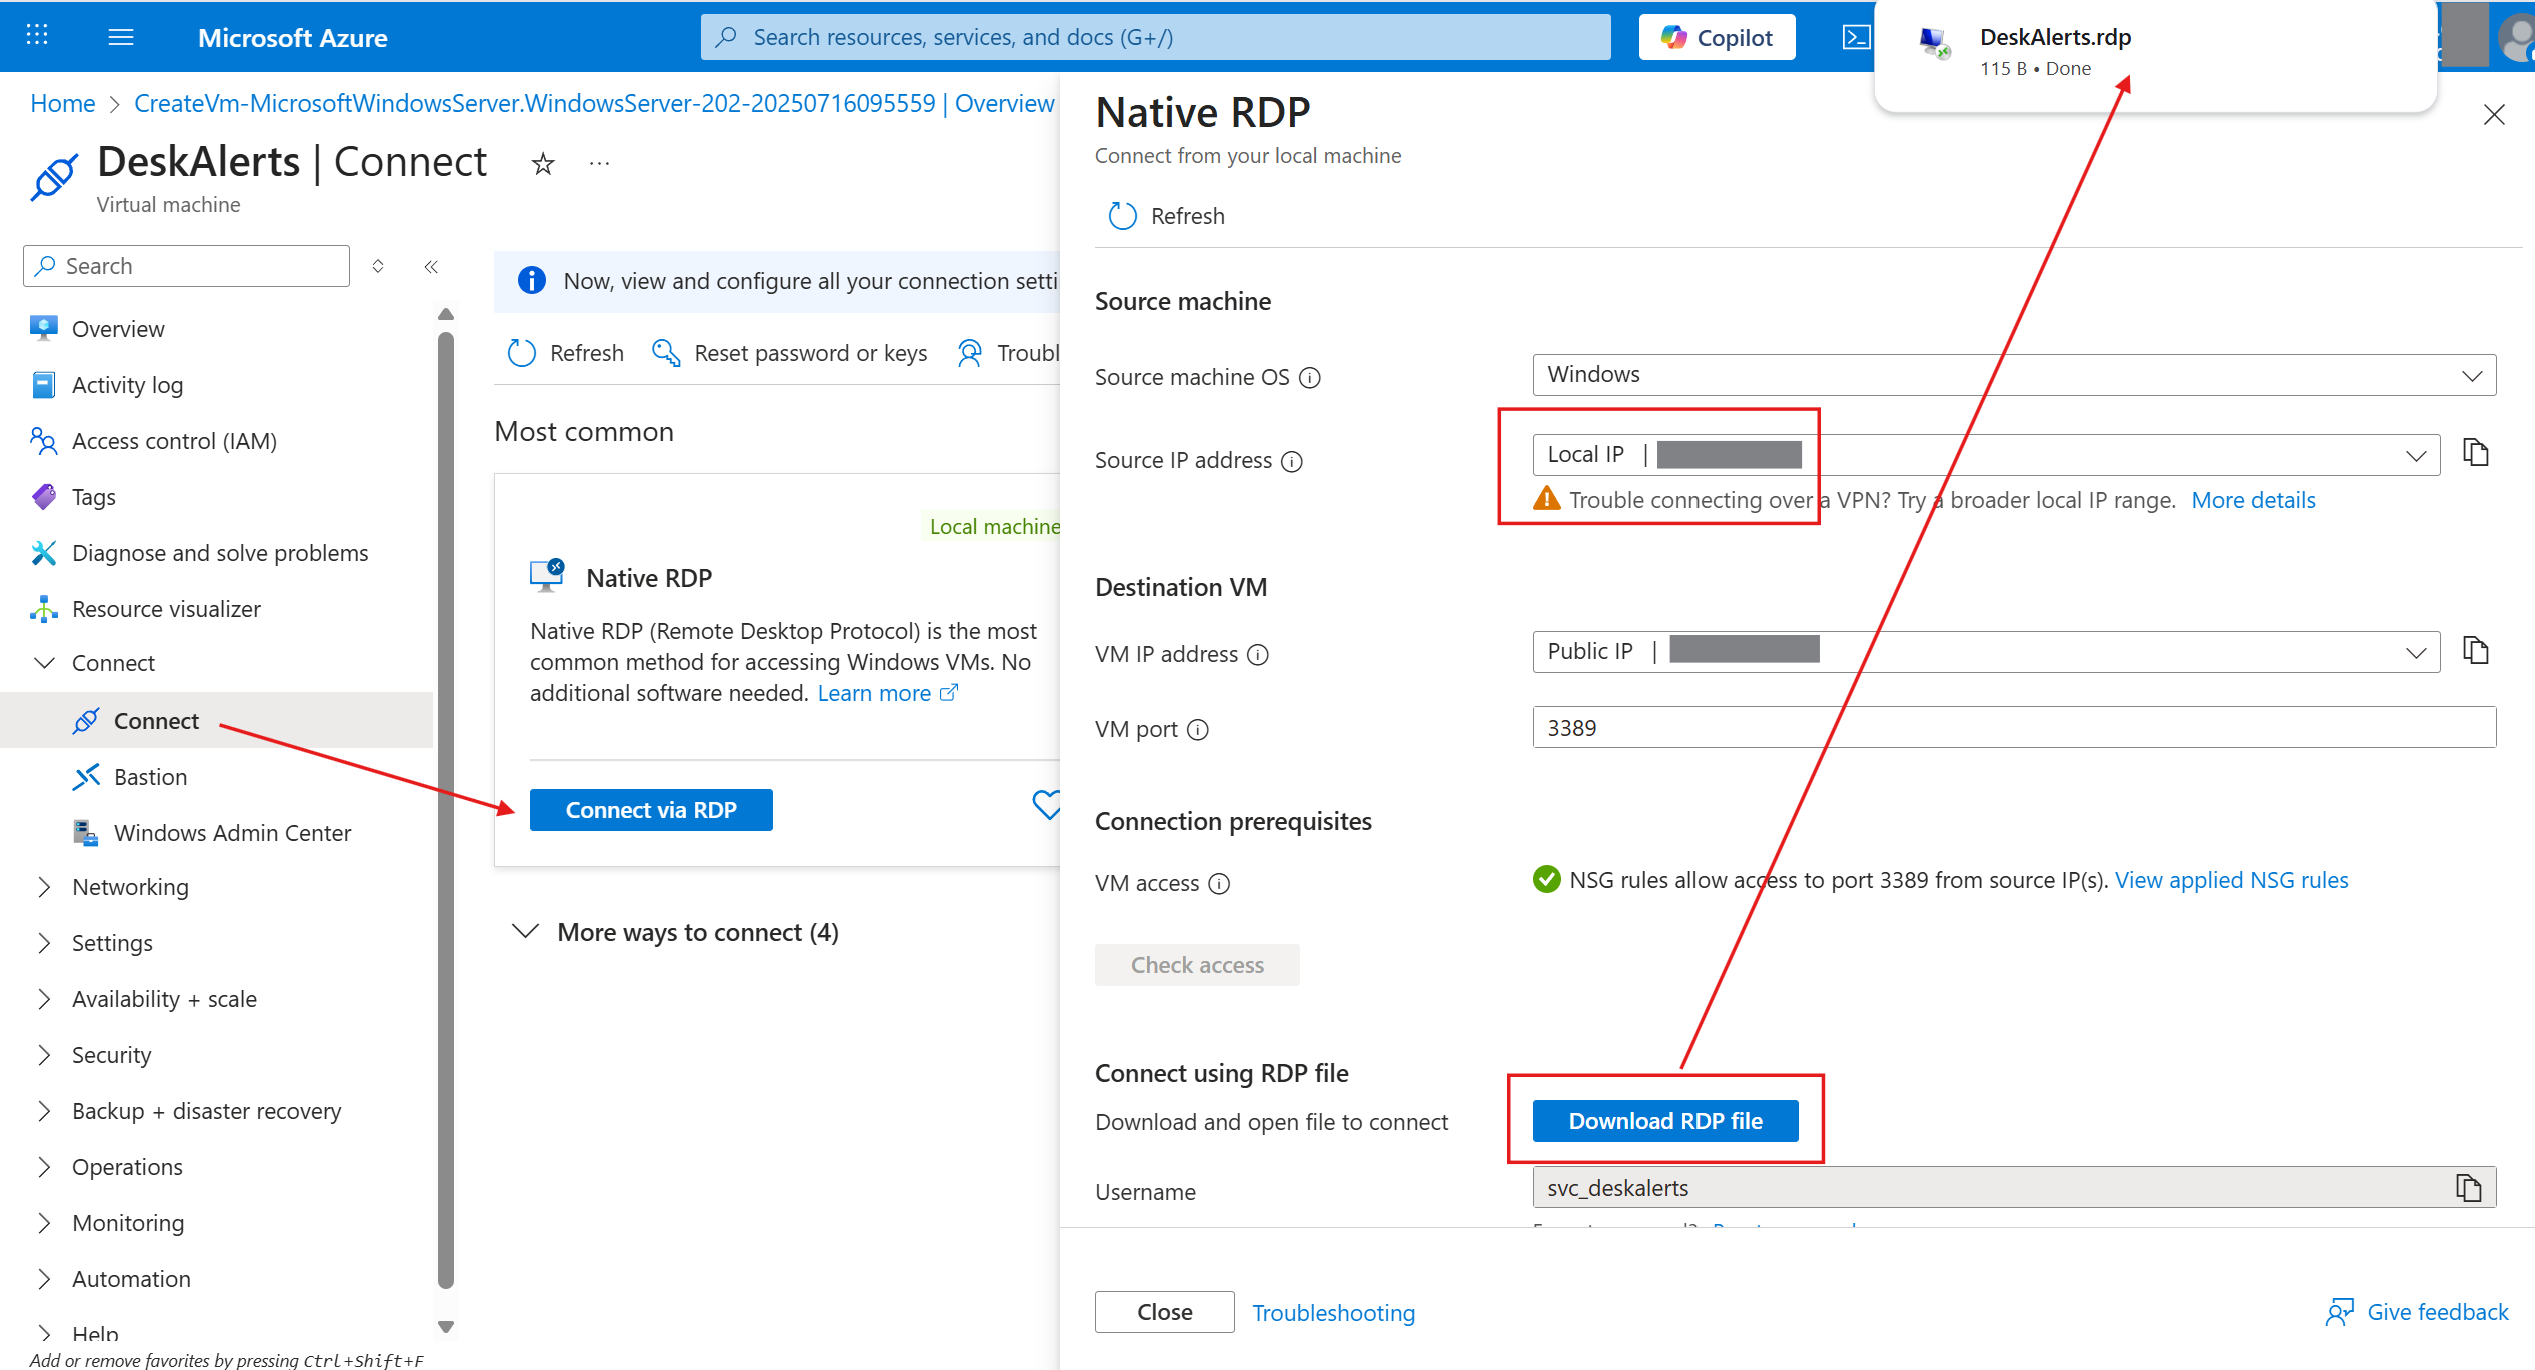
Navigate to VM > Connect > Connect > Connect via RDP >
- Source machine OS:
Windows(where you are connecting from) - Source IP address:
Local IP - Click
Check accessto verify VM accessibility, should return✅ NSG rules allow access to port 3389 from source IP(s) - Click
Download RDP file - Open RDP file and connect
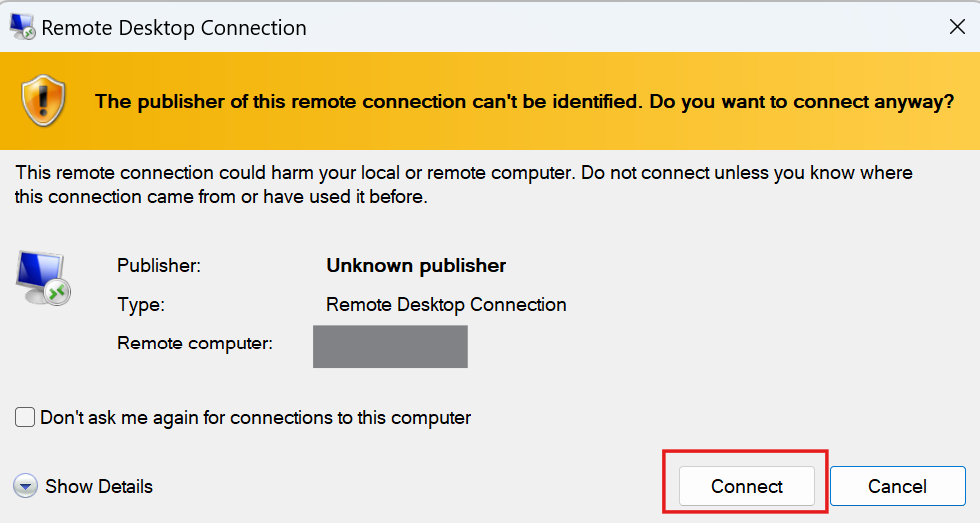 | 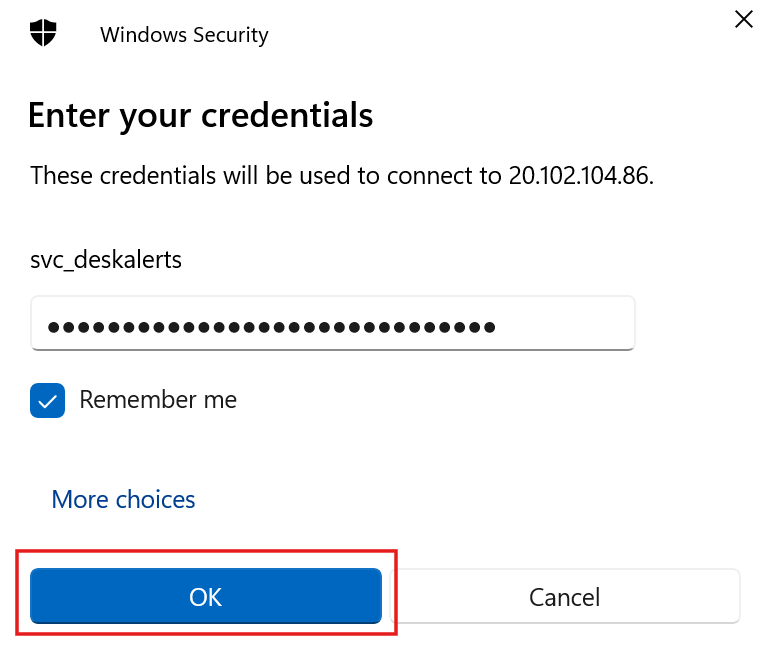 |
You should be able to see the desktop of the web server.
While you are on the web server, download and install SQL Server Management Studio (SSMS)
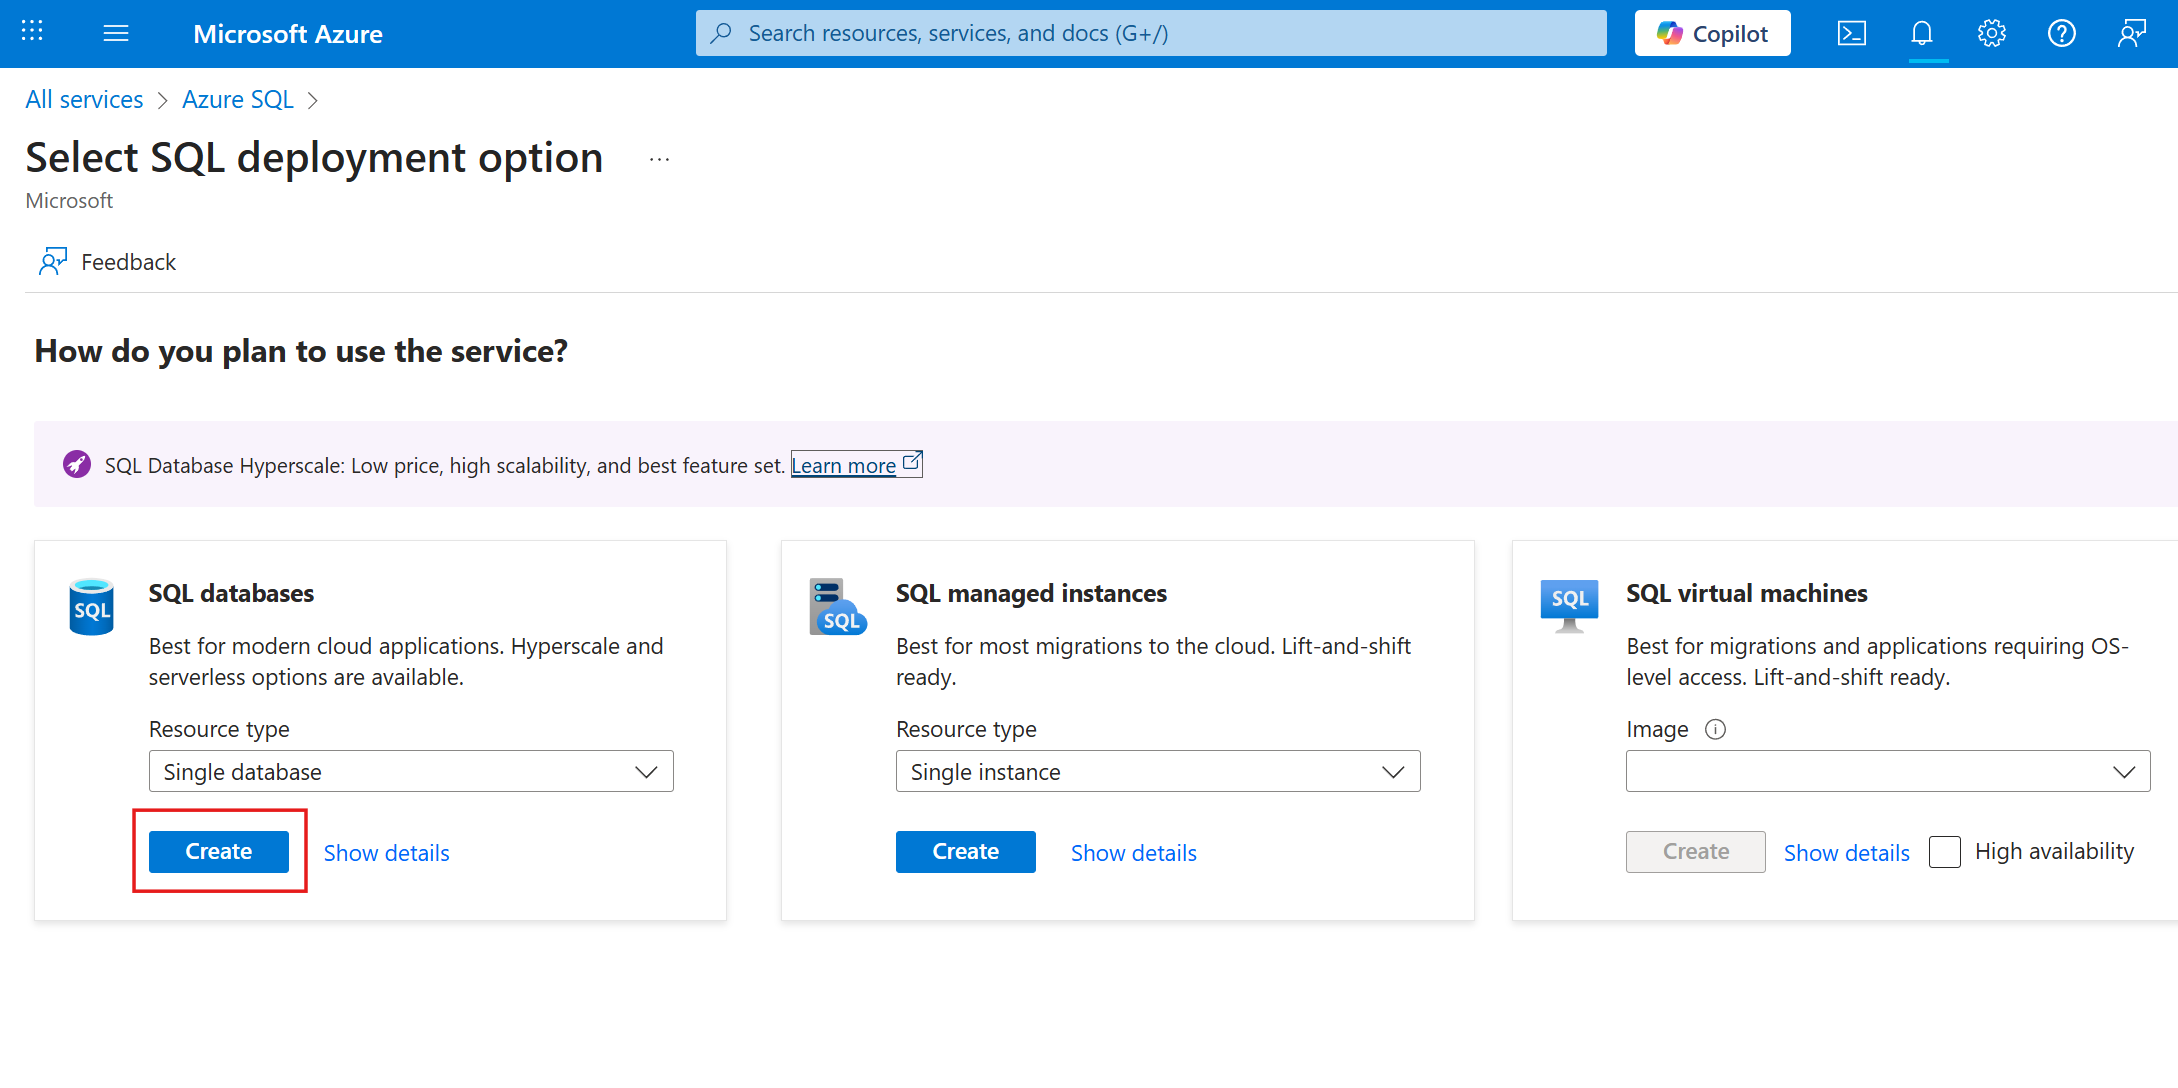
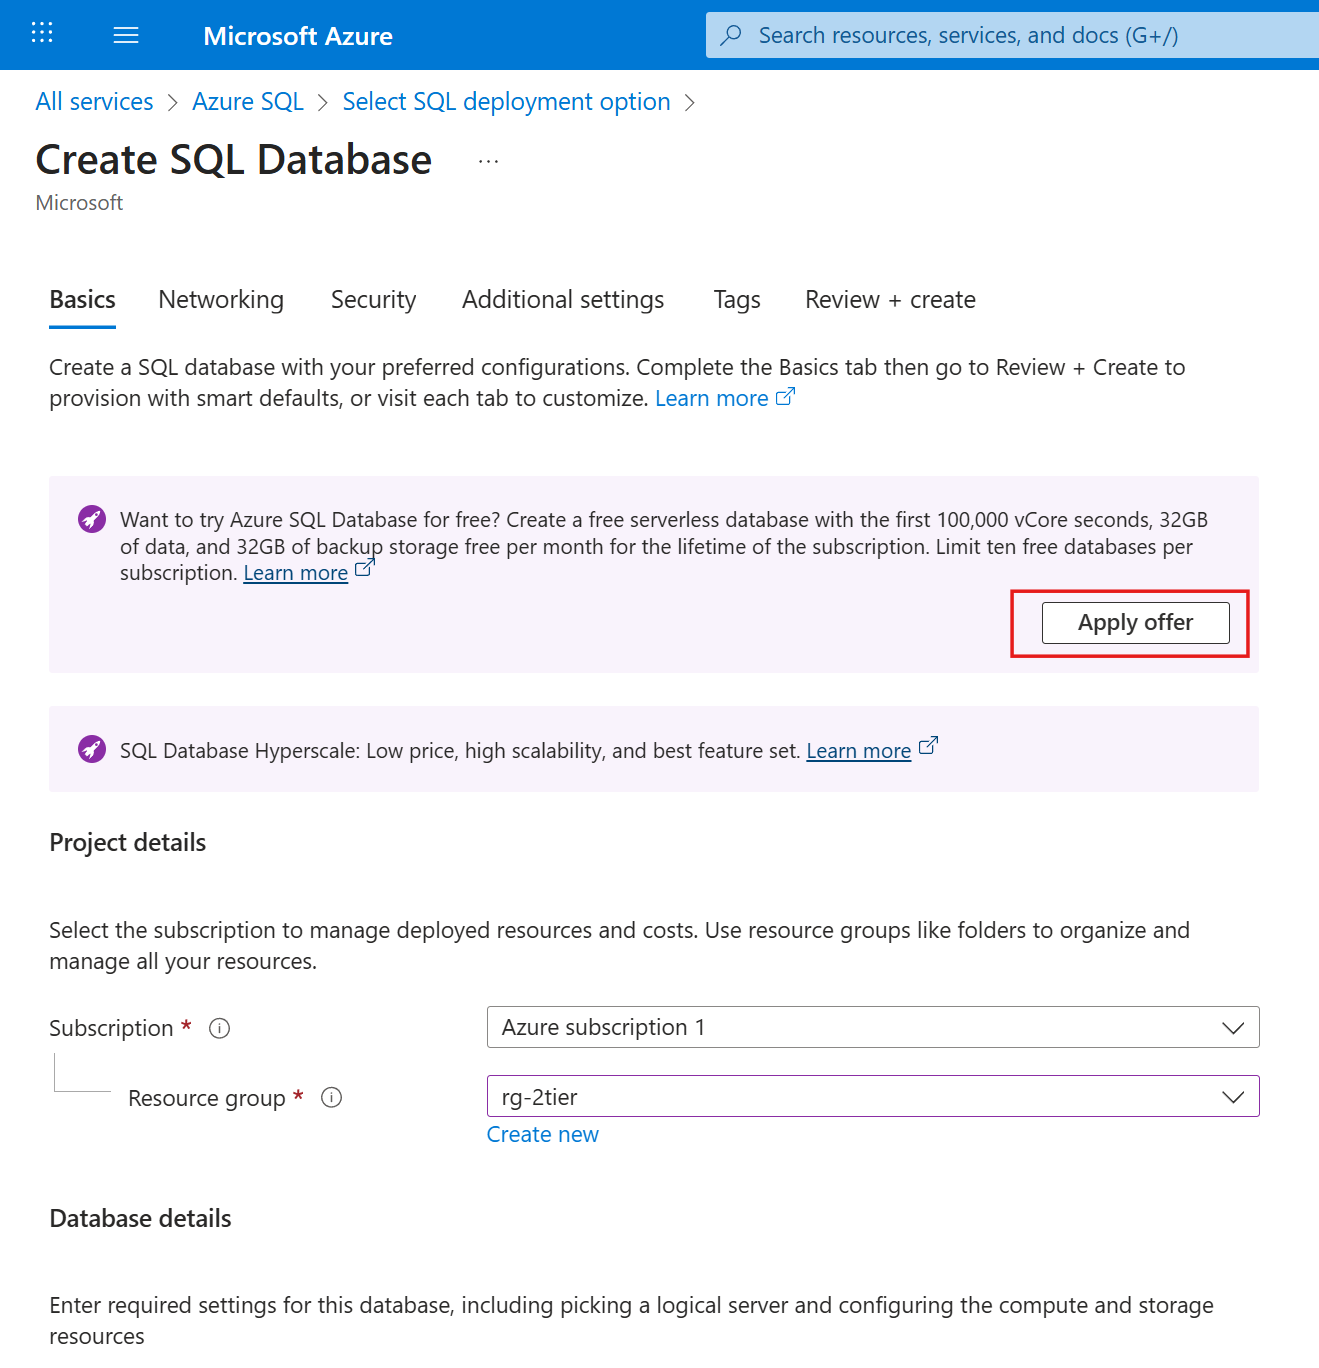
5. Create Azure SQL Database (PaaS)
- Go to Azure SQL > SQL database > Create.
If you see "Apply offer" button, you can press it to save some costs. Restrictions apply, more info https://learn.microsoft.com/en-us/azure/azure-sql/database/free-offer
Specify subscription and resource group
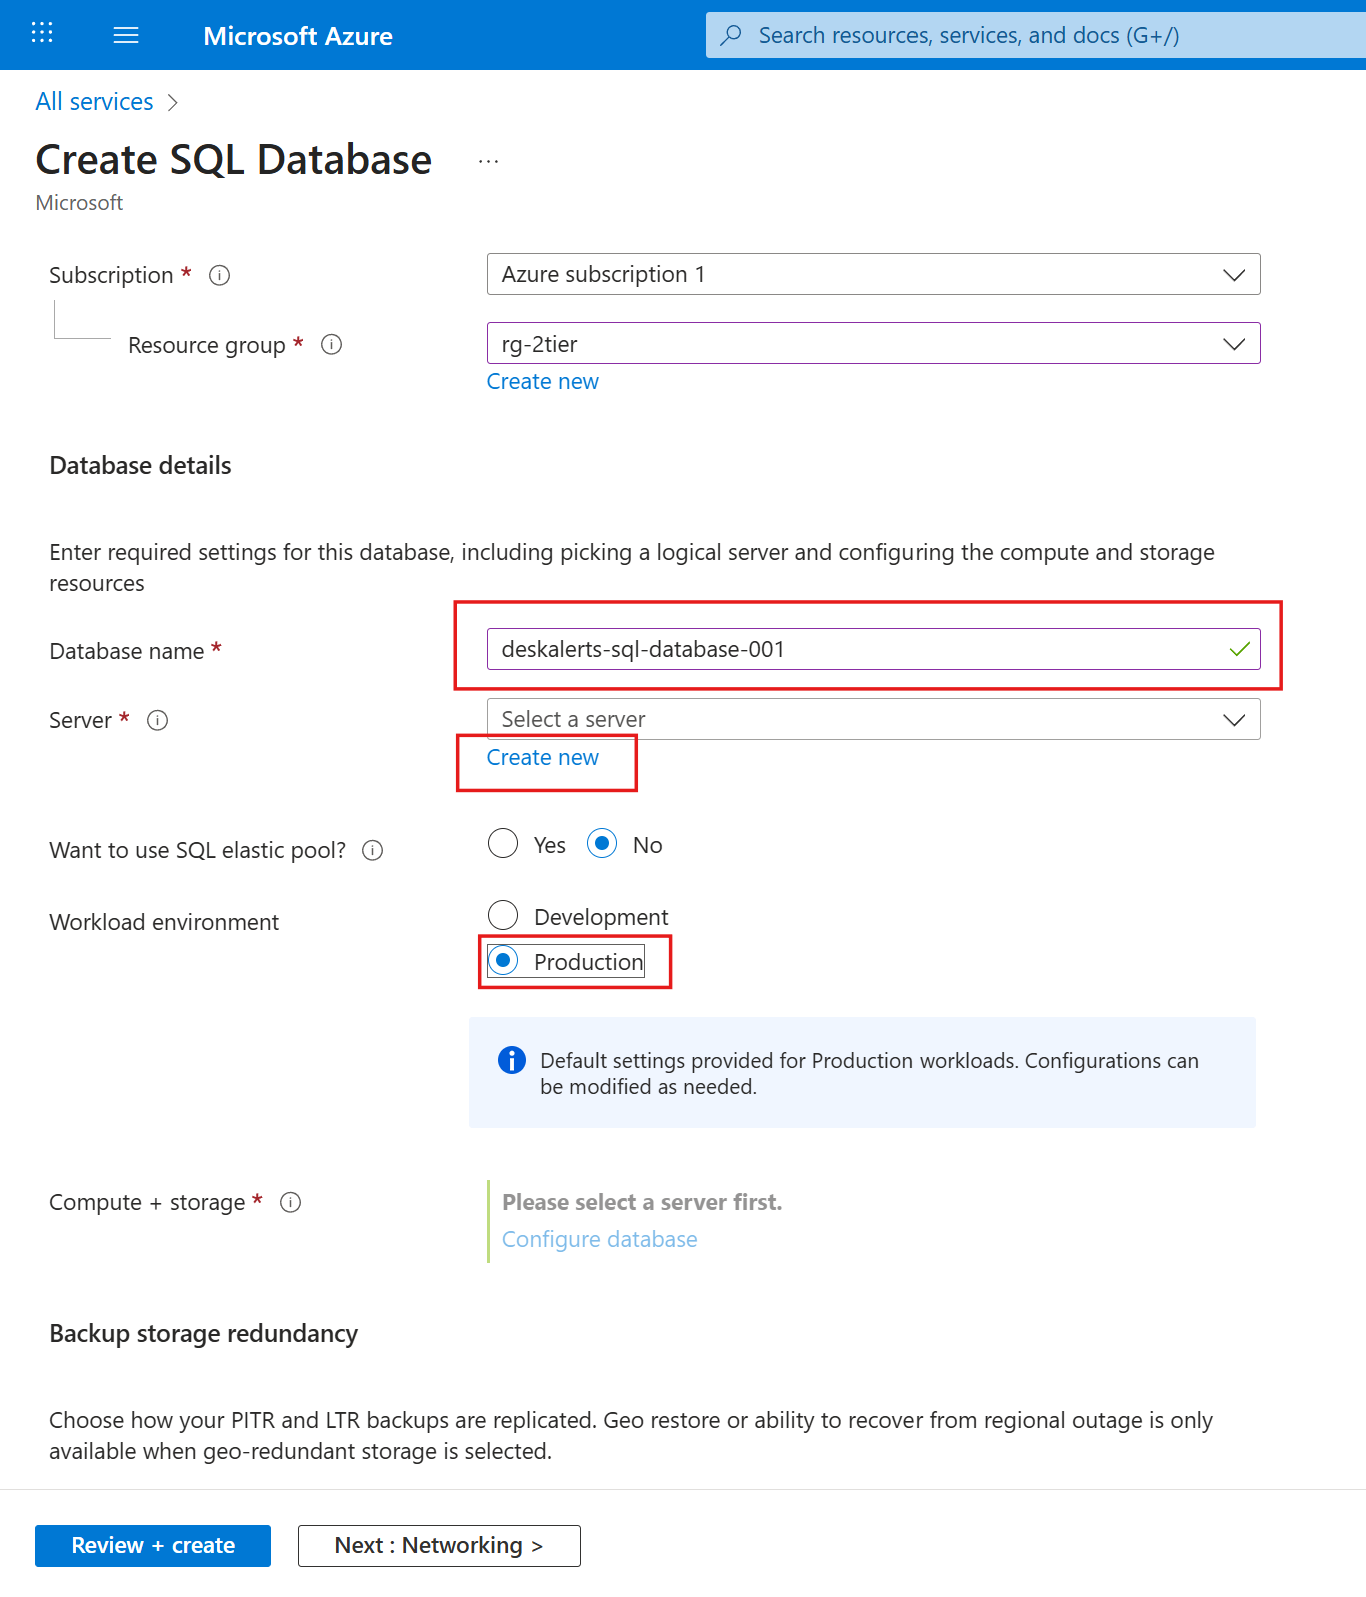
Specify settings:
- Database name: Specify a globally unique database name
- Workload environment:
Production(modify for your requirements)
Under Server Click Create new button.
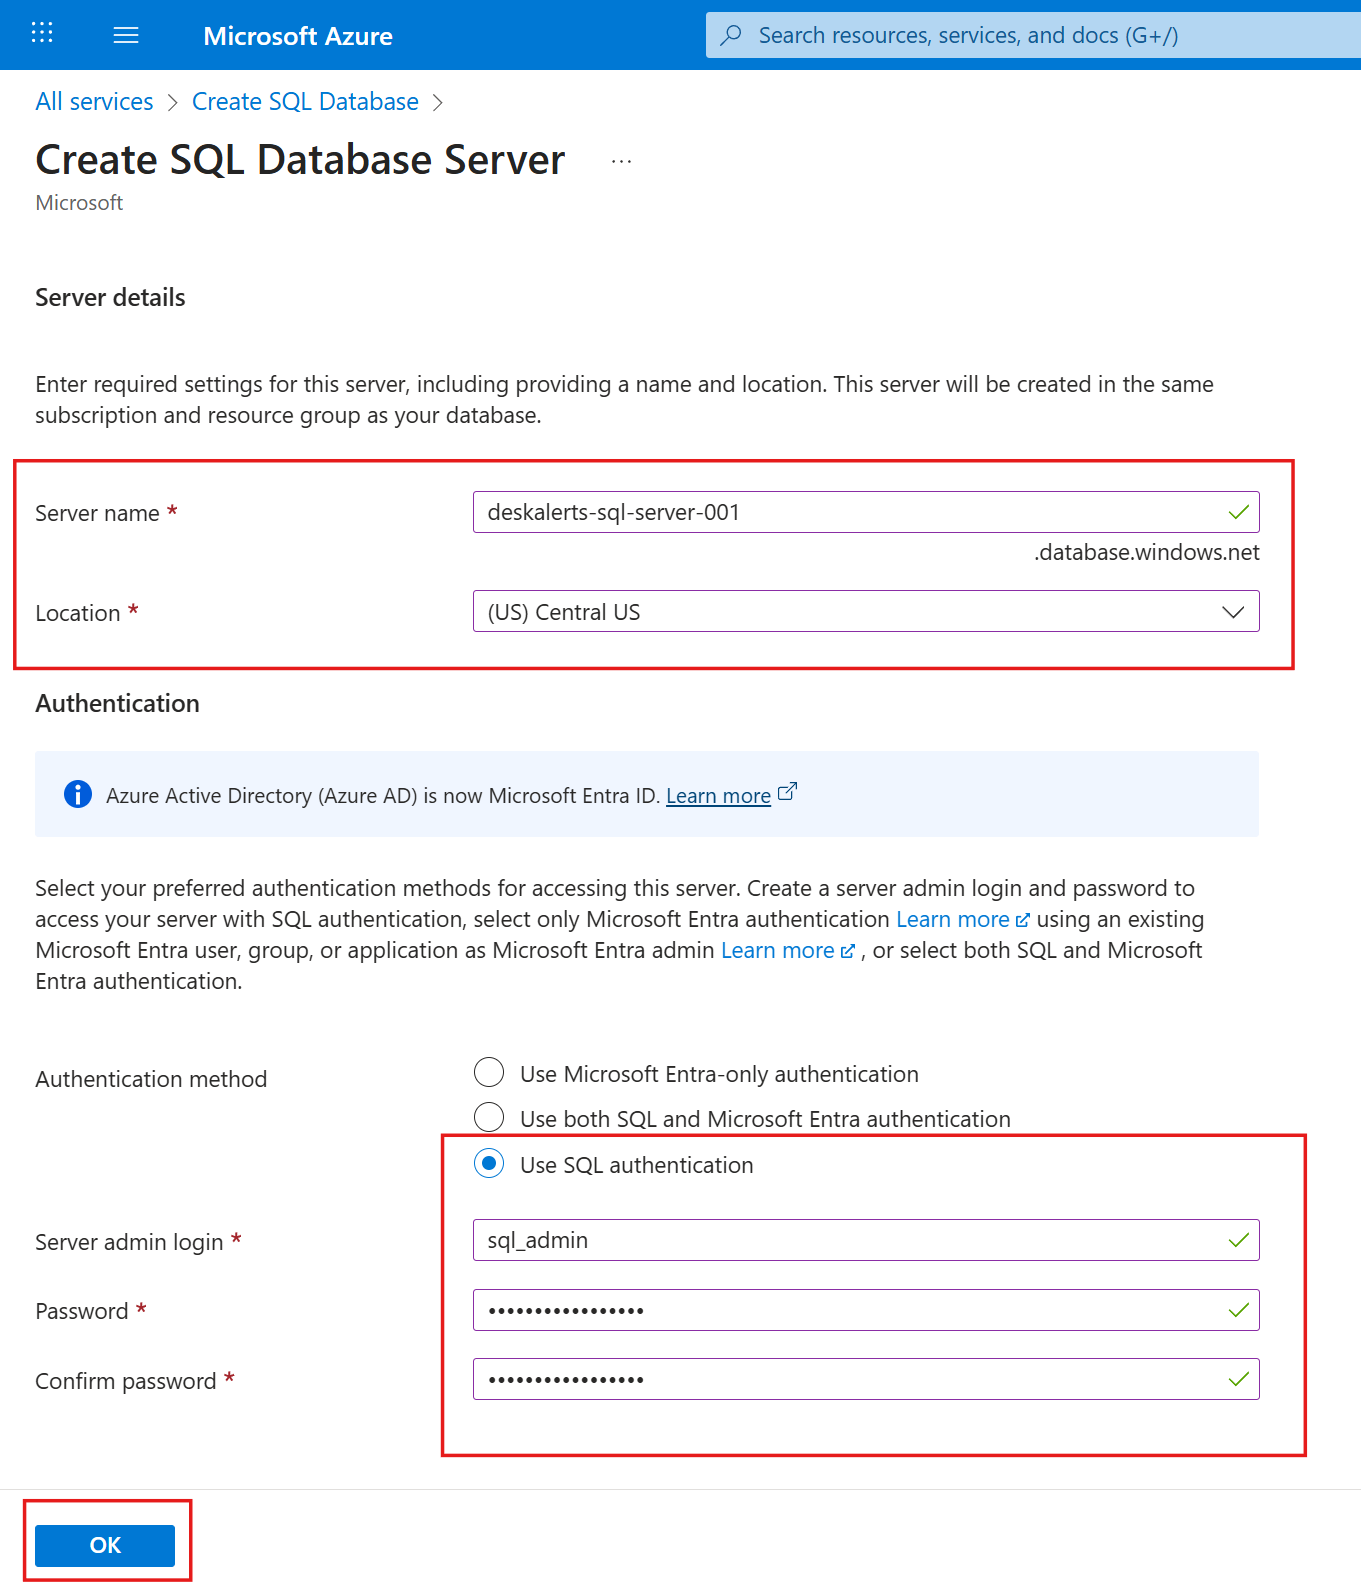
Specify settings:
- Server name: globally unique server name
- Location: same region as other resources
- Authentication method:
Use SQL authentication
Specify SQL admin credentials and click Ok button
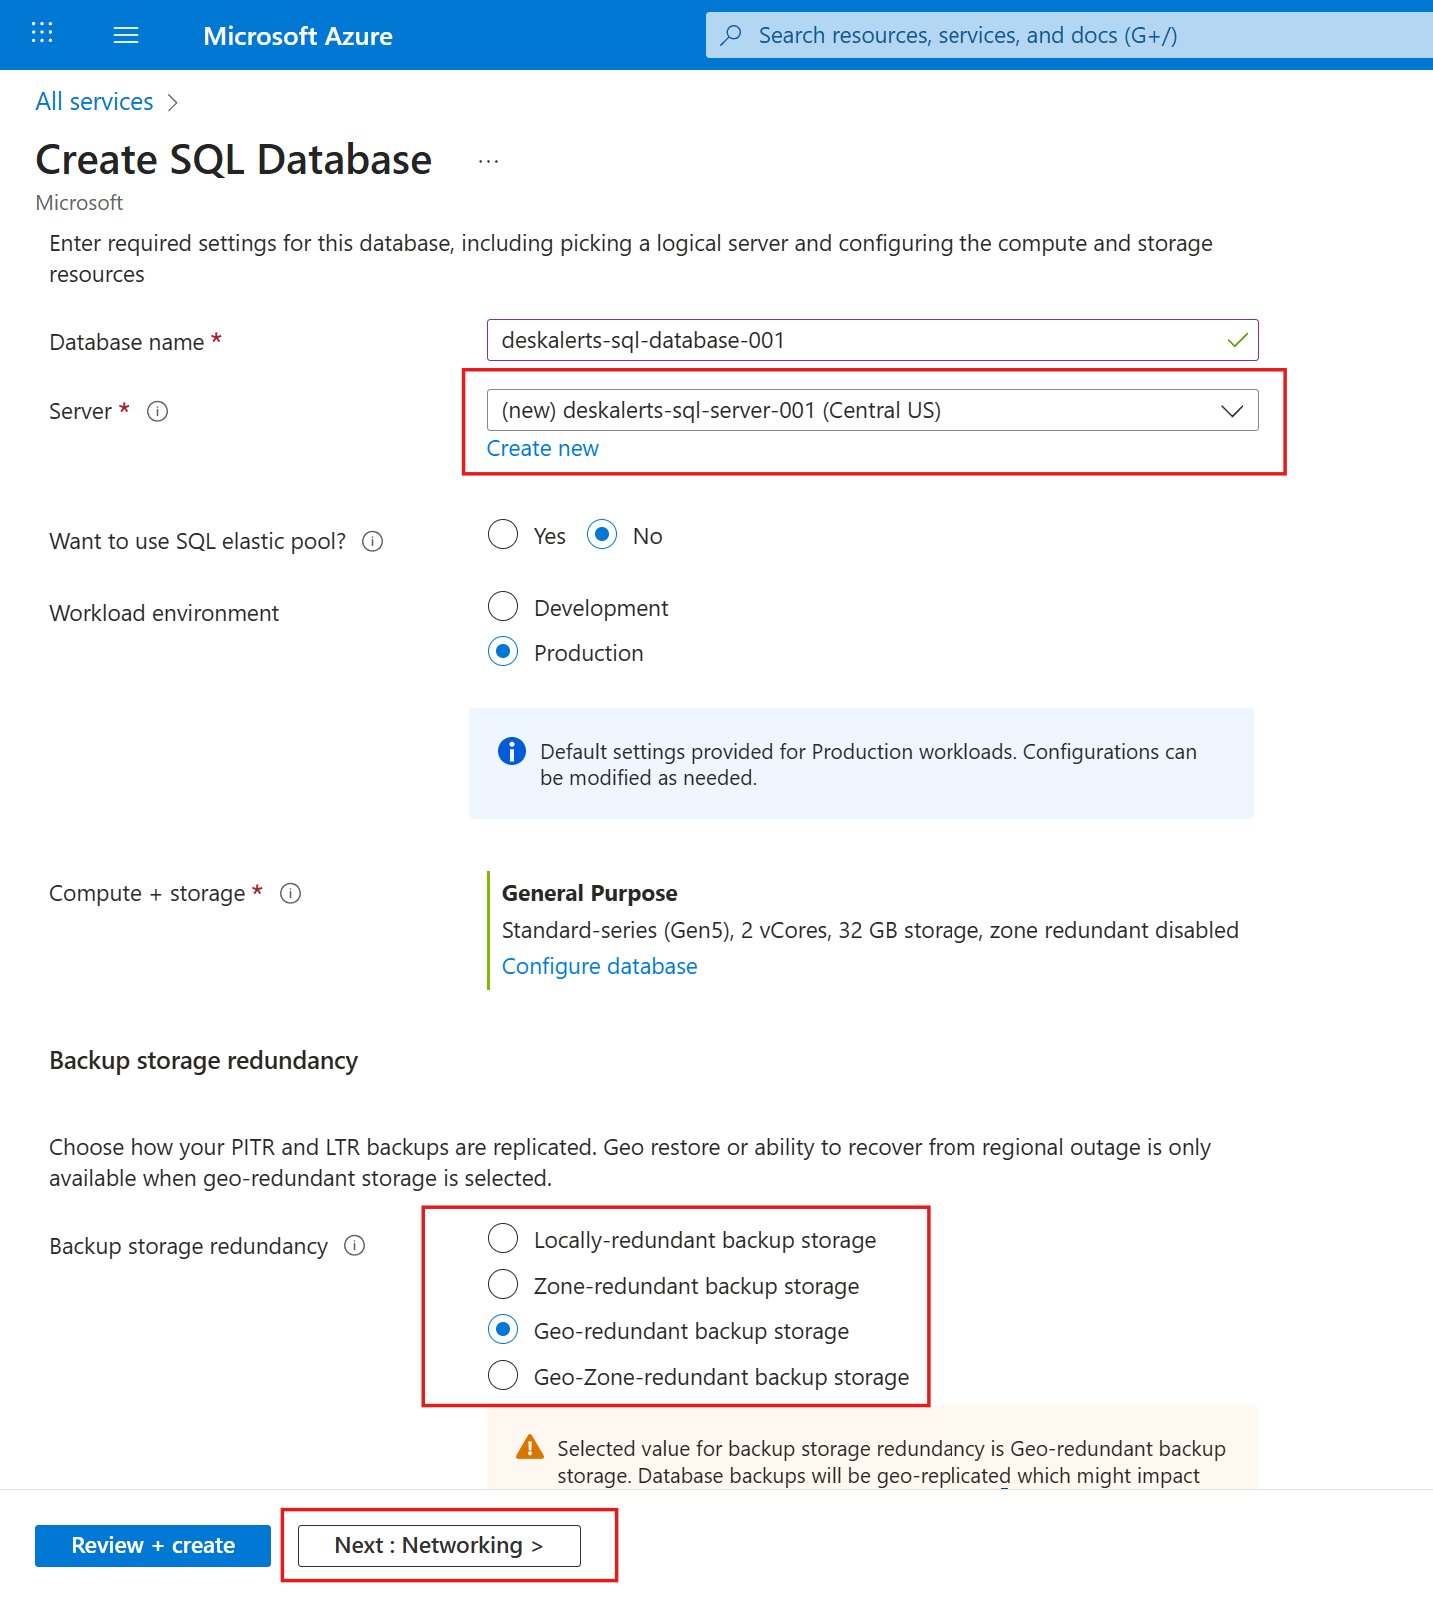
Make sure newly created server is selected, adjust Backup settings to your requirements and switch to networking tab.
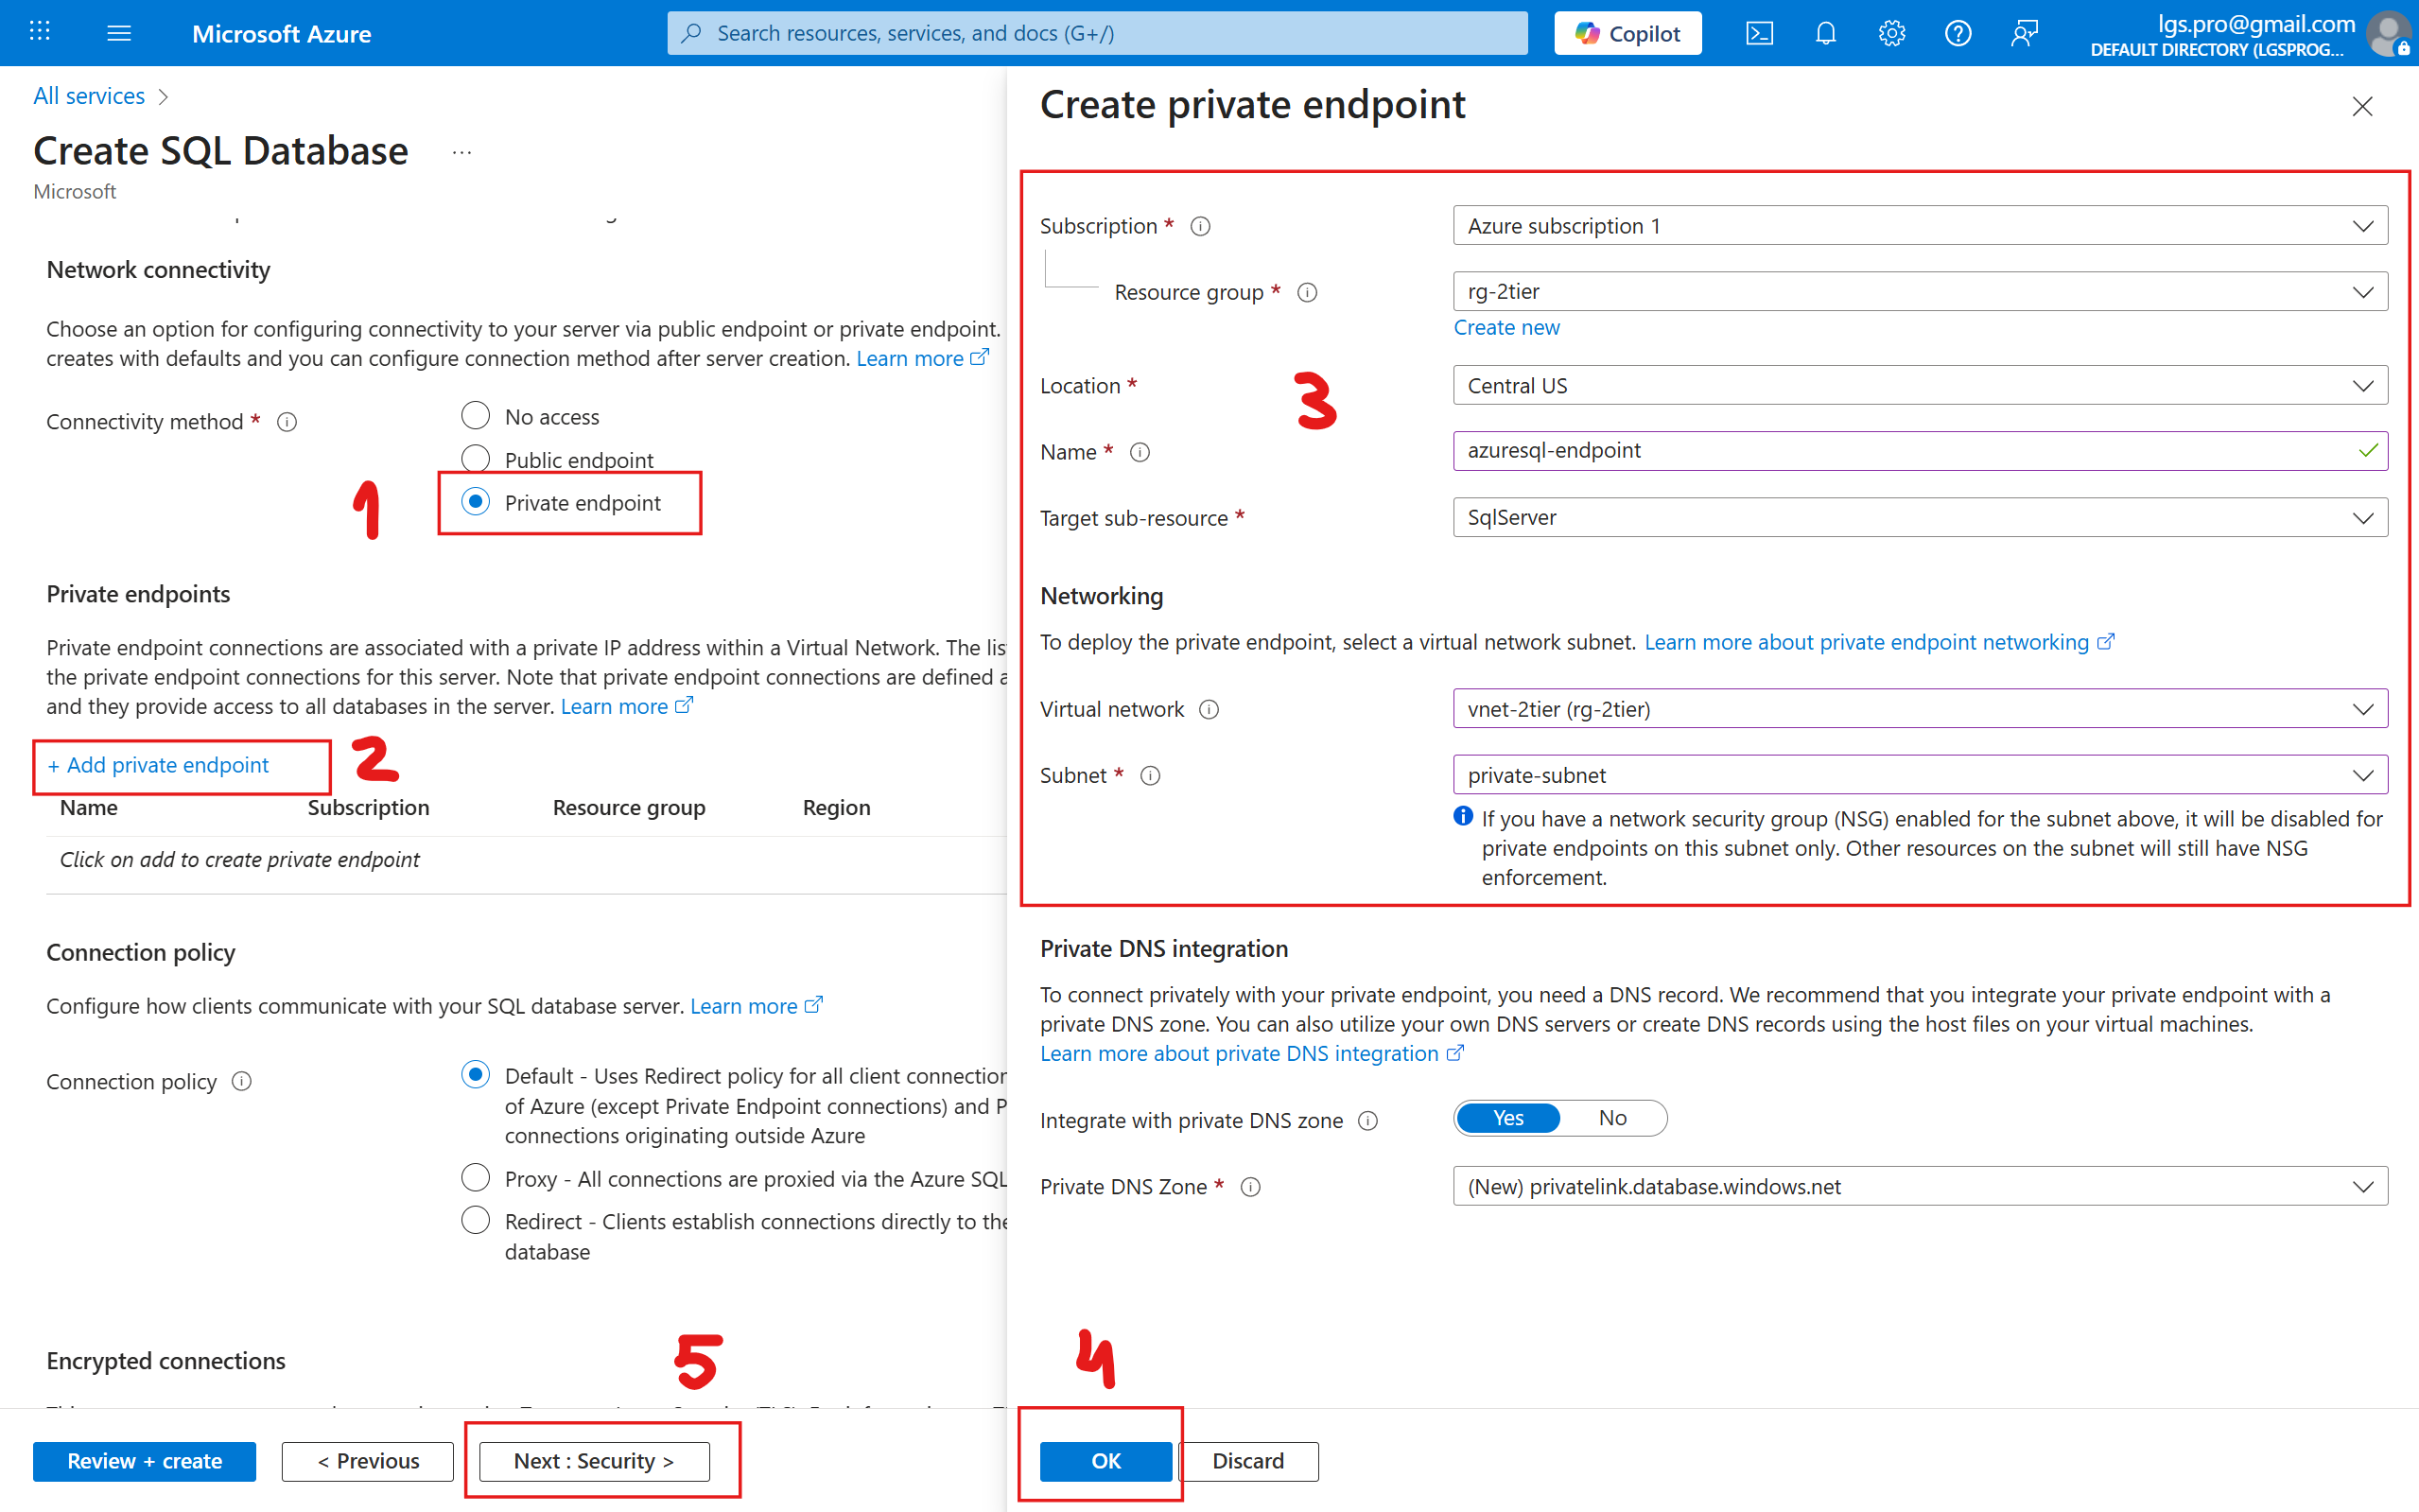
In the Network tab:
- Enable Private endpoint and click + Add private endpoint:
- Name:
azuresql-endpoint - Target sub-resource:
SqlServer - Virtual network:
vnet-2tier (rg-2tier) - Subnet:
public-subnet
- Name:
Leave other settings as default, click Ok and Next: Security >
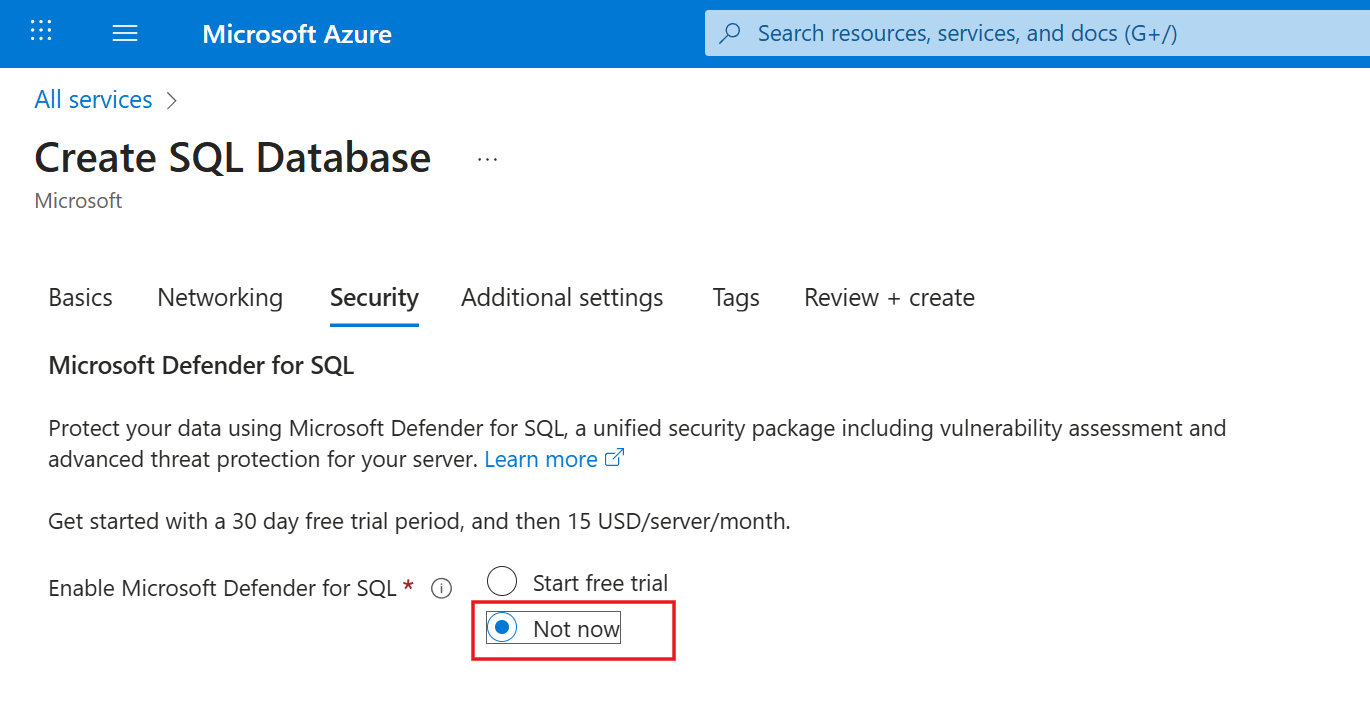
(Optional) Opt out from Microsoft Defender for SQL:
- Enable Microsoft Defender for SQL:
Not now
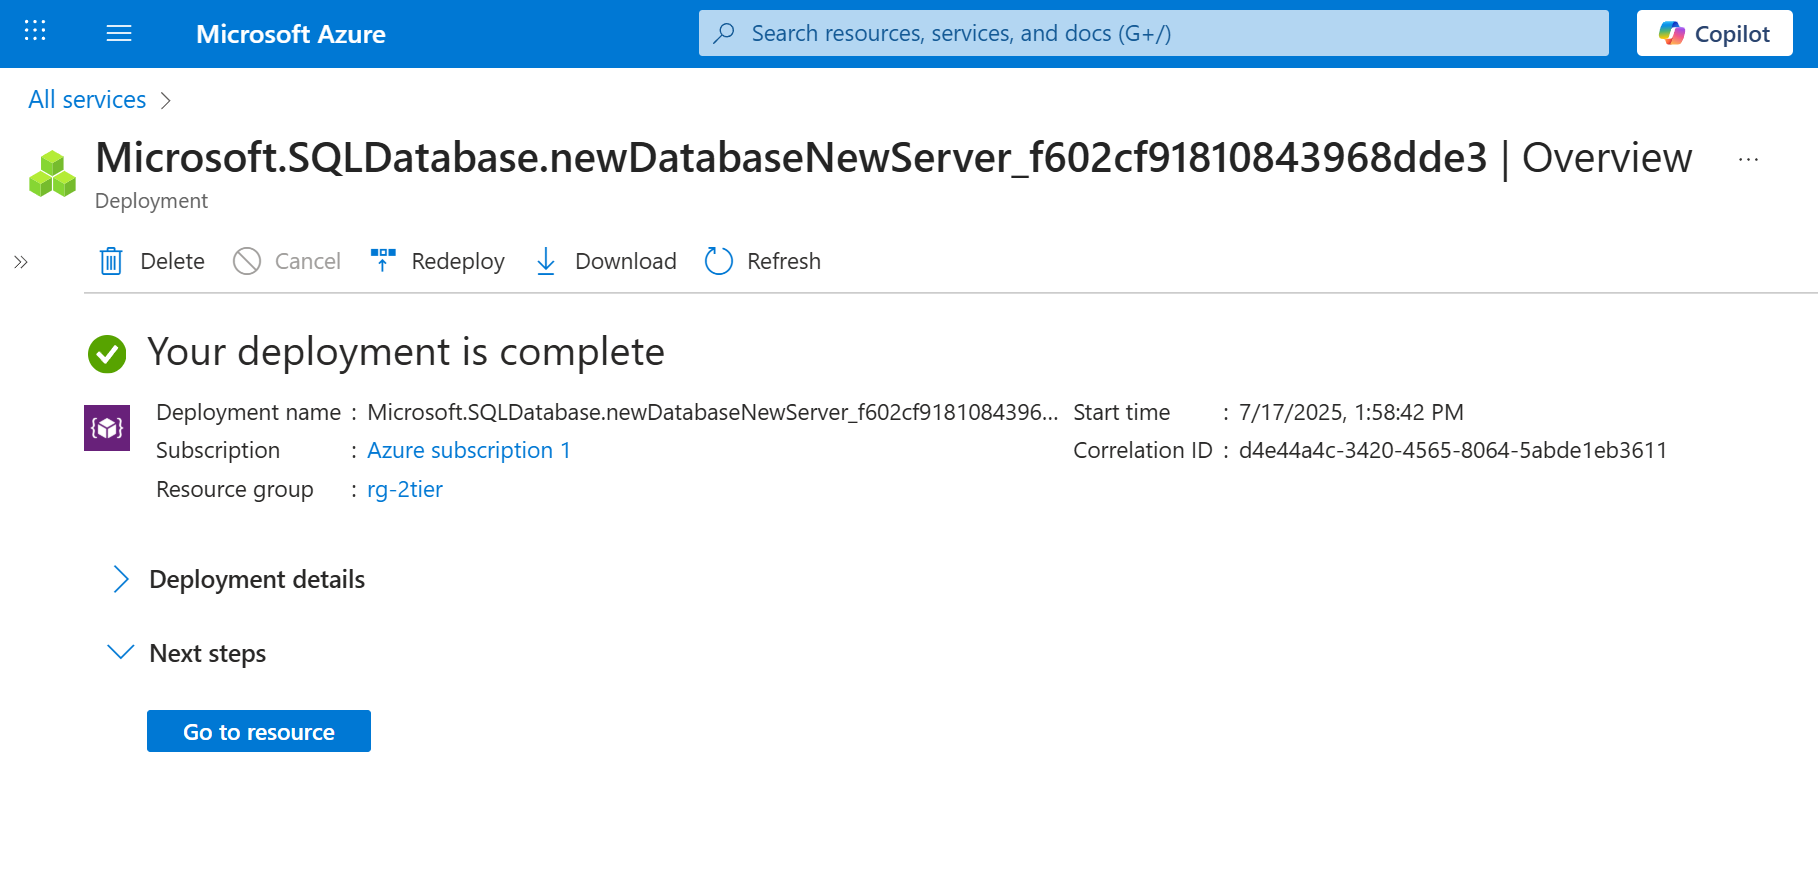
- Click Review + create > Create
Wait for the deployment to complete:
6. Test database connection
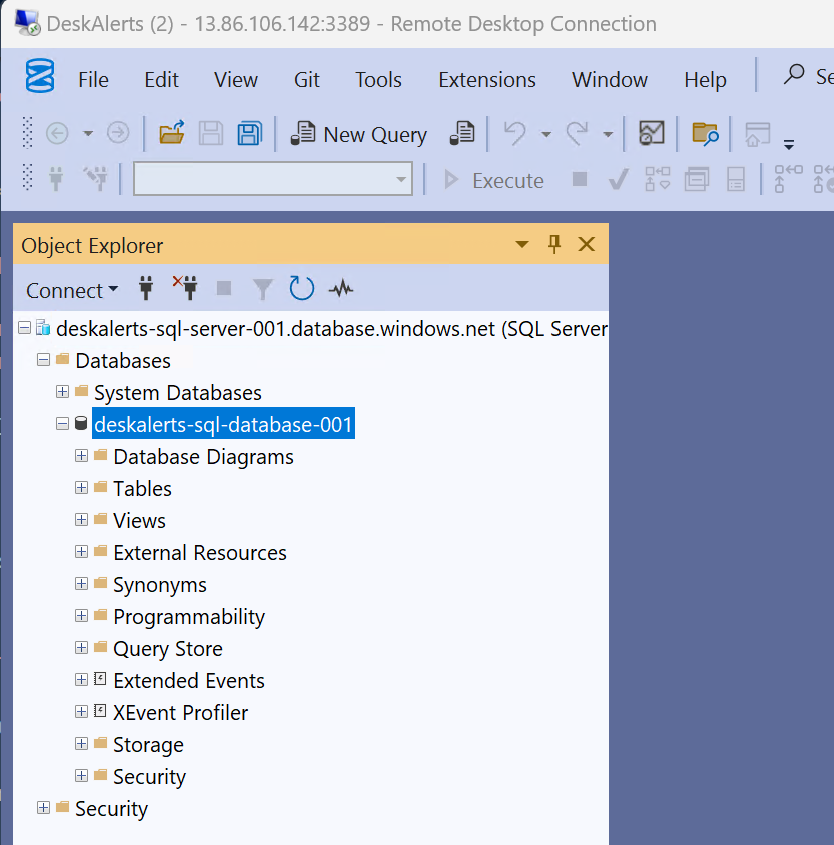
Get back to RDP session to your web server, open SSMS and try to connect using SQL server name that you have specified:
- Server name:
deskalerts-sql-server-001.database.windows.net(replace with your actual server name) - Authentication:
SQL Server Authentication - Login:
sql_admin - Password: your password
Click Connect, you should connect and be able to see your database:
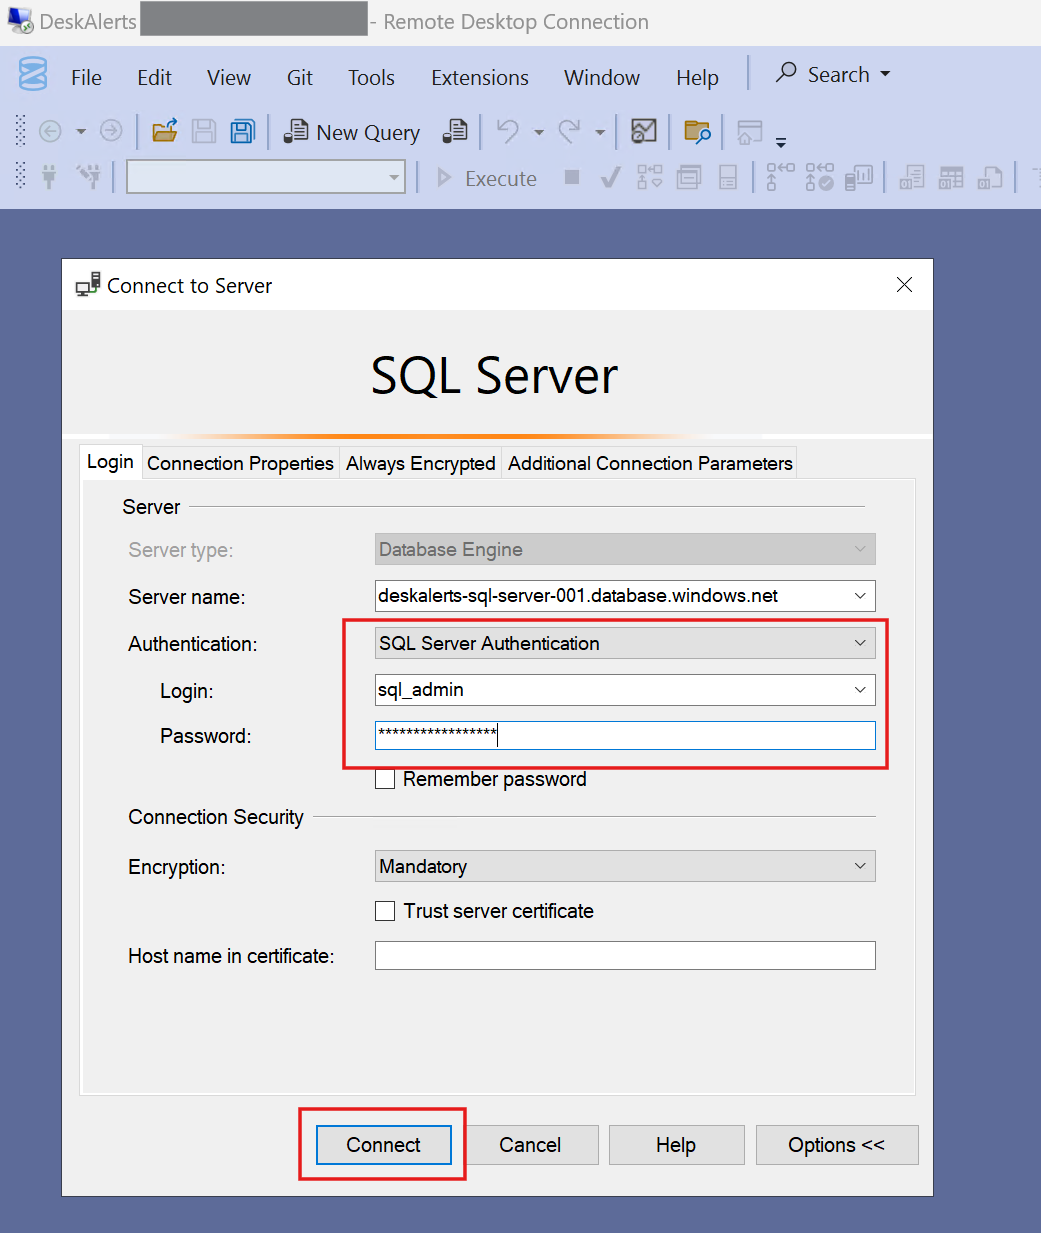
You should be able to see your database
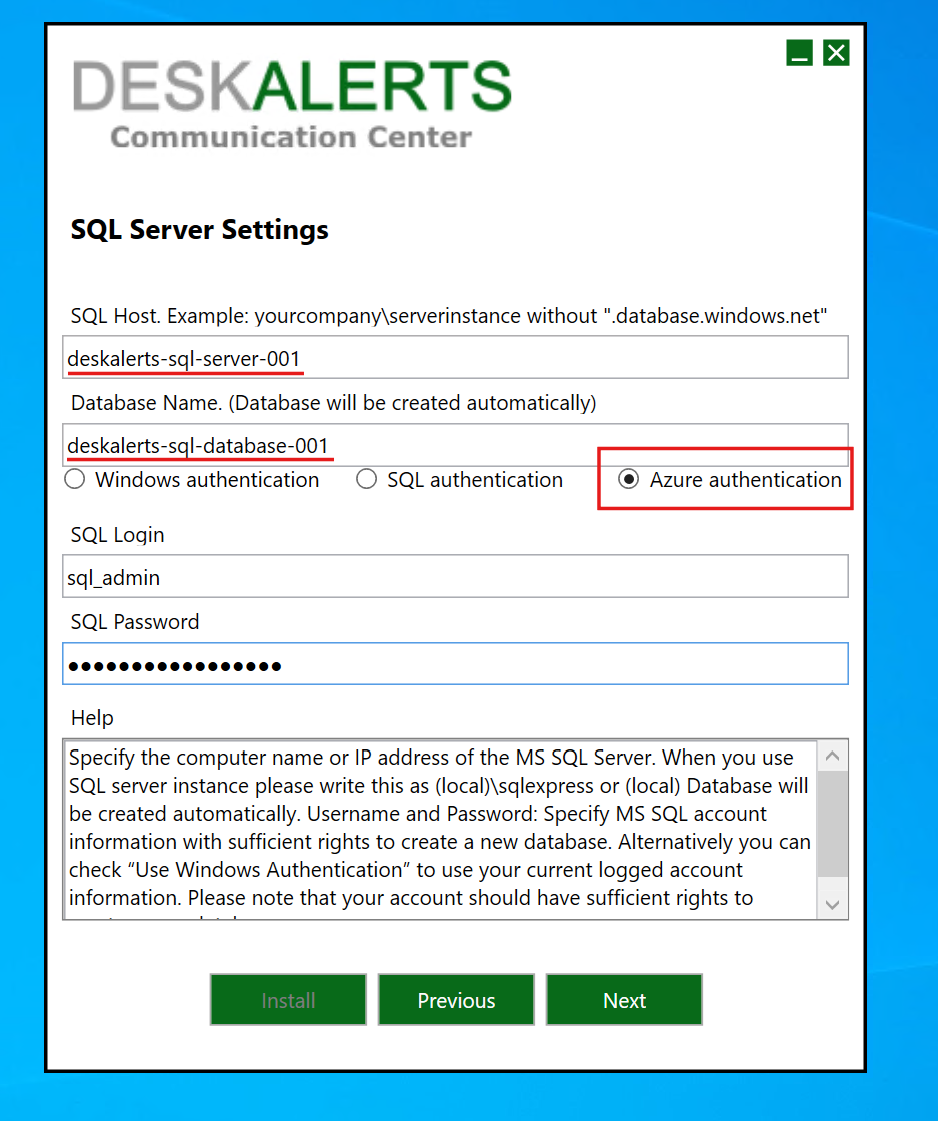
Your Azure infrastructure is now ready for DeskAlerts server deployment. When you are going to install DeskAlerts server, use Azure authentication method to connect to the database,
specify the server and database name that you have configured, and provide the SQL user credentials:
Summary
At this point, your Azure infrastructure is ready for installing the DeskAlerts server.
During installation, use the configured Azure SQL Database connection string and SQL credentials.