Creating an SSL Certificate for DeskAlerts Using AD CS
How to create an SSL Certificate Using Active Directory Certificate Services (AD CS)
This section describes how to generate and install an SSL certificate using Active Directory Certificate Services (AD CS) for use with the DeskAlerts Server.
If your organization has its own Active Directory Certificate Services (AD CS) infrastructure, you can generate a valid SSL certificate by following the steps below.
⚠️ If the PowerShell script fails to run on your local machine, all procedures must be performed directly on the AD CS server.
If your organization does not have an AD CS infrastructure, you can generate a self-signed certificate for testing purposes using the following command:
New-SelfSignedCertificate -DnsName da-ws22-1 -FriendlyName "DeskAlerts" -CertStoreLocation cert:\LocalMachine\My
Replace da-ws22-1 with your server’s FQDN. After running the command, a new certificate named DeskAlerts will appear in the Local Computer > Personal certificate store.
Next steps:
- Export this certificate with its private key in
.pfxformat. - Open IIS Manager and import the
.pfxcertificate via Server Certificates > Import. - Apply the certificate to the HTTPS binding of your site.
- Import this certificate to the Trusted Root Certification Authorities store:
- for Local Computer
- for the Current User
- Finally, restart IIS using the command:
iisreset
To ensure that all client workstations trust this certificate, import it into the Trusted Root Certification Authorities store on each machine that needs to connect to the DeskAlerts server.
Step 1: Create a New Text File and Copy the Script
# Prepare CSR File with SAN
$CommonName = "deskalerts.yourserver.com"
$SANNames = @("deskalerts","deskalerts.yourserver.com")
$Date = (Get-Date).ToString('ddMMyyyy')
$ReqFile = "Cert_Req-$CommonName-" + "$Date" + ".csr"

$InfFile = @"
        [NewRequest]
        Subject = "CN=$CommonName"
        HashAlgorithm = SHA256
        ProviderName = "Microsoft Enhanced RSA and AES Cryptographic Provider"
        KeySpec = 1
        KeyLength = 2048
        Exportable = TRUE
        RequestType = CMC
        MachineKeySet = TRUE
        [Extensions]
        2.5.29.17 = "{text}"
        _continue_ = "DNS=$CommonName&"
"@

# For SAN Name
$i=0

if ($i -lt $SANNames.Length) {

 foreach ($SANName in $SANNames[$i]) {

    $InfFile = $InfFile + @"

        _continue_ = "DNS=$SANName&"
"@
    }
    $i++
}

# To remove & for the last SAN name
$LastItem = $SANNames[$SANNames.Length-1]

$InfFile = $InfFile + @"

        _continue_ = "DNS=$LastItem"
"@

$FinalInfFile = "Cert_Req_Inf-$CommonName-" + $Date + ".inf"

New-Item $FinalInfFile -type file -value $InfFile -Force

cmd /c "certreq -new $FinalInfFile $ReqFile"
Step 2: Customize the Script
- Replace
deskalerts.yourserver.comwith the fully qualified domain name (FQDN) of your DeskAlerts server. - Replace
deskalertswith the NetBIOS name of your DeskAlerts server. - Optionally, add other server names (e.g., additional NetBIOS names, FQDNs, IP addresses) in the
$SANNamesarray, separated by commas.
Step 3: Save and Run the Script
Save the file with a .ps1 extension and run it from an elevated PowerShell console.
As a result, a .csr file (Certificate Signing Request) will be generated in the same folder.
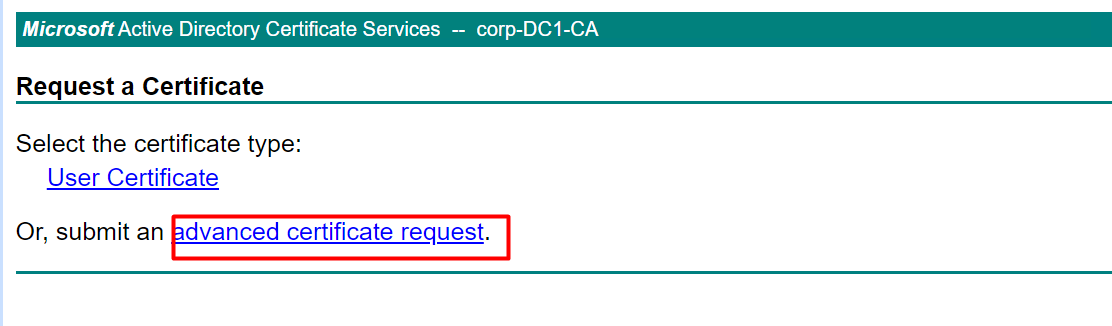
Step 4: Submit the Certificate Request
Log in to your AD CS web interface and select Advanced certificate request.
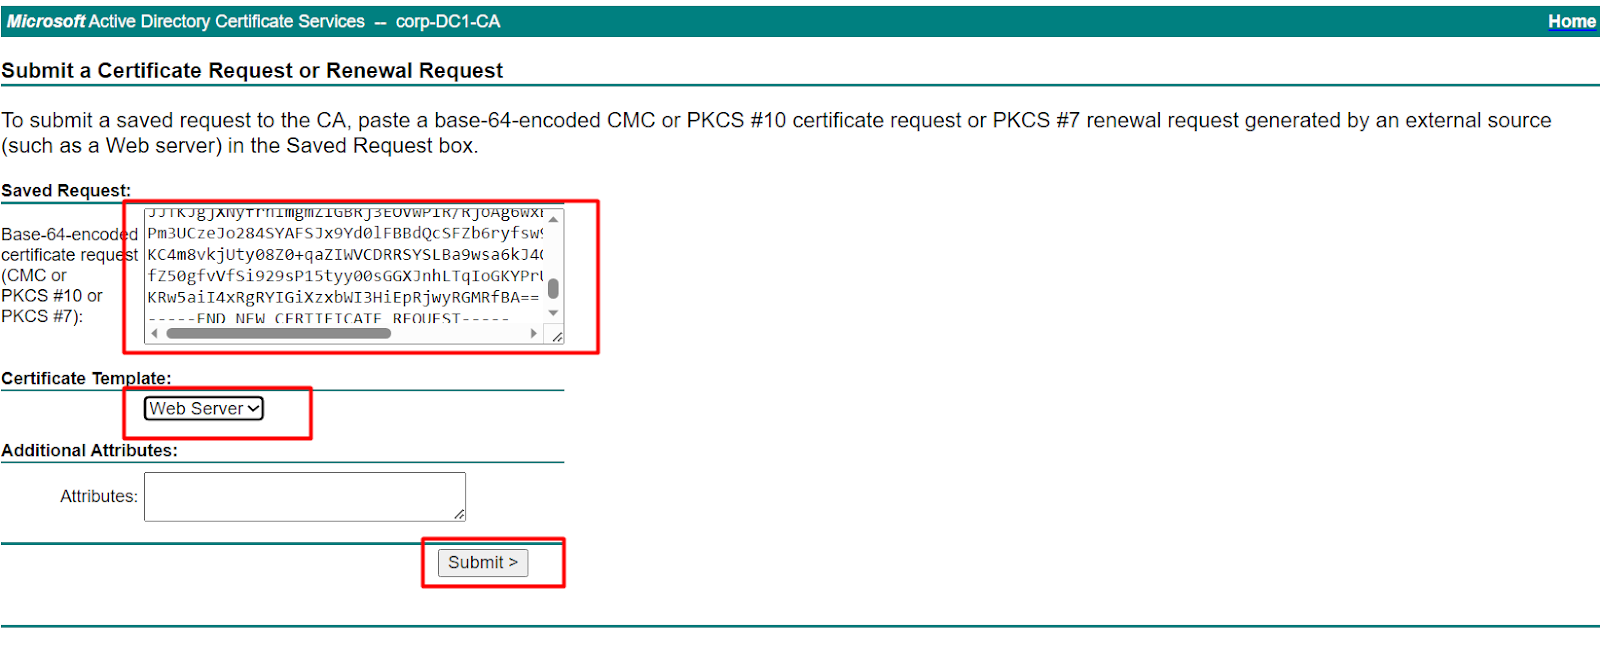
Step 5: Submit the CSR
- Open the
.csrfile in a text editor and copy its entire contents. - Paste it into the Saved Request field.
- From the Certificate Template drop-down, choose Web Server.
- Click Submit.
If the Web Server template is missing, refer to How to Add the Web Server Template.
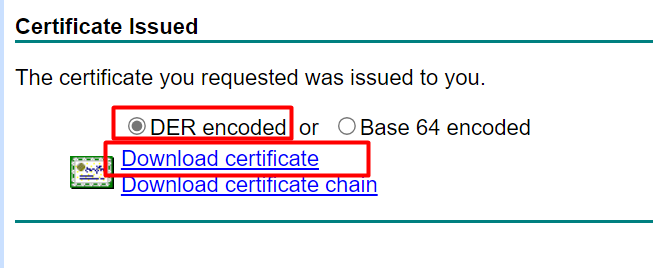
Step 6: Download the Certificate
On the confirmation page:
- Choose DER encoded format
- Click Download certificate
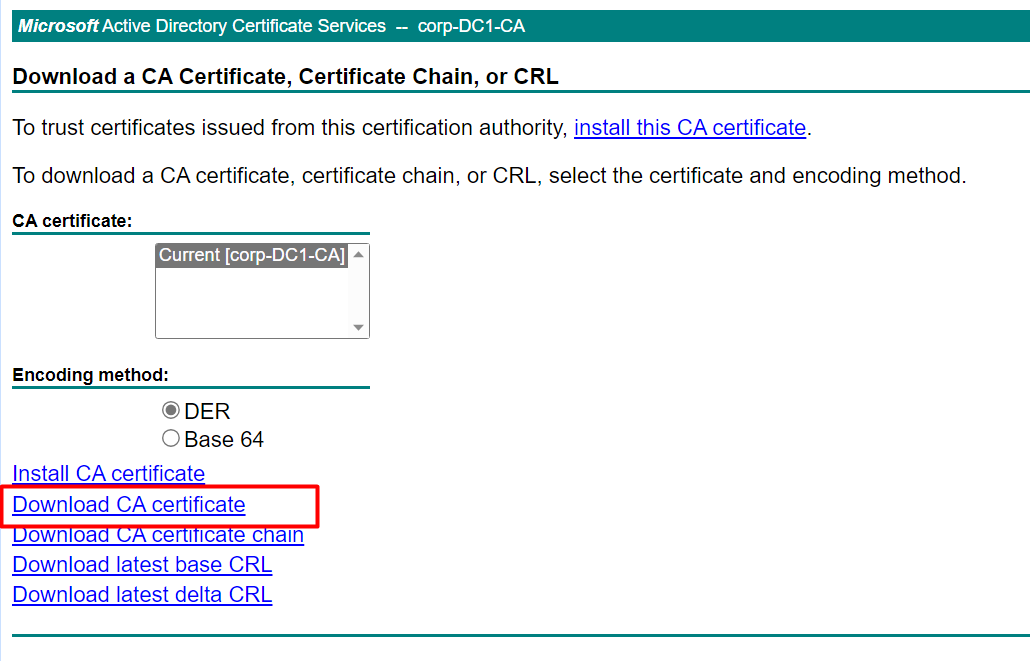
Step 7: Import the CA Certificate (for non-domain servers)
If your server is not domain-joined, download the CA certificate from the AD CS web portal and import it to the Trusted Root Certification Authorities store.
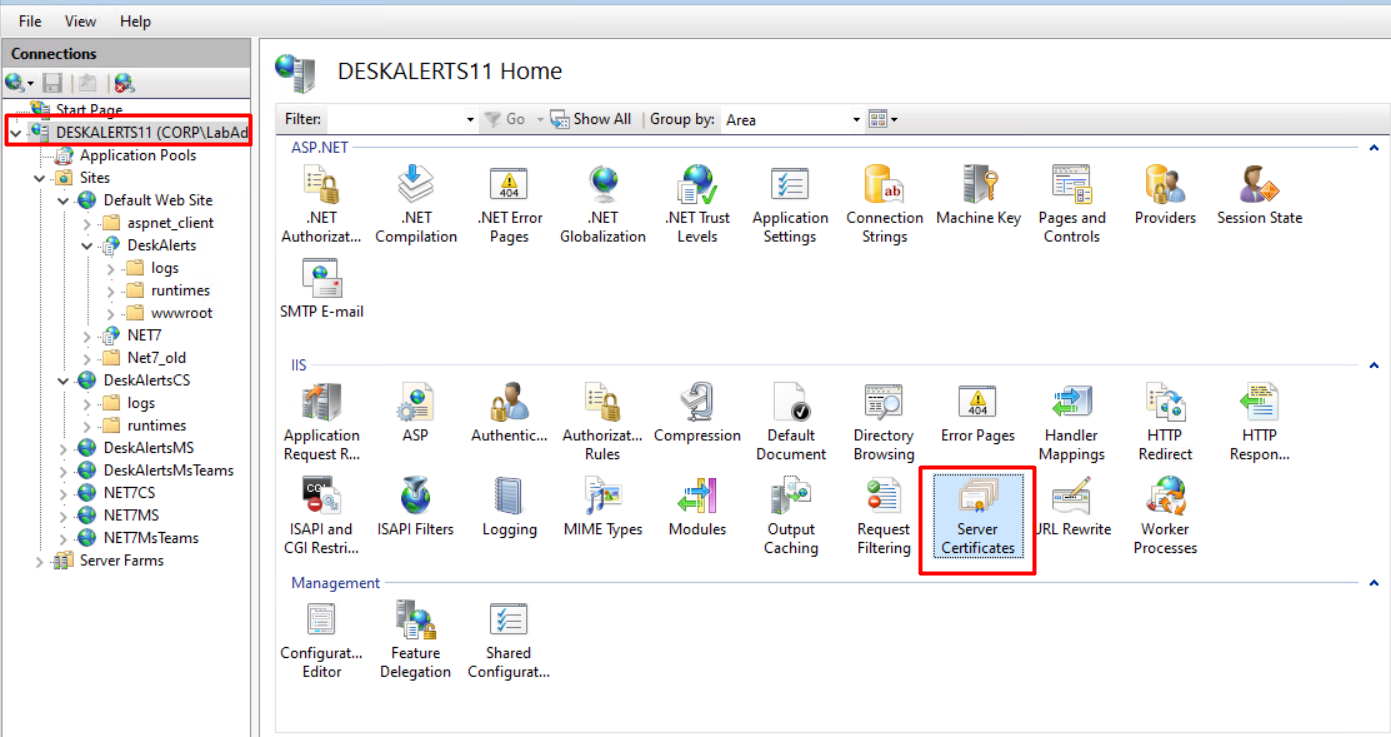
Step 8: Complete the Certificate Request in IIS
On the application server:
- Open IIS Manager
- In the Connections pane, select the server node
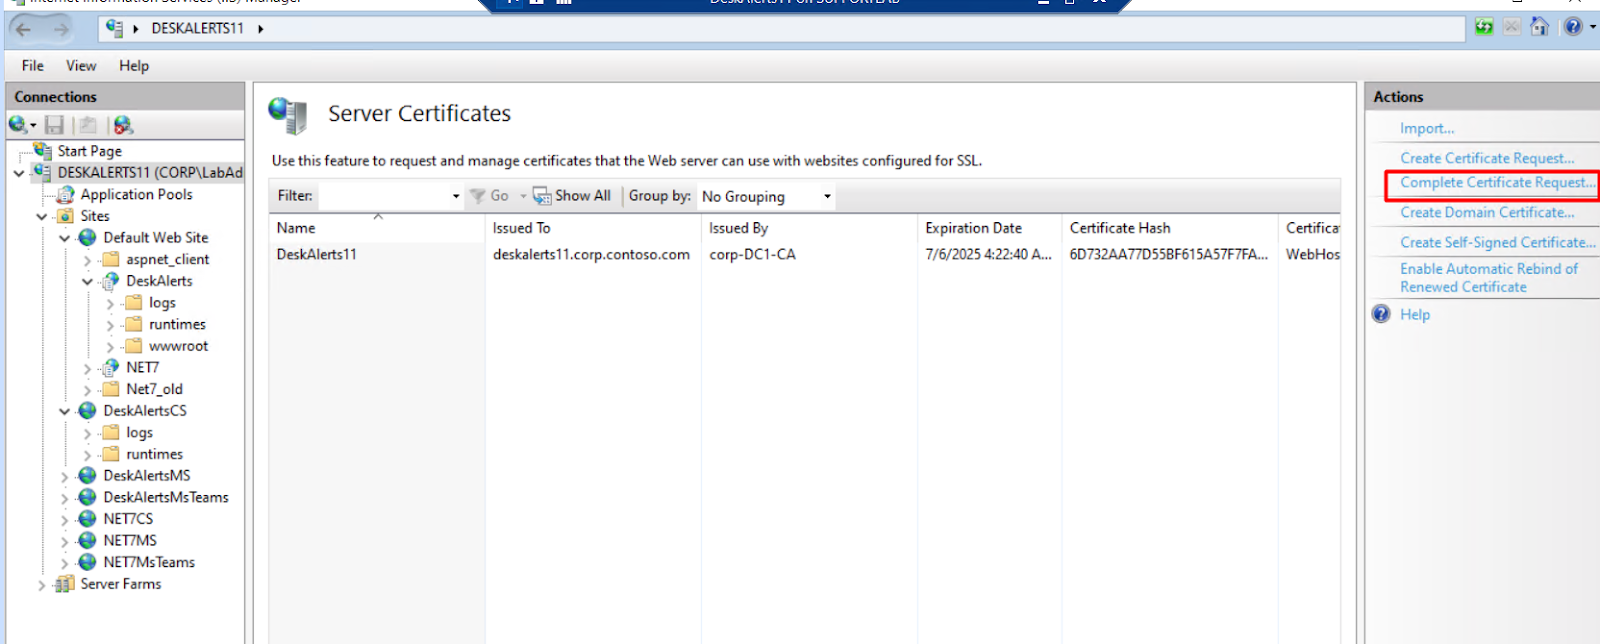
- Double-click Server Certificates
- In the Actions pane, click Complete Certificate Request
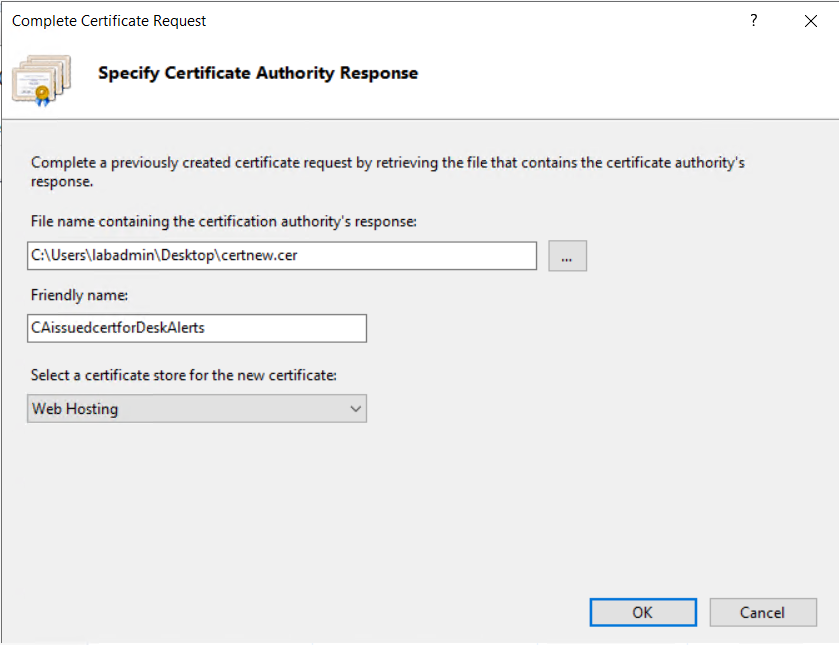
Step 9: Import the Certificate
- In the Complete Certificate Request window:
- Browse to the downloaded
.cerfile - Provide a friendly name
- Select Web Hosting from the Certificate Store dropdown
- Browse to the downloaded
- Click OK
Step 10: Verify the Certificate
Ensure your certificate appears in the Server Certificates list.

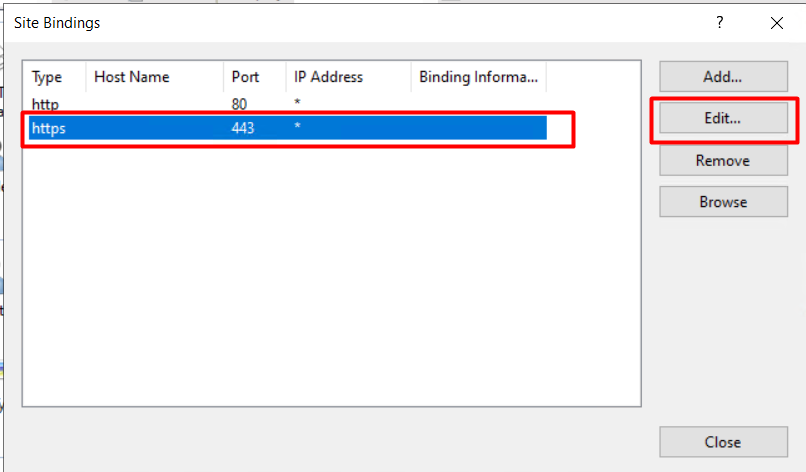
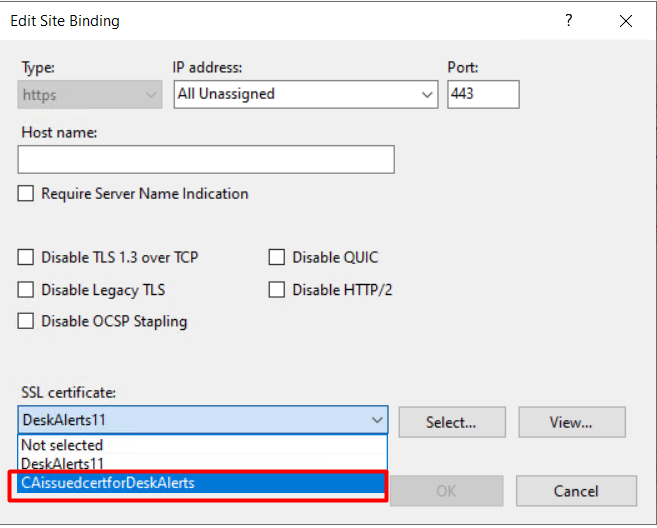
Step 11: Bind the Certificate to HTTPS
- In IIS Manager, go to Default Web Site
- In the Actions pane, click Bindings…
- Select or add the HTTPS binding
- From the SSL Certificate dropdown, choose your imported certificate
- Click OK, then Close
How to Add the Web Server Template in Active Directory Certificate Services (AD CS)
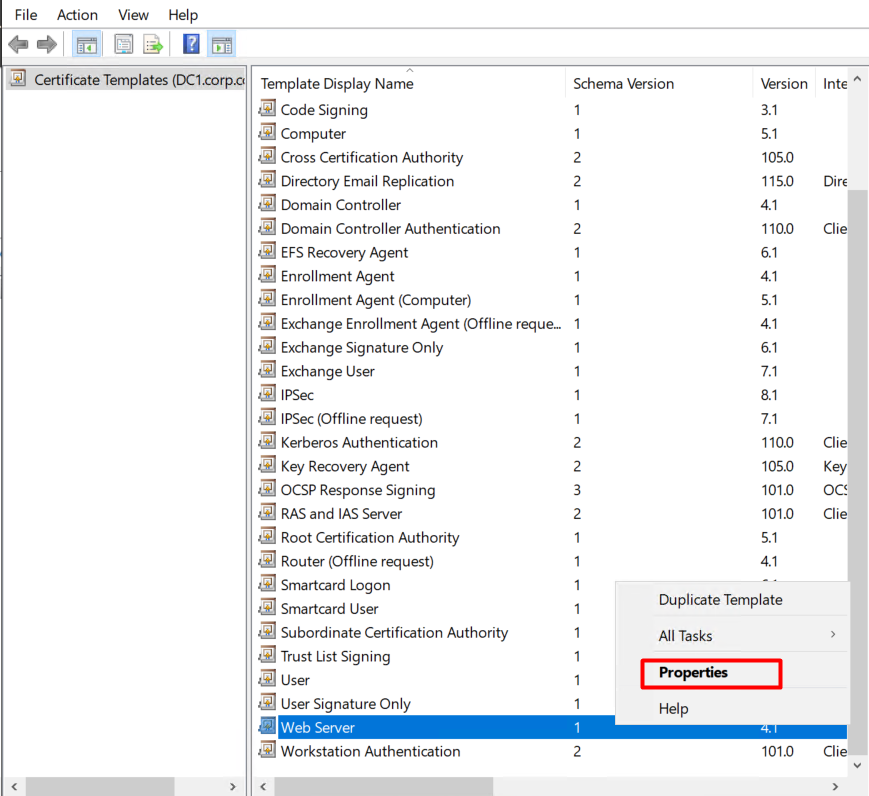
Step 1: Open Certificate Templates Management Console
- Open the Certification Authority console.
- Right-click Certificate Templates → Manage

Step 2: Select and Configure the Web Server Template
- In the Certificate Templates Console, locate Web Server
- Right-click → Properties
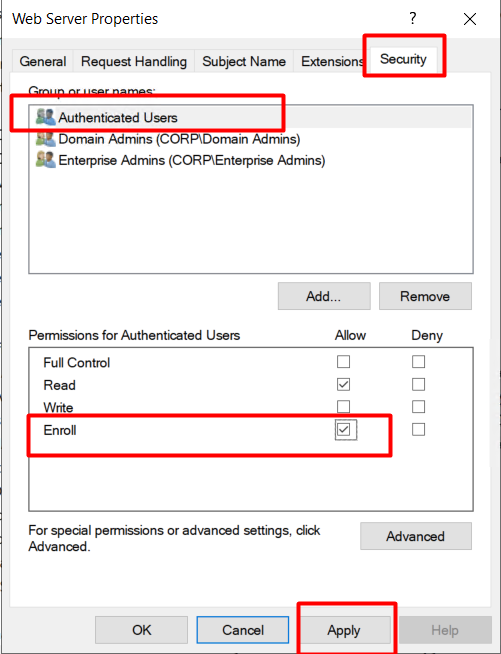
Step 3: Configure Template Permissions
- Go to the Security tab
- Select Authenticated Users
- Check Enroll
- Click Apply and then OK
After saving, restart the AD CS Web Enrollment service to apply changes.